Change test configurations
Test configurations control what's required, allowed, and not allowed during a test.
Tip
Janison sets the configurations for a test initially, but you can change them if required.
Configuration settings are divided into four categories: Identity Verification Settings, Test Settings, Allow URL/Apps, and Student Settings.
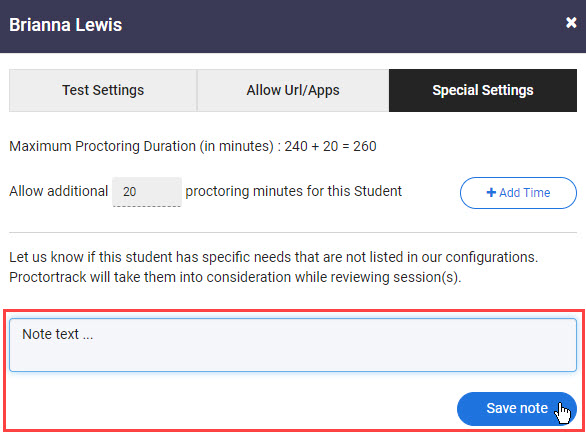
Identity Verification Settings
These settings control the identity and environment scans candidates need to complete at the start of the test. Each setting has a name and a description of what happens if it's enabled or disabled.
Test Settings
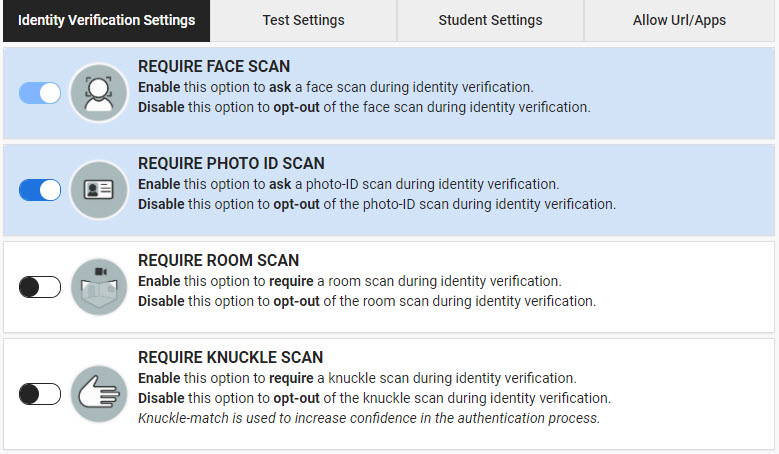
Controls the student actions and resources allowed — for example, whether the candidate can take short breaks, have food and drink, or use a physical calculator. Each setting has a name and description. Scroll down to view all settings.
Allow URL/Apps
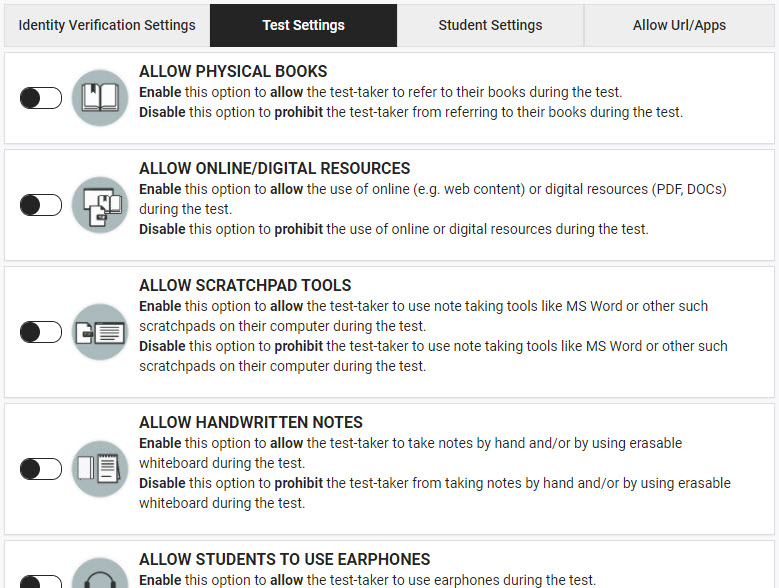
Use this to whitelist URLs and applications that candidates may use during the test. Some URLs and applications may be allowed by default.
Student Settings
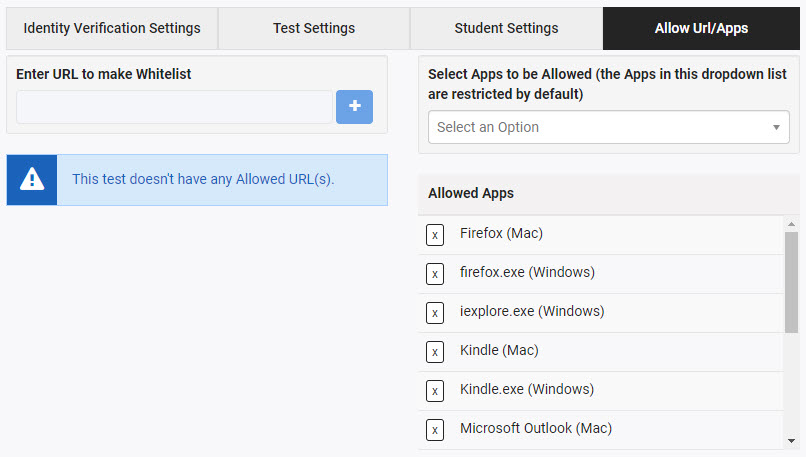
Set specific Test Settings, Allow URL/Apps, or Special Settings for an individual candidate — for example, allowing a specific application or website, or adding extra test time.
Tip
These settings may override the general configurations for a test or give special consideration to a candidate.
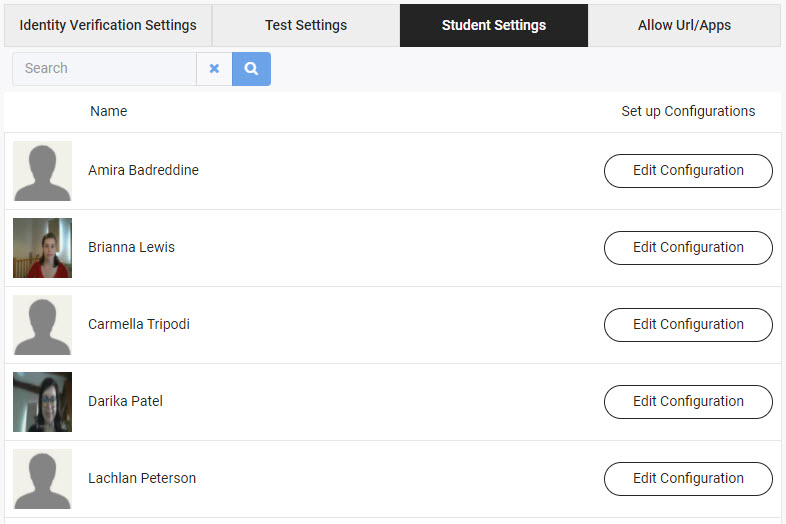
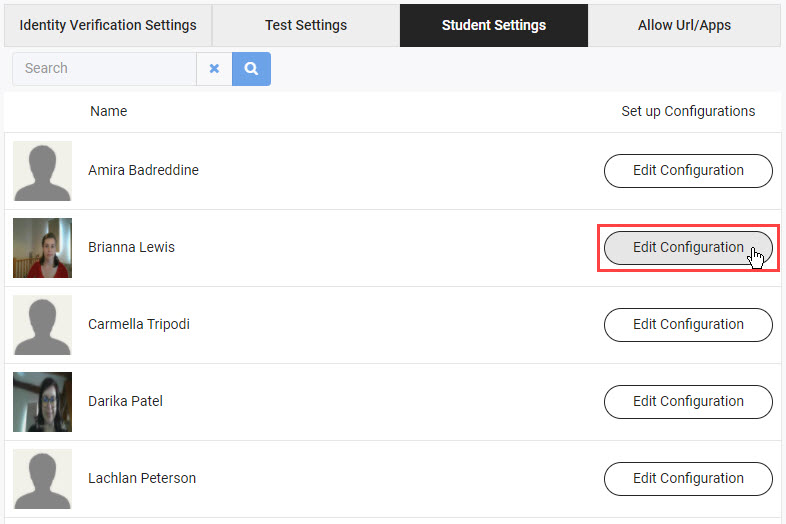
The Student Settings tab contains a list of candidates enrolled in the test.
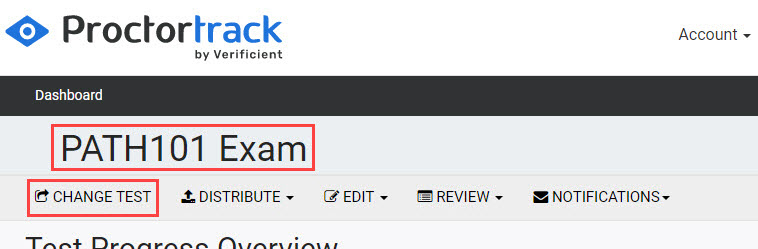
Set the active test
Configurations are changed per test, so the required test needs to be active. See Changing the active test.
View a test's configuration settings
- Ensure the correct test is active.
-
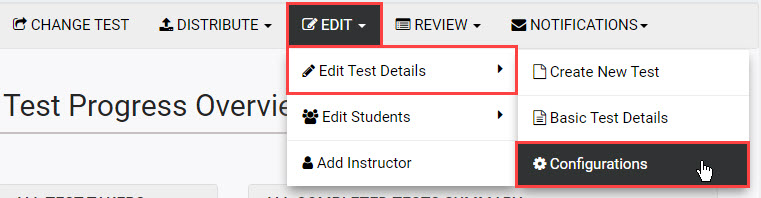
On the dashboard, select EDIT, hover over Edit Test Details, and select Configurations.
-
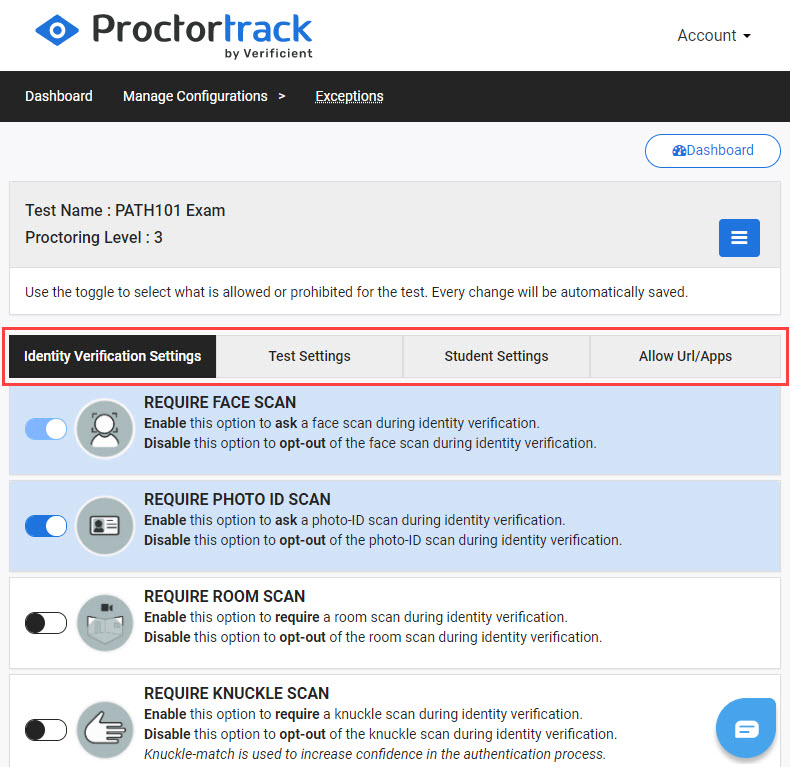
The Manage Configurations screen displays. Each category is on a separate tab.
Change Identity Verification Settings or Test Settings
-
Select the toggle next to a setting to enable or disable it. Changes save automatically.

-
Enabled settings have a blue toggle switched right and a blue background.

- Disabled settings have a black-and-white toggle switched left and no background colour.

- If a setting can't be changed, a change unavailable symbol displays when your mouse hovers over the toggle.

Change Allow URL/Apps settings
Whitelist URLs
-
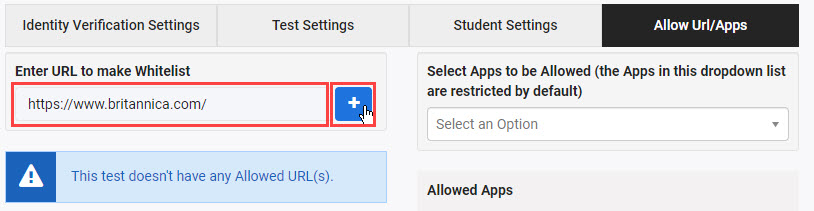
Enter the URL in the Enter URL to make a Whitelist field and select the add button.
-
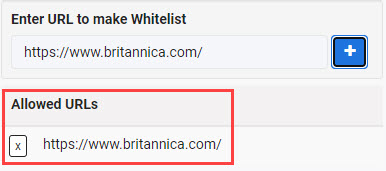
The URL displays in the Allowed URLs list.
-
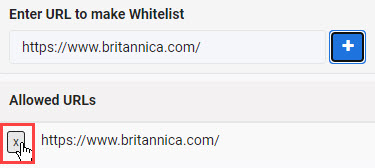
Select the x button next to a URL to remove it.
Allow apps
-
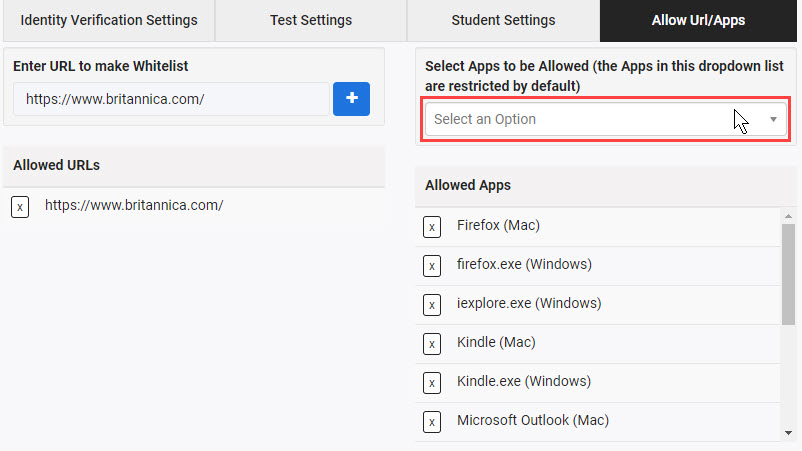
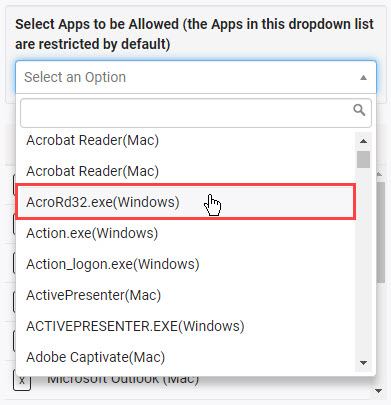
Select the Select an Option dropdown.
-
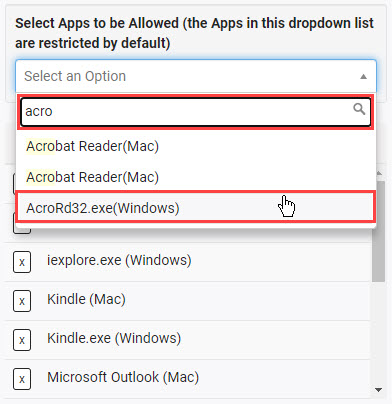
Either scroll through the list, or filter by entering part of the app name.
-
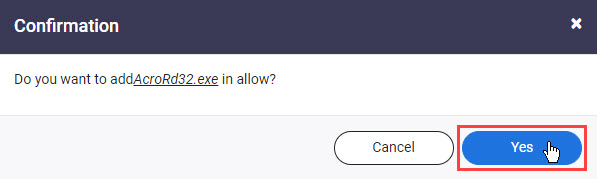
A Confirmation popup displays. Select Yes.
-
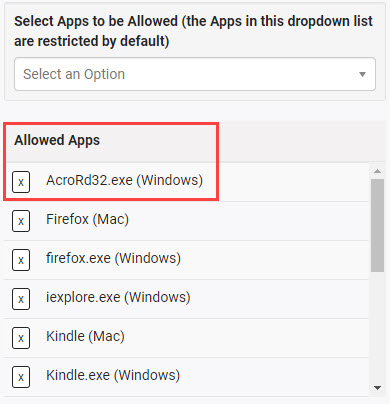
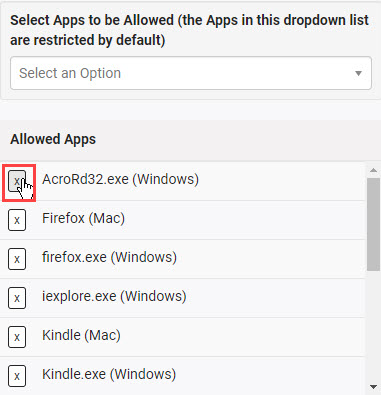
The selected app displays in the Allowed Apps list.
-
Select the x button next to an app to remove it.
Change Student Settings
-
Configure the test settings for a specific candidate by either:
- Selecting Edit Configuration next to the candidate, or
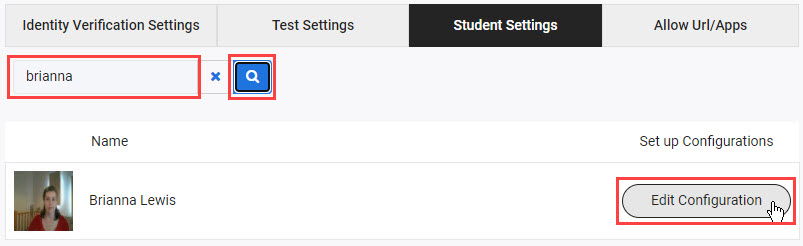
- Filtering the candidate list by entering their name, then selecting Edit Configuration in the results.
-
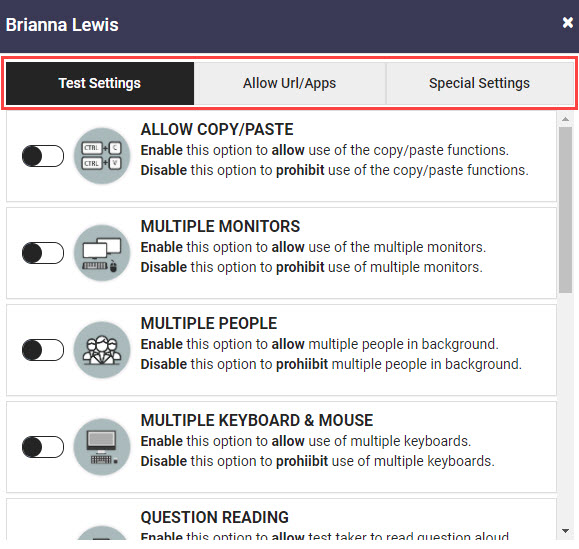
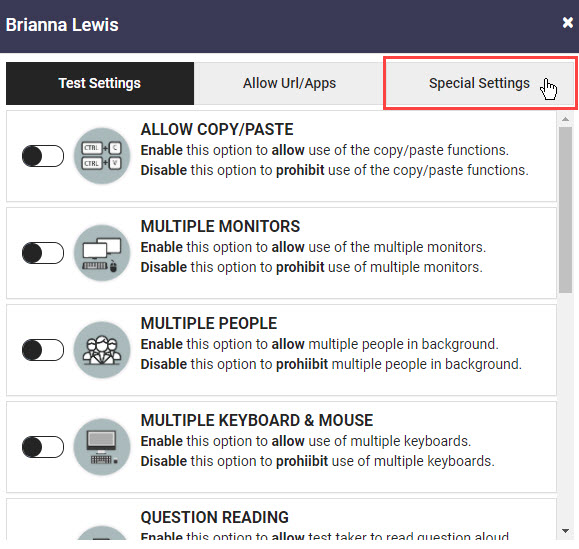
A popup displays for the selected student, with three tabs.
- Test Settings and Allow URL/Apps work the same way as on the main configurations page.
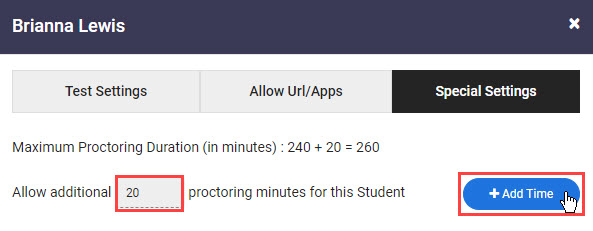
- Special Settings lets you add more time to the proctoring time limit for the selected test and candidate.
Add extra proctoring time
-
Select the Special Settings tab.
-
Enter the number of minutes to extend the proctoring time limit for this candidate and select Add Time.
Tip
This only extends the time limit for proctoring in Proctortrack. Time also needs to be added to the candidate's limit in the Janison Replay test player.
-
To leave feedback for Proctortrack about configuration options, enter your note in the form at the bottom of the popup and select Save note.