Assessment module questions
In the CLS, questions are linked to tests. There are two kinds of modules that tests and questions can belong to: Learning and Assessment. The first is oriented towards learning; the second towards assessing that learning. Tests and questions are managed differently depending on the type of module they belong to.
This document covers assessment questions. For assessment tests, see Assessment module tests.
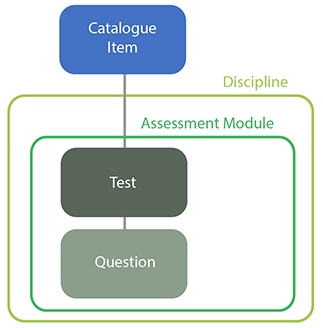
The first step in creating a question is to select the type — many different assessment question types are available.
Once created, the question's details screen shows linked entities (tests, etc.) and all aspects of the question. You can view and edit linked stimuli, comments, and marking rubrics (where appropriate). You can also see a response analysis of previous test attempts, view and edit tags, administrators, workflow states, and psychometric data, and preview the question.
Note
Functionality available is determined by Settings > Test Designer Settings — not everything described here may be visible on your screen.
Manage and explore questions
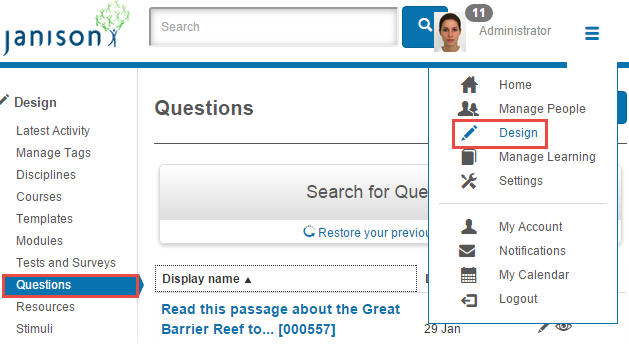
To manage questions, select Design > Questions.
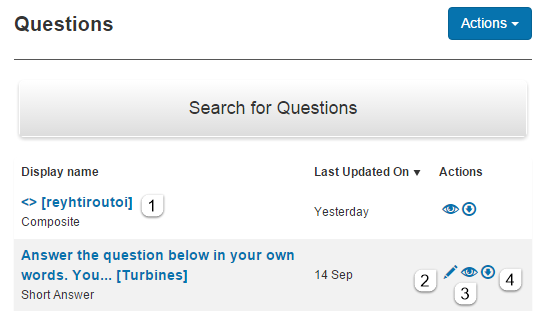
A list is displayed with names, type, workflow state (if enabled), and date of last update. Sort by selecting headings.
For each question:
- Select the name to inspect details.
- Select the pencil icon to edit.
- Select the eye icon to preview (how it appears in the test player).
-
Select the arrow icon to export (QTI-compliant questions only).
Question details
Navigate to Design > Questions and open the question. The top shows the module name (link) and type.

Flag this
The flag function helps with review. Select Flag This to flag the question.

The widget updates to show it's flagged. Hovering shows who flagged it.
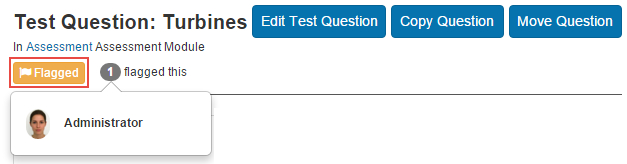
Remove a flag via the  button.
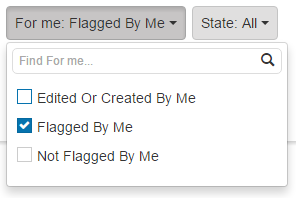
Flagged questions can be located using Search under For me.
Widget bar
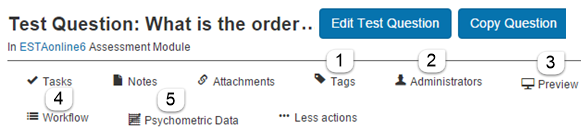
- Tags — categorise and locate.
- Administrators — set permissions over the question.
- Preview — see how the question appears in the test player.
- Workflow — only visible if workflow is enabled.
- Psychometric Data — collected metadata in a popup.
Under the widget bar, clickable links show relationships with other entities.

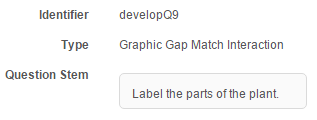
Basic information appears below.
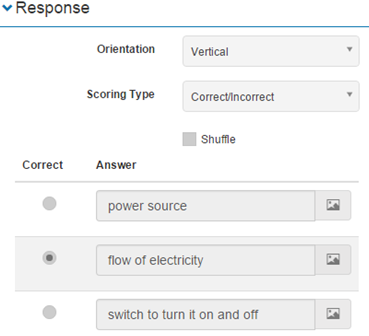
Response
The full details of the question, view-only here. Layout varies by question type.
Stimulus
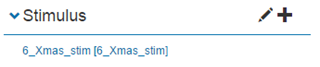
If a stimulus has been added, view it here. Select the pencil to edit, or the + to create a new stimulus and link it.
Comments
If enabled in Test Designer settings, comments can be added. Useful during workflow review.
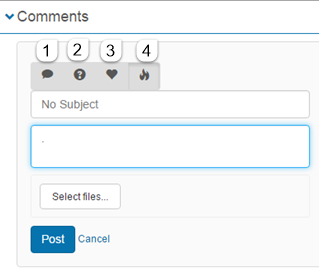
Type a message and classify it via icon (General, Question, Support, Challenge). Attach a file with Select files and Post.
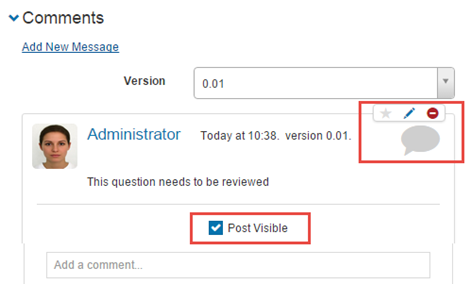
Once posted, edit with the pencil, delete with the minus icon, or hide by removing the Post Visible check.
Marking
This section only appears for question types that can't be automatically marked — short answer, multiple short answer, file upload. Provide guidance to markers.
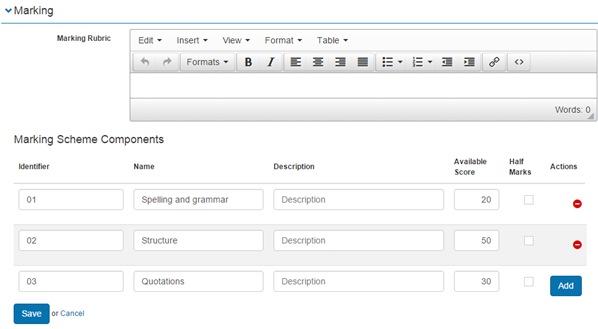
- Text box — qualitative marking guidance.
- Marking Scheme Components — quantitative breakdown.
For each component:
- Create an Identifier.
- Give it a Name.
- Optionally enter a Description.
- Allocate a Score. Check Half Marks for decimal places.
- Select Add. Use the minus icon to delete.
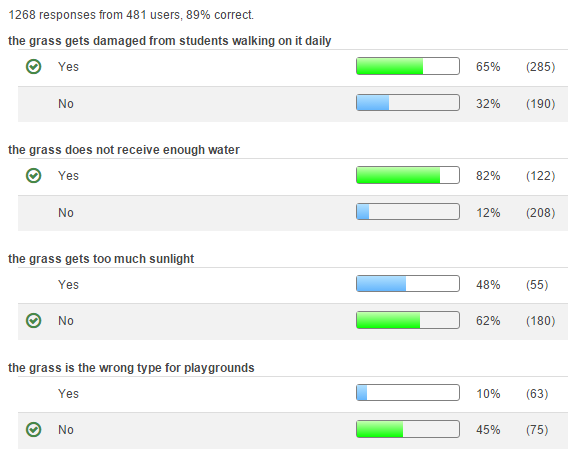
Response Analysis
Details about test attempts on the question.
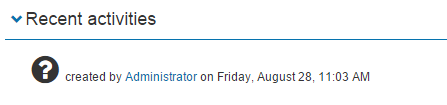
Recent activities
Any recent activity.
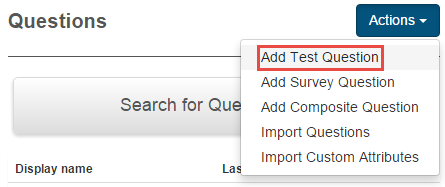
Add a question
Navigate to Design > Questions and select Add Test Question from the Actions dropdown.
The next steps depend on the question type — see Assessment question types.
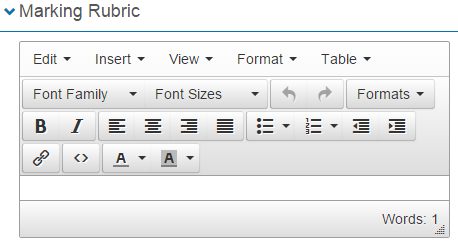
At the bottom there's a section for marking rubric notes. Open Marking Rubric and enter information.
Select Save Test Question. Select and add another to save and create another.

Edit a question
Navigate to Design > Questions, select the question, and select Edit Test Question.

The edit screen has the same fields as the create screen.
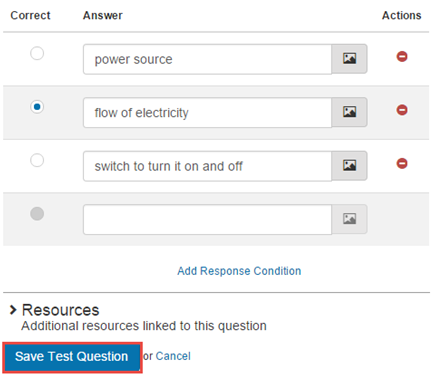
Select Save Test Question.
Preview a question
Previewing is an important part of assessment development. Attempts in preview aren't saved.
Navigate to Design > Questions and locate the question.
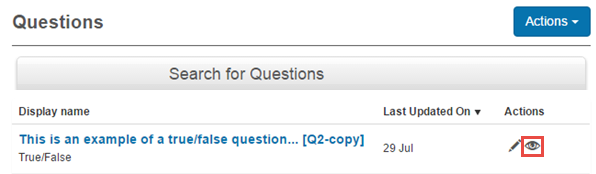
Select the eye icon. The test player opens in a new window.
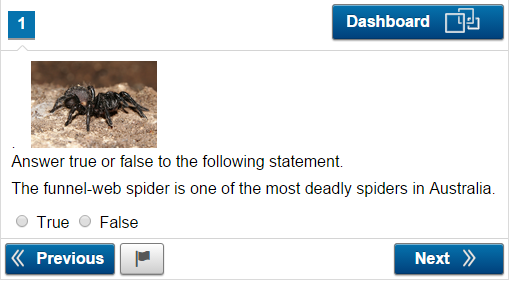
You can also preview from the question's details screen.
Search for questions
Select Design > Questions.
-
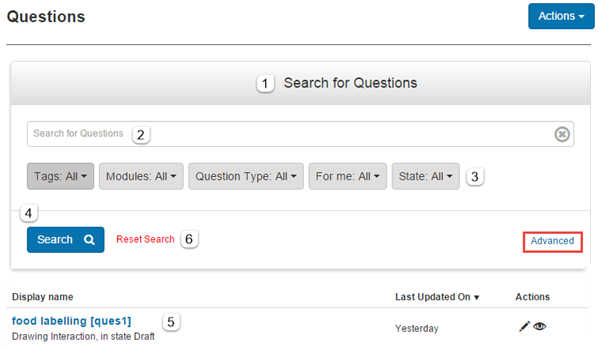
Select Search for Questions.
-
Enter a search term.
- Five options narrow the search (workflow state, tags, made or flagged by you, etc.).
For example, filter by module to see only questions in a specific discipline.
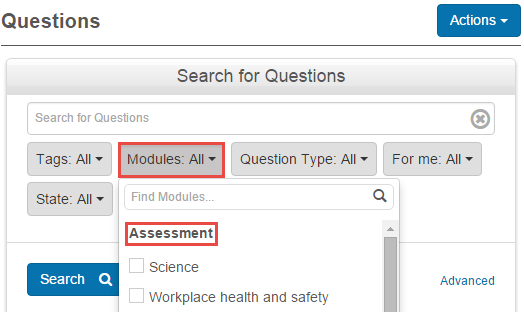
- Select Search.
- Results appear in the Display Name column.
- Reset Search for another search.
You can select Advanced to customise the search using filters — see the document on building filters.
Copy a question
You can copy questions to a different module (and discipline if desired).
Select Copy Question from the question details page.

Select the new Discipline and Module.
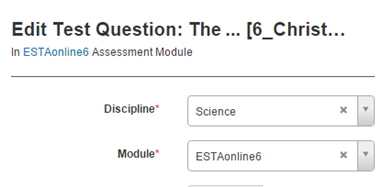
Optionally modify aspects of the question. Scroll down and select Save Test Question.
A popup warning may appear about resources, stimuli, and metadata.
- Subsequent changes to the original aren't applied to the copy (or vice versa).
- Moving to a different discipline means metadata isn't copied.
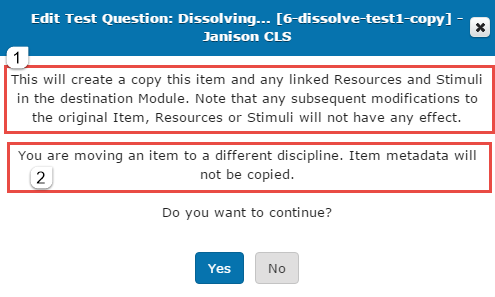
Select Yes or No to continue.
The copied question appears with copy next to its name.
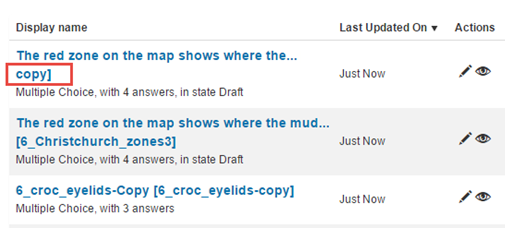
The copied question has an extra Linked Items section showing its origins.
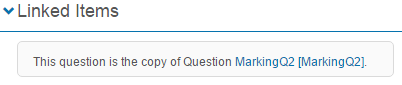
The original notes the copy under Recent activities.

Move a question
Questions not linked to a test or test section can be moved to another module (and discipline). Questions already part of a test can be copied but not moved.
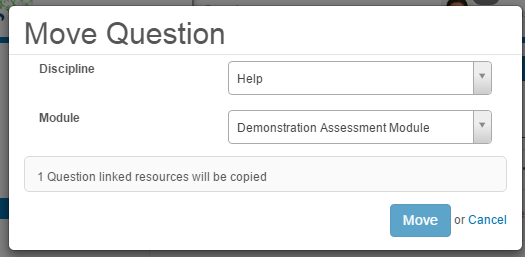
Select Move Question from the details page.

The question moves. Copies of the linked resources and stimuli are also moved.
Import questions
Two ways to import: a spreadsheet, or QTI.
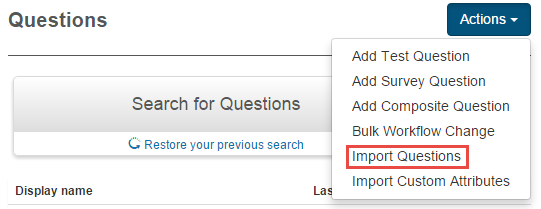
To use a spreadsheet, select Design > Questions > Import Questions from the Actions dropdown.
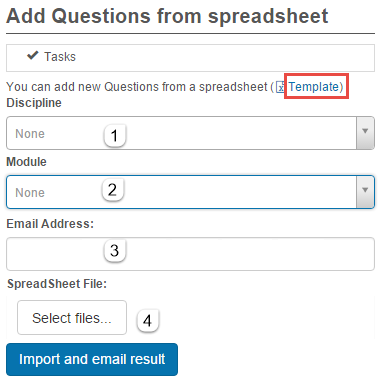
Select Template to download the template. Customise it, then:
- Select a Discipline.
- Select the Module.
- Enter an email address for results.
-
Select your spreadsheet and Import and email result.
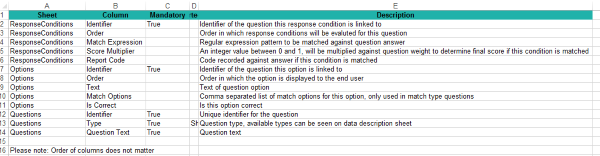
There are four pages in the template — three for question information and one listing mandatory fields and valid question types.
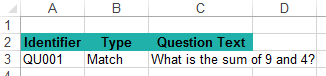
Questions
Identifier, question type, and question body. A sample entry is provided.
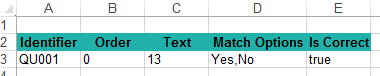
Options
Match the question identifier with its options:
- Order — display order.
- Text — option text.
- Match Options — comma-separated list for match-type questions.
- Is Correct — yes/no.
Response Conditions
Only relevant for some question types. Match identifiers with responses.

- Order — evaluation order.
- Match Expression — regex pattern matched against the question answer.
- Score Multiplier — value between 0 and 1, multiplied against question weight.
- Report Code — recorded against the answer if the condition matches.
Supported Attributes
Lists mandatory fields and valid question types.
Add a composite question
A composite question is composed of multiple questions displayed to students on one long screen — for example, a multiple choice question followed by an extended text question. Learners must complete all interactions to have successfully answered the composite question.
Scoring can be for the composite question as a whole, or per-interaction. Scoring Mode is only available if multiple graded responses is enabled in Test Designer Settings.
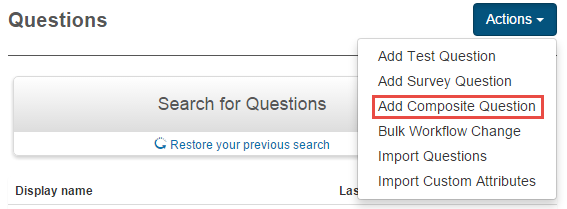
Navigate to Design > Questions and select Add Composite Question from the Actions dropdown.
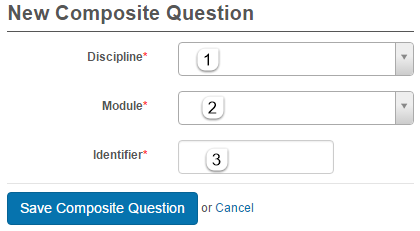
- Select a Discipline.
- Select a Module.
- Enter an Identifier.
- Select Save Composite Question.
The details screen now shows two new sections for composite questions.
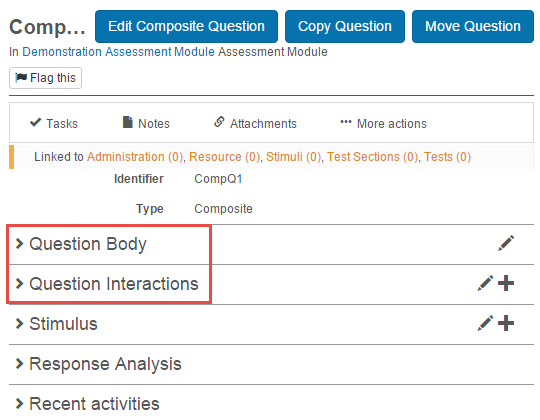
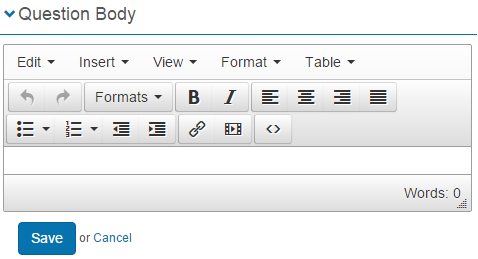
Question Body
Enter the first part of the composite question (e.g. an explanation). Edit via the pencil icon.
Question Interactions
Each question that's part of the composite is a question interaction.
- Select the + icon to add an interaction. Select the question type.
- Enter the information for the interaction.
- Select Save.
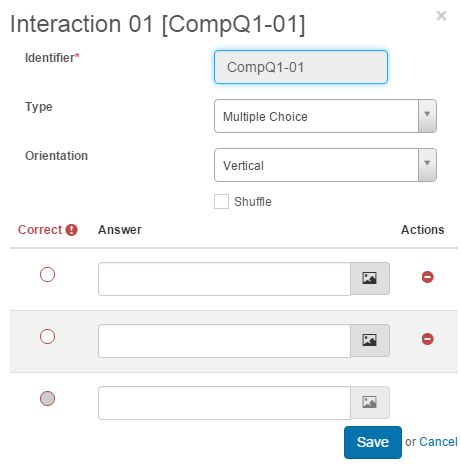
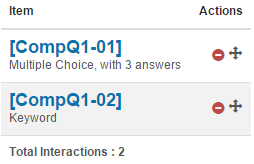
The interactions you add are listed.
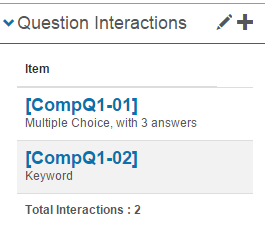
Select an interaction name to edit. Select the pencil to delete with the minus icon or reorder.
Import custom attributes
Custom attribute data can be imported via spreadsheet — enters data into custom attributes added to questions.
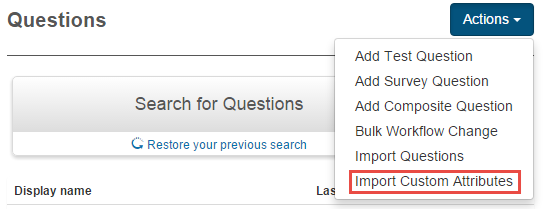
Select Design > Questions > Import Custom Attributes from the Actions dropdown.
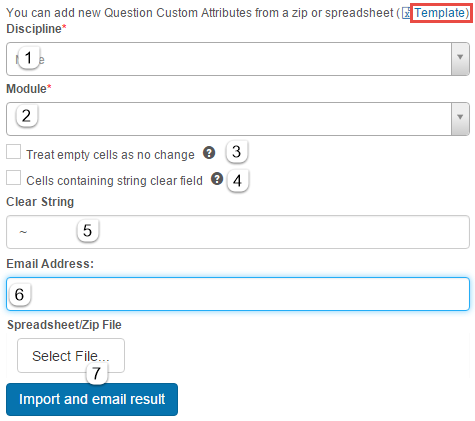
Download the template, customise, then:
- Enter the Discipline.
- Enter the Module.
- Optionally check options to skip empty cells and clear via a clear-string.
- Enter the clear string if desired.
- Enter an email address for results.
-
Select the spreadsheet and Import and email result.
If images are referenced, upload a zip containing the spreadsheet and images. Image paths must be relative to the spreadsheet.
Two pages in the template — the data sheet (with sample data) and instructions.

- Columns are headed by custom attribute identifiers.
- Each row starts with the question identifier.
Notes:
- For Boolean attributes, values must be
trueorfalse. - For image attributes, use the image name; include the image (and folder path if any) in the zip.
- For list-type attributes (single-select), use element identifiers.
- For list-type attributes (multi-select), separate identifiers with a comma.
Settings
Several platform settings affect assessment module questions.
Administrators can configure the following settings:
Test Designer Settings (Settings > Test Designer Settings) — enable comments, workflow, multiple graded responses (for composite questions), psychometric data, and other authoring features.
Custom Attributes (Settings > Custom Attributes) — define custom attributes linkable to questions.
Workflow Definitions (Settings > Workflow Definitions) — define workflow definitions applied to questions.