Resources
Stimuli, resources, and resource sets are used to store images, videos, and other resources used to deliver content and construct test questions within the Janison CLS.
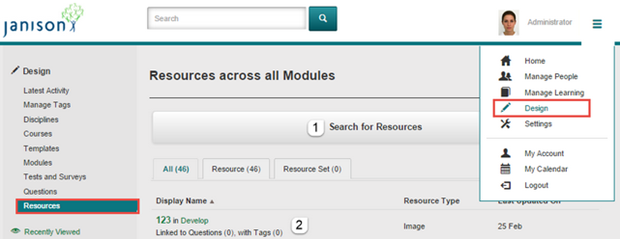
Resources can be accessed by selecting Design > Resources.
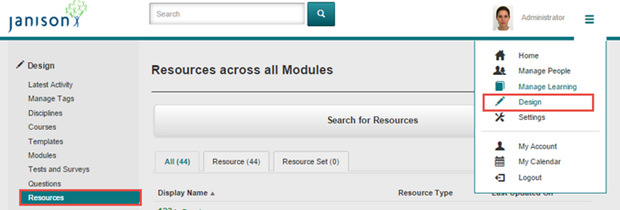
Search for resources
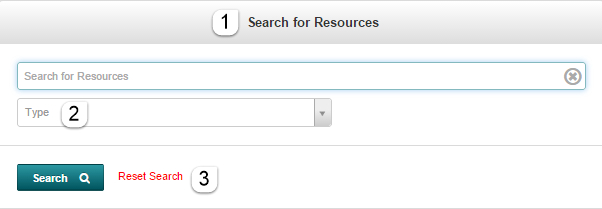
The search feature lets you quickly find a resource. Search is only useful when there are a large number of resources in the list.
Navigate to Design > Resources.
- Select Search for Resources — a search field appears.
- Enter your search text and optionally a resource type, then select Search.
-
To perform another search, select Reset Search.
Inspect resource details
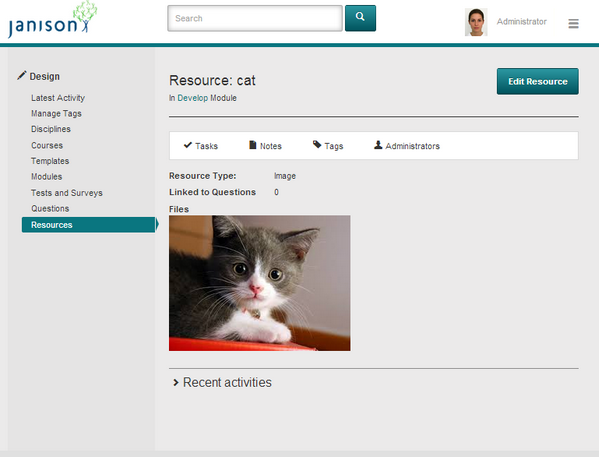
Inspecting a resource gives you access to information on the module and questions the resource is linked to, as well as the resource type.
To inspect a resource, open it by selecting its name.
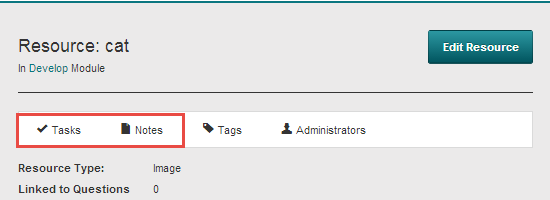
Tasks and Notes
Add information about the resource.
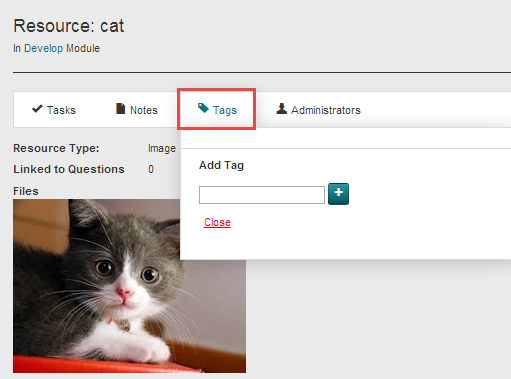
Tags
Like modules, tests, and questions, resources can be tagged and searched by tags. Type the tag keyword and select the + button.
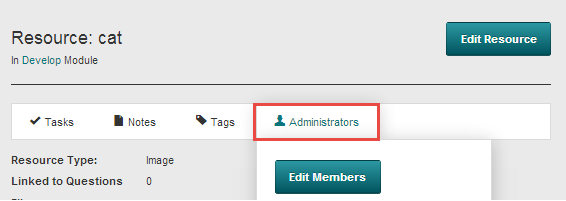
Administrators
Manage permissions for this resource and view all the users that have permissions over it.
Edit a resource
Use this function when resource details need to be changed.
Navigate to Design > Resources.
-
Search for the required resource or select it from the Display Name list.
-
Select Edit Resource.

-
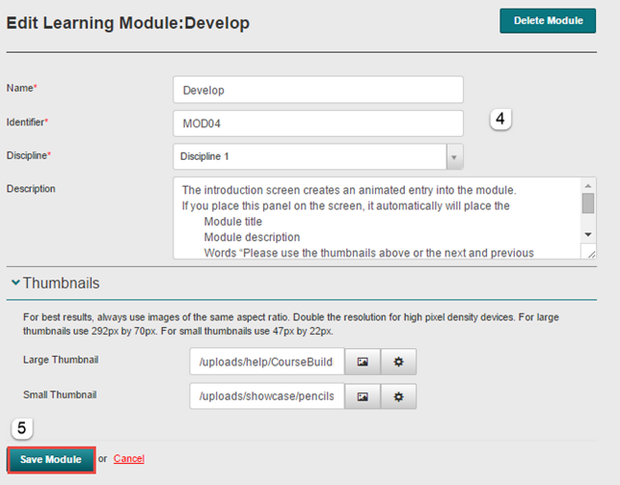
Change details as required.
-
Select Save Resource.
Types of resources
Each resource is of a different resource type.
Image
Displays an image file.
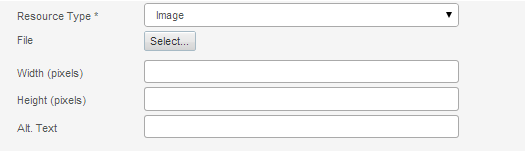
- The Select button lets you upload a file.
- Width and Height (in pixels) set how it's displayed on screen.
- Alt Text — alternative text shown as hover text.
Supported formats: jpg (recommended), png, aif.
Video
Displays a video file with controls.
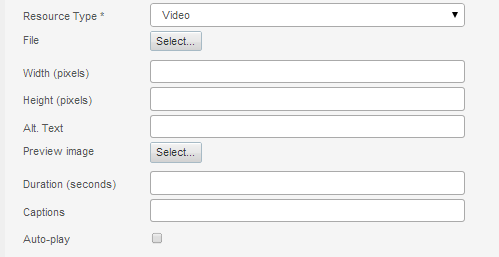
- The first Select button uploads a file.
- Width and Height set the display size.
- The second Select button previews the video.
- If Auto-play is checked, the video starts immediately.
Supported formats: mp4 (recommended), m4v, f4v.
Audio
Allows an audio file to be played with controls.
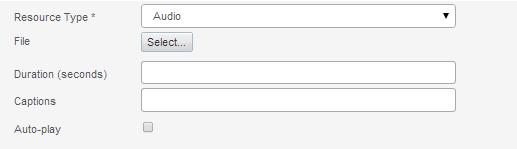
- The Select button uploads a file.
- If Auto-play is checked, the audio starts immediately.
Supported formats: mp3 (recommended), aac, m4a.
PDF
Displays a PDF file on screen.

The Select button uploads a file.
Script
Allows extra JavaScript to be embedded in the question. Recommended for advanced authors only.

The Select button uploads a file. Supported format: txt (any standard text file format).
Style
Allows extra CSS style sheets to be embedded in the question. Recommended for advanced authors only.
Add a single resource
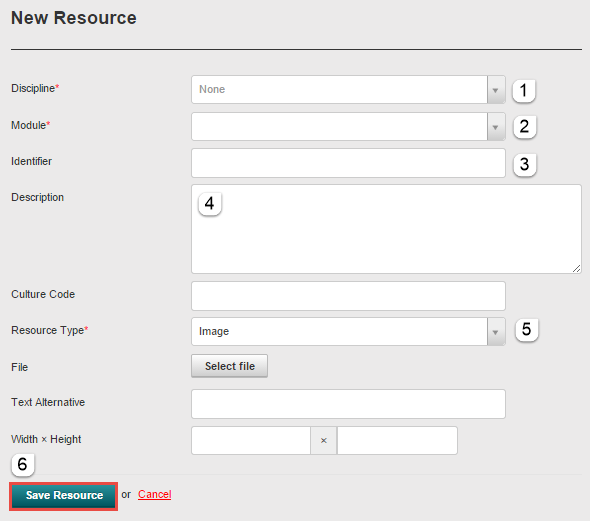
Navigate to Design > Resources and select Add Resource from the Actions dropdown.
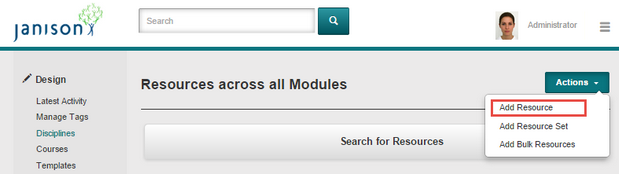
Complete the form:
- Select the Discipline the resource belongs to.
- Select the Module the resource belongs to.
- The Identifier is the unique name of the resource.
- Add a Description (optional) to aid searching.
- Select the Resource Type.
-
Select Save Resource.
Add resource sets
Resource sets let multiple resources be defined together as a resource group — useful if the resources are always used together.
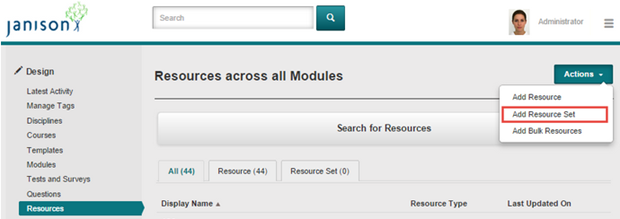
Navigate to Design > Resources and select Add Resource Set from the Actions dropdown.
The Resource Set screen is similar to the New Resource screen but contains multiple entries:
- Fill out the Discipline, Module, and Identifier the resource set will be linked to.
- Select New Resource.
- Indicate the Resource Type and select the file to upload.
-
Select Save Resource Set.
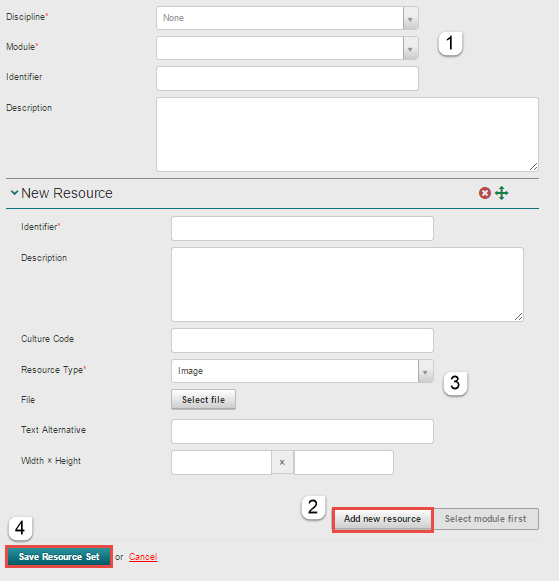
There's no limit to the number of resources that can be added to a set.
Add bulk resources
Use this to load a lot of resources from your local machine.
Navigate to Design > Resources and select Add Bulk Resources from the Actions dropdown.
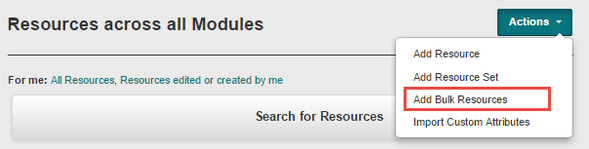
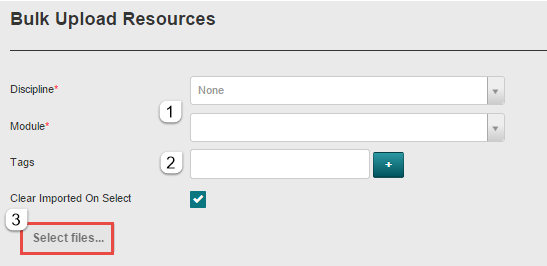
- Link the resources to a Discipline and Module.
- Add a Tag by entering the name and selecting +.
-
Select Select files to browse your local drive.
-
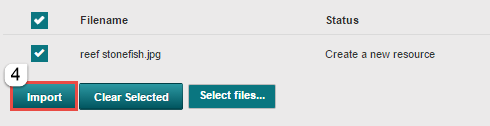
Select Import.
Add stimulus
Stimuli let complex resources be authored and linked to multiple questions. Even when a stimulus is linked to multiple questions, there's only one copy in the system — any changes apply to all linked questions.
For full details on creating and managing stimuli, see Assessment stimuli.
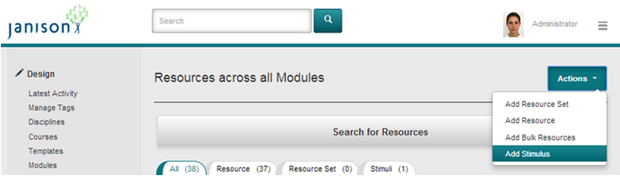
To add a stimulus, navigate to Design > Resources and select Add Stimulus from the Actions dropdown.
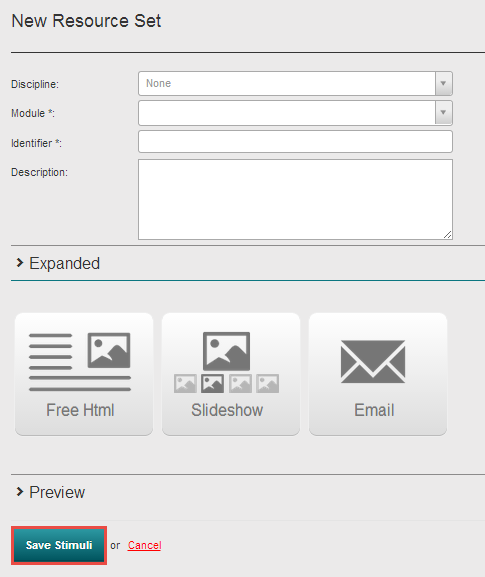
- Select a Discipline and Module to link the stimulus to.
-
Select where the stimulus is being created (for example, Free Html for a passage of text or an image).
-
Select Save Stimuli.
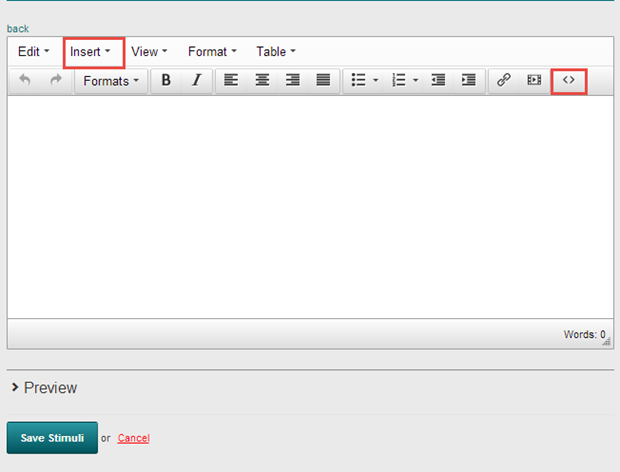
You can add information in Free Html by:
- Typing text directly into the text box.
- Using the source button (
<>) to paste HTML directly. - Using the Insert button to add text or images from another source.
Settings
Administrators can configure the following settings at Settings > Resource Settings.
Resource Settings — controls auto-generation of identifiers, which stimulus types are available (Free HTML, Slideshow, Email), and other resource-management options.