Groups
A group is a collection of users brought together for various purposes. A group belongs to the tenant although it can be restricted to a particular organisation or organisation unit if desired.
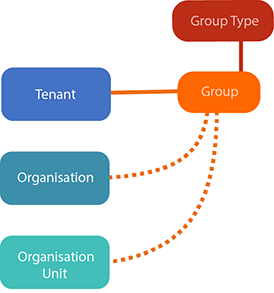
Group types are collections of groups, used to categorise them. (Group types belong to the tenant — see Group types.)
Groups let cohorts of people be defined and managed in different ways. CLS users are already organised by their membership in an organisation and an organisation unit — groups give complementary or alternative ways to organise and handle cohorts. A user can be a member of multiple groups, including groups attached to a different organisation unit from their own.
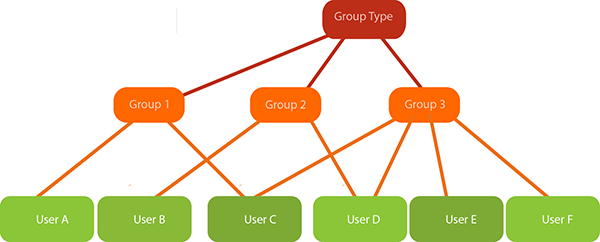
In the example above, three groups belong to one group type. Group 1 contains users A and C; Group 2 contains users B and D; Group 3 contains users C, D, E, and F. Users C and D are members of more than one group.
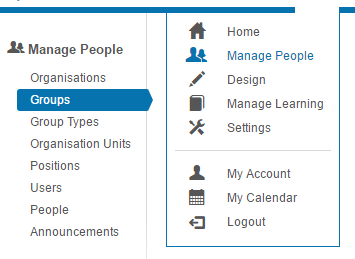
Groups are managed by selecting Manage People > Groups.
Uses of groups
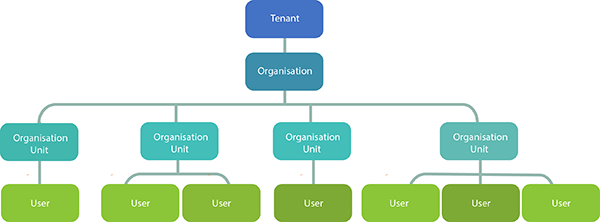
CLS users are organised by their membership in an organisation and an organisation unit. This follows a strict tree structure with two levels between the tenant and the user — a user can only belong to one org unit in this hierarchy.
Groups offer additional or alternative methods for categorising cohorts because a user can belong to more than one group, and a group doesn't have to be restricted to one organisation or organisation unit. Broadly, there are two main ways groups are used:
- Cohorts that transcend organisational structures — groups created independently of the org hierarchy.
- Cohorts that extend organisational structures — groups that add levels within an organisational hierarchy.
In one tenant you might have a mix of both.
What you can do with cohorts of users
- Catalogue access — control the courses users see in the catalogue by setting up catalogue access rules.
- Enrol learning — via the assign learning wizard, user enrolment rules, or directly from a catalogue item.
- Target with filters — use groups and group types in filters across the CLS, including in custom reports, competency requirements, continuing professional development (CPD) plans, and bulk actions like regenerating passwords or activating accounts.
- Define administration roles — set users as administrators (e.g. markers) of an entire group, granting them appropriate role-linked permissions over its members.
Users can also be set up to self-select group membership when they self-register (for example, joining age-limited groups linked to an age range group type).
Cohorts that transcend organisational structures
A groups structure is more flexible than an organisation structure because users can be members of many groups not aligned with their organisation or organisation unit.
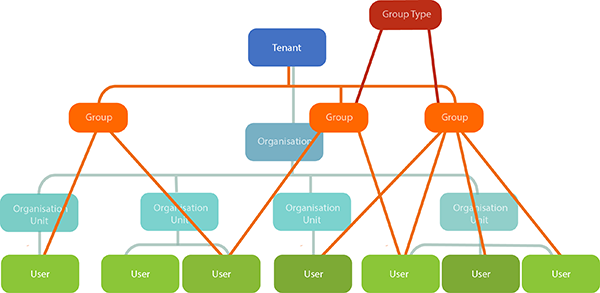
Above, three groups (orange) span the users' organisation structure. Users can belong to more than one group, and group memberships cross organisation unit boundaries.
A common example is appointing building wardens in an organisation. They aren't necessarily aligned to the HR structure, and they're further divided into chief wardens, area wardens, and fire wardens.
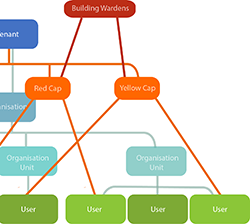
These groups cross HR boundaries. A participating user is a member of the building wardens group type and a specific red cap, yellow cap, or white cap group. Training and competency requirements can then be directed at all wardens via the group type, or targeted at fire wardens only via the red cap group.
Cohorts that extend organisational structures
Groups and group types can effectively add levels in an organisational hierarchy.
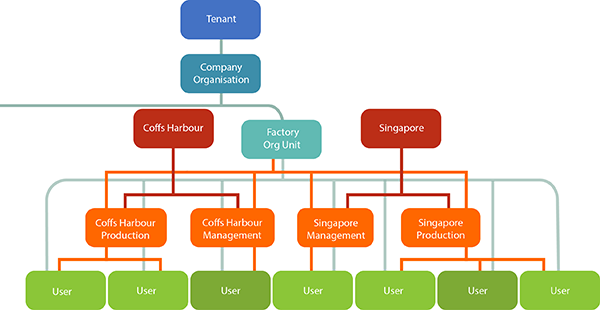
There's no single right way to manage multi-level HR structures in the CLS. Discuss configuration options with Janison based on:
- How HR data is already set up
- The reporting and management functionality you need
- Which cohorts you need to enrol, manage, assess, or report on
Add groups
Groups can be added one by one or imported in bulk.
Navigate to Manage People > Groups.
Add a group manually
Use this method for a small number of groups.
-
Select Add Group from the Actions menu.
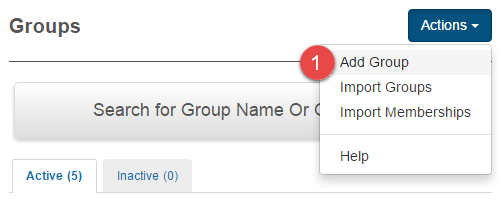
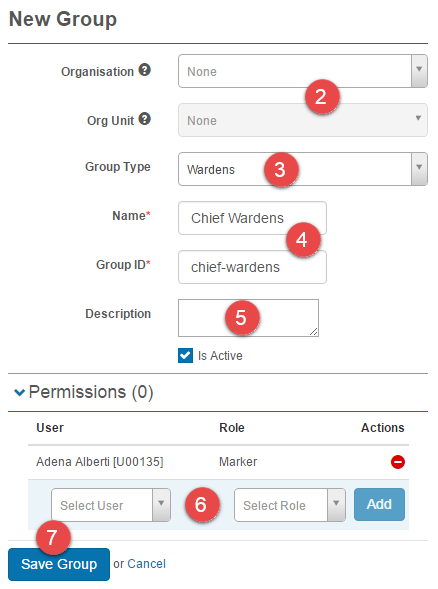
The new group screen is displayed.
- Optionally select an Organisation and Organisation Unit.
- Select a Group Type. Group types must be added before you can create the group.
- Enter a Name. The Group ID populates automatically.
- Optionally enter a Description.
- Optionally add Permissions. Granting users permission to the group opens options such as enrolling group members into catalogue items, marking tests of group members, and sending messages to them.
-
Select Save Group.
Import groups
Use this method for multiple groups.
-
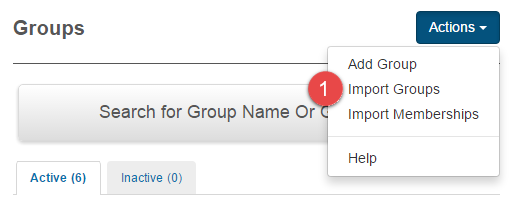
Select Import Groups from the Actions menu.
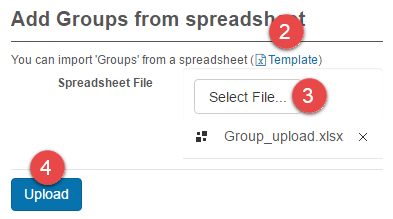
The Add Groups from spreadsheet screen is displayed.
-
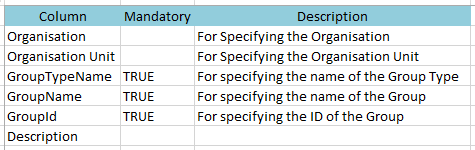
Download the template and populate it with your group data. The template provides sample data; the Supported Attributes tab describes the field requirements.
-
Select Select File to upload your new groups spreadsheet.
-
Select Upload.
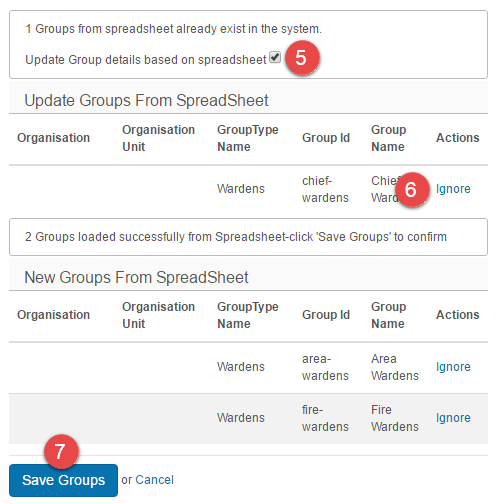
A feedback screen appears where you can review the import data.
- Optionally select Update Group details based on spreadsheet to update details of existing groups.
- Optionally select Ignore to remove a row from the import.
-
Select Save Groups.
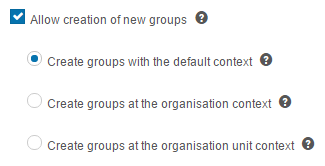
You can also import groups using the user import feature — see the document on import users.
Archive groups
Archived groups no longer appear in the system.
Navigate to Manage People > Groups.
- Select the box to the left of the group name. The top box selects all groups.
-
Select Archive.
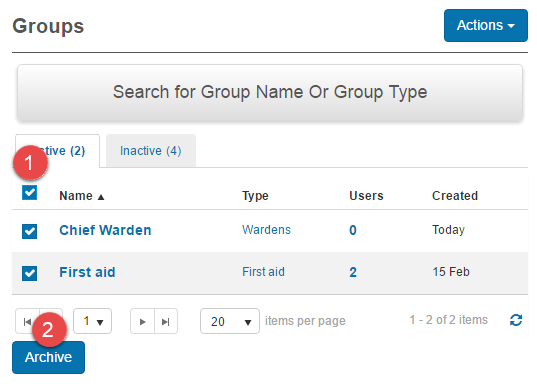
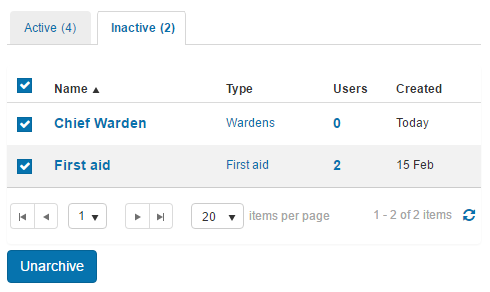
Archived groups move to the Inactive tab and can be unarchived from there.
Add memberships
You can add users to a group manually or using the import feature.
Navigate to Manage People > Groups.
Import memberships
-
Select Import Memberships.
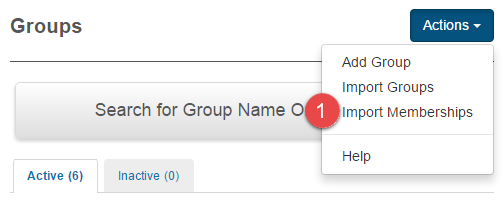
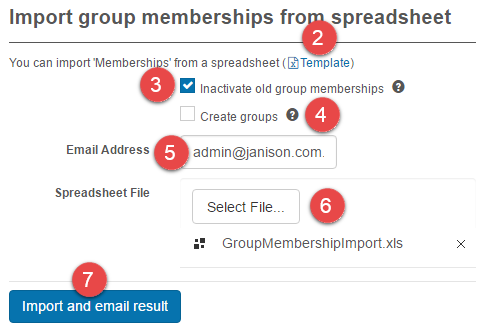
The Import group memberships from spreadsheet screen is displayed.
-
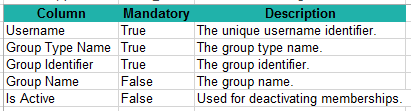
Download the template and populate it with your user data. The Supported Attributes tab describes the field requirements.
-
Optionally select Inactivate old group memberships — any group memberships a user has that aren't specified in the import file will be inactivated. This only applies to group types specified in the import file.
- Optionally select Create groups to create groups if they don't already exist.
- Enter an Email Address for import feedback.
- Select your file.
-
Select Import and email result.
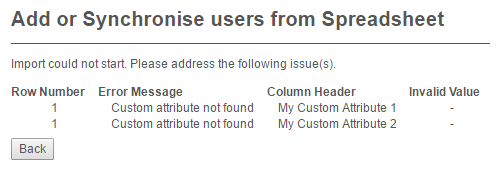
If issues exist in the import file, feedback is displayed.
If no issues exist with the file, success feedback is displayed.
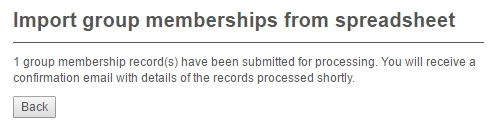
You can also import group memberships using the user import feature.
Manually add memberships
Open a group.
-
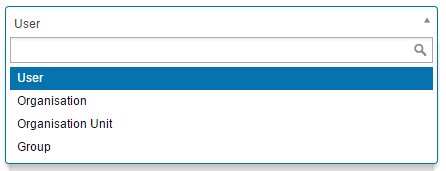
Select an entity. Options are users, organisations, organisation units, and groups.
-
Select the relevant items. The items shown depend on the entity selected.
- Select Add. The item appears in the section below.
- To remove an item, select the box to its left.
-
Select Remove.
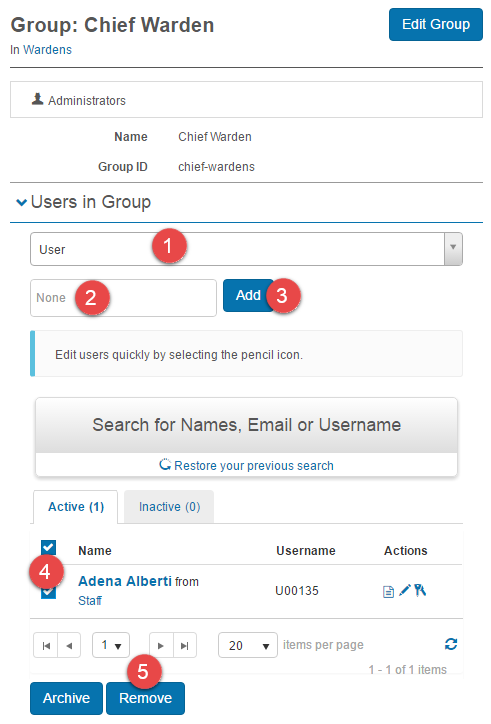
Users can also be archived and edited from this screen — selecting the edit or archive links directs you to the user screen.
Settings
Several platform settings affect groups.
Administrators can configure the following settings:
Roles (Settings > Roles) — define the roles available to assign as group permissions (e.g. marker, group administrator).
Catalogue access (Settings > Catalogue Access) — define rules that grant or restrict catalogue items to specific groups.
User Settings (Settings > User Settings) — control how group membership appears on user import templates.