Manage Catalogue
The CLS supports a number of learning assets — courses, tests, discussion forums, face-to-face events, and more. A learner doesn't enrol in these directly; instead they enrol in a catalogue item linked to the learning asset.
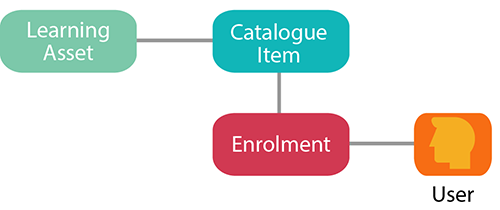
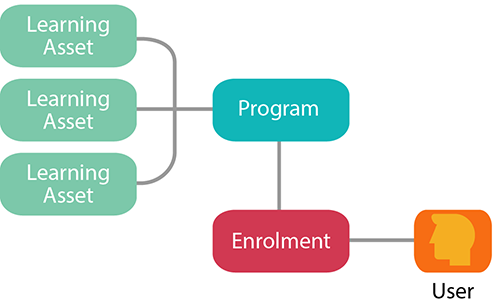
A catalogue item is the container for learning assets. The features available depend on the plugins enabled — for example, the competencies section only appears if the competency plugin is active. See the document on catalogue item settings.
If a catalogue item contains only one linked learning asset, it's referred to as a catalogue item. If it contains more than one, it becomes a Program.
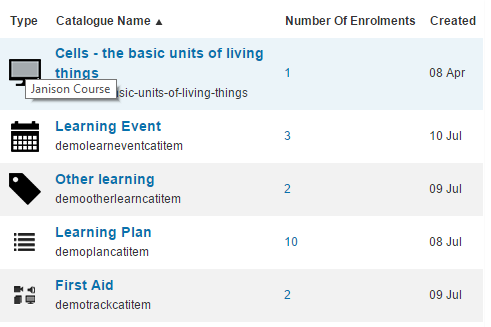
The icon in the Type column of the catalogue manager represents the type of learning asset. Hovering over the icon shows the type (e.g. Janison Course).
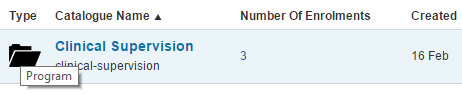
The icon changes when more than one asset is added.

Catalogue management is reached via Manage Learning > Manage Catalogue.
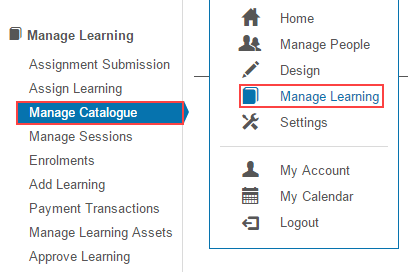
Add a catalogue item
Browse to Manage Learning > Manage Catalogue.
-
Select Add Catalogue Item.

The Add Catalogue Item popup is displayed.
-
Select a Catalogue Template. See Catalogue Item Templates.
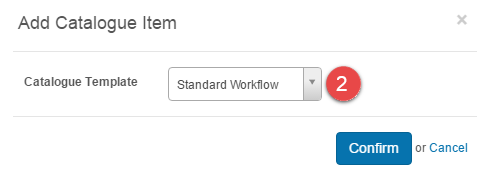
-
Enter a Name and Identifier.
-
Optionally enter an Overview and Learning Objectives. These appear on the Browse Learning tile and the catalogue item info page.
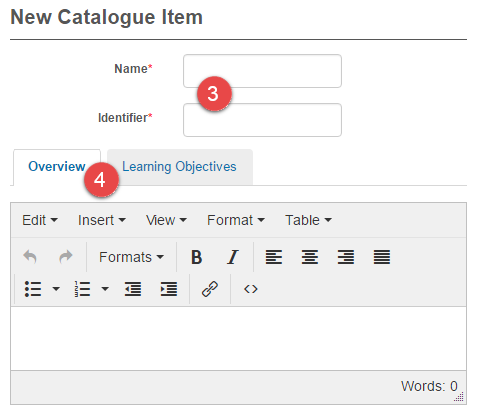
-
Select a component using the add icon.

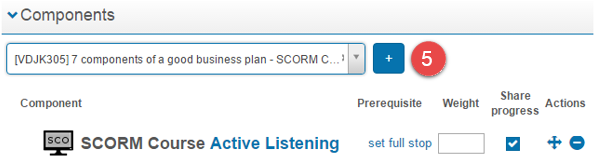
-
Select Save Catalogue Item.

Basic settings
The basic settings are optional. Populated info may appear on the catalogue item info page and the learning transcript.
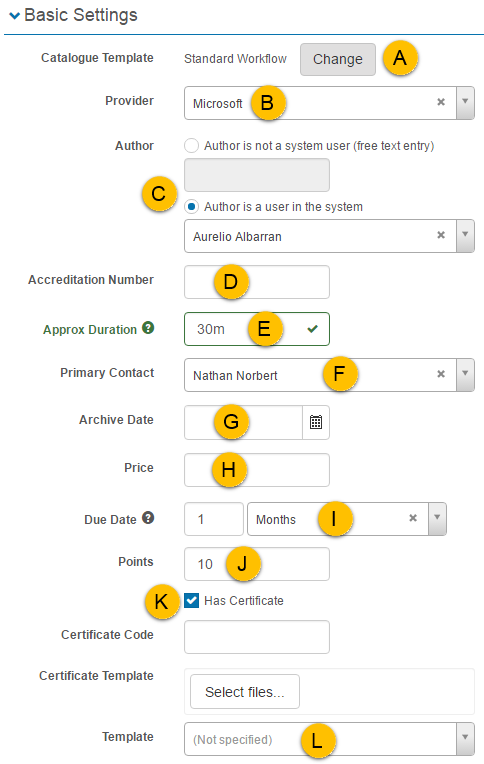
- Select Change to access the Add Catalogue Item popup and select a different template.
- Select a Provider (configured in Settings > Providers).
- Enter a non-system Author or select a system Author.
- Enter an Accreditation Number.
- Enter an Approx Duration.
- Select a Primary Contact.
- Set a date to automatically archive the catalogue item.
- Enter the cost. See payment settings.
- Set how long learners have to complete after enrolment (the due date).
- Points relate to continuing professional development (CPD).
- Enable Certificates to link a certificate awarded on completion.
-
Program Template is left unselected except in special circumstances.
Add Learning wizard
Catalogue items can be added via the Add Learning wizard.
Catalogue item components
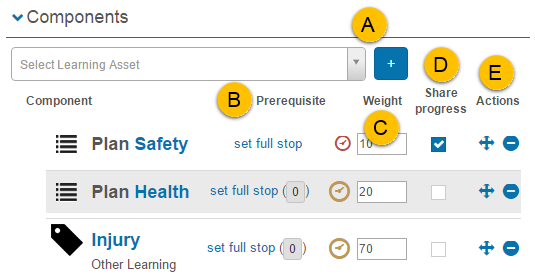
Learning assets are added to catalogue items in this section.
- Add a learning asset using the add icon.
- Set learning assets as Prerequisites so a learner must complete one item before accessing consequents.
- The Weight is the relative importance of the component. Use higher weights for time-consuming items. Weight = 0 makes the component optional.
- Share Progress applies when a learning asset exists in more than one catalogue item — when checked in both, completion in one auto-completes in the other.
-
Use the remove and reorder icons to remove or reorder components.
Catalogue component grouping
Component Grouping organises learning assets into groups within a catalogue item.
Enable component grouping
Browse to Settings > Catalogue Item Settings.
- Open Authoring Settings.
-
Check Enable Component Grouping.
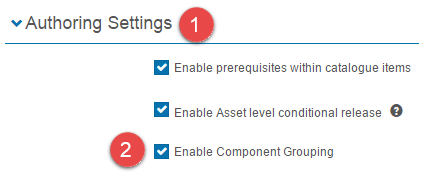
-
Select Save Settings.

Group components
Open the catalogue item in edit mode.
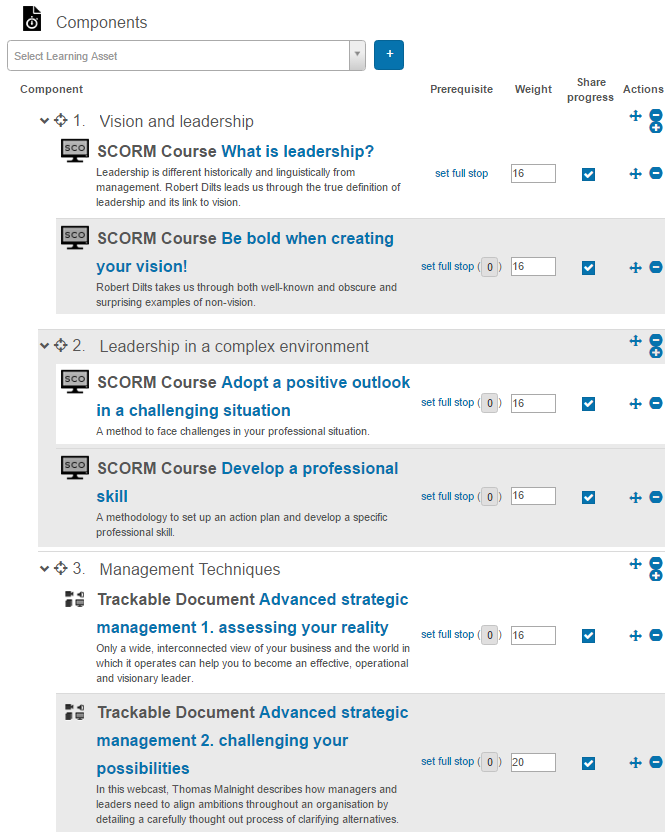
- In the Components section, select Group (Level 1).
-
Select the add icon.
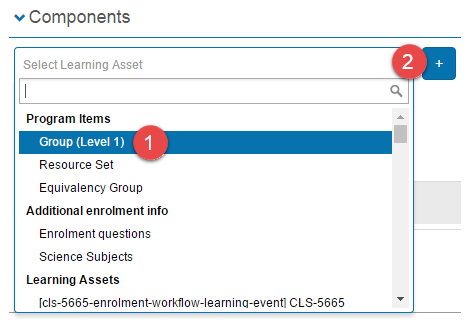
A group appears in the components.
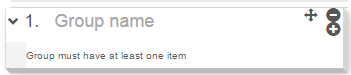
- Enter a Group name.
-
Add learning assets to the group from the dropdown and the add icon.
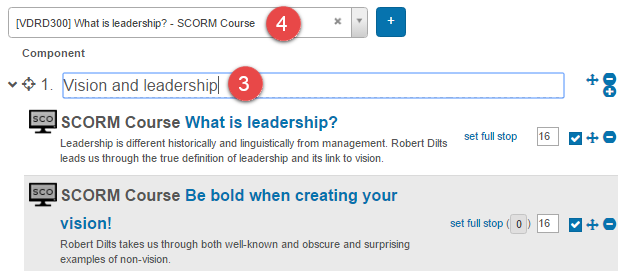
You can re-order with the drag-handle icon or remove with the remove icon.
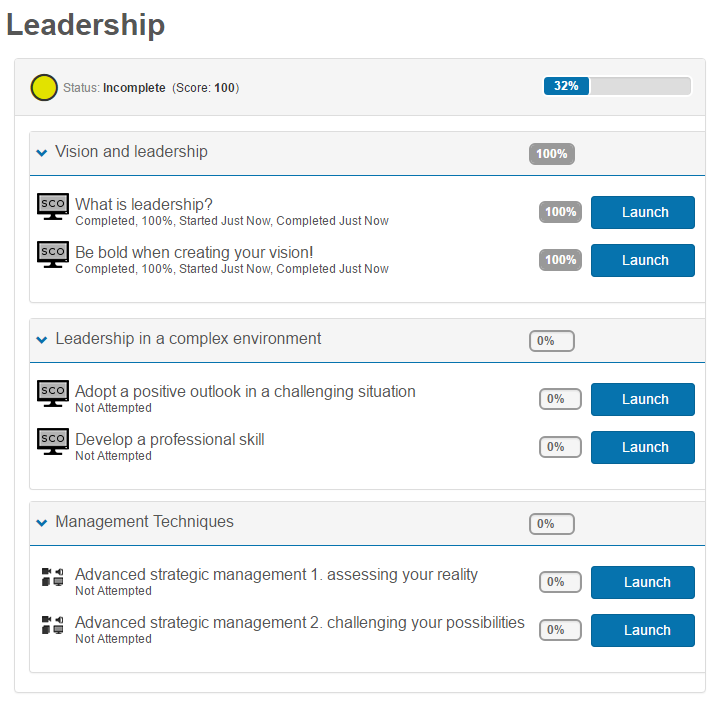
Learner experience
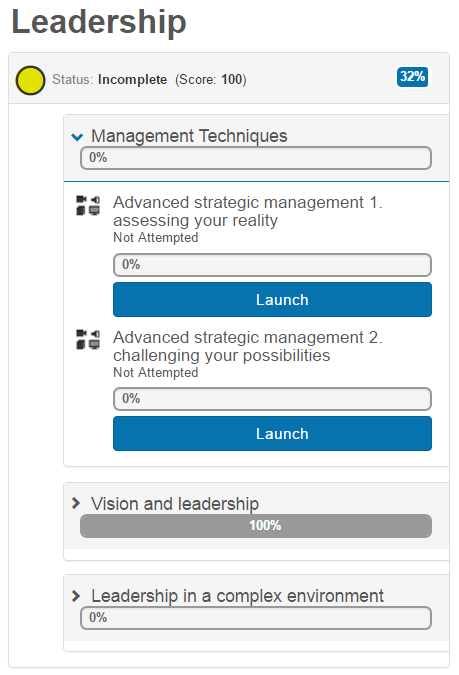
Learners see grouped sections they can expand to view and launch the assets.
Nested groups
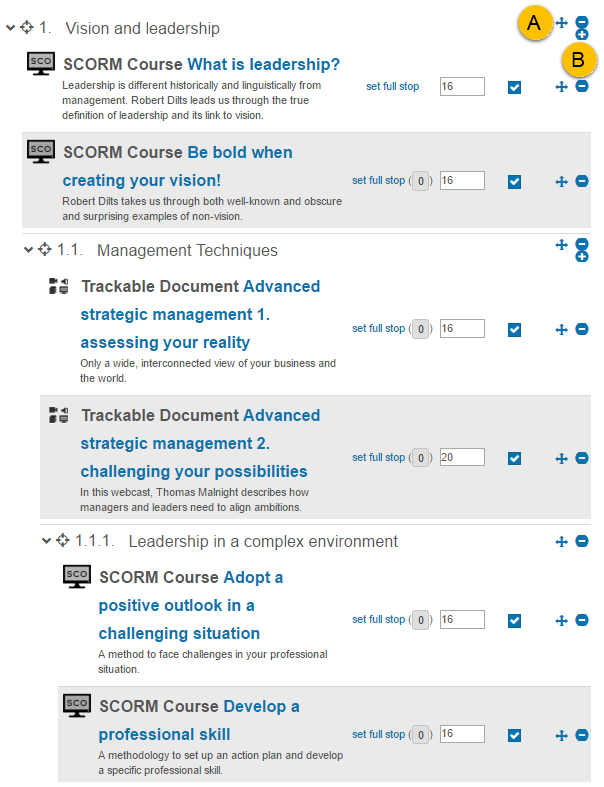
Component groups can be nested:
- Drag a group onto another to nest it inside.
-
Use the add-nested-group icon to create a new empty nested group within a group.
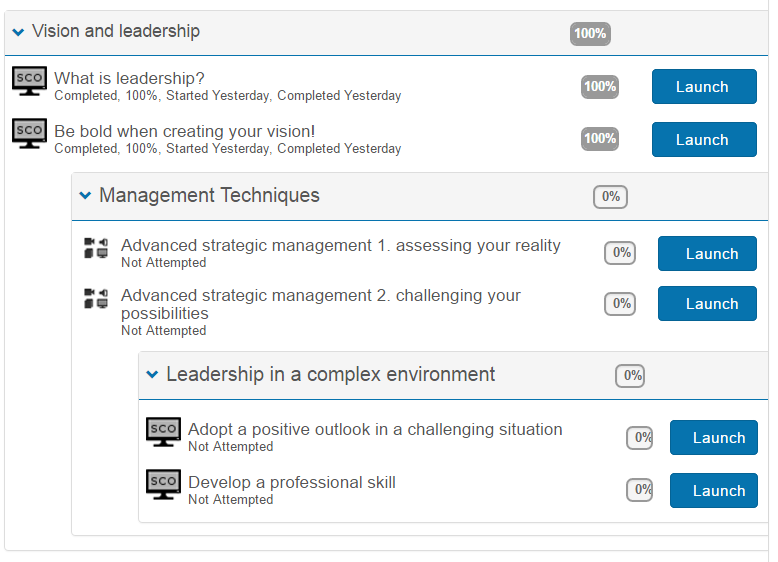
They appear to learners as nested items.
Component equivalency groups
This feature lets you specify the number of learning assets in a group that need to be completed. For example, a group of three assets but a learner only needs to complete one.
Enable equivalency groups
Browse to Settings > Catalogue Item Settings.
-
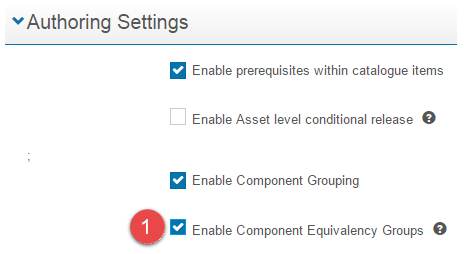
Under Authoring Settings, select Enable Component Equivalency Groups.
-
Select Save Settings.

Add equivalency groups
Open the catalogue item in edit mode.
- Select Equivalency Group.
-
Select the add icon.
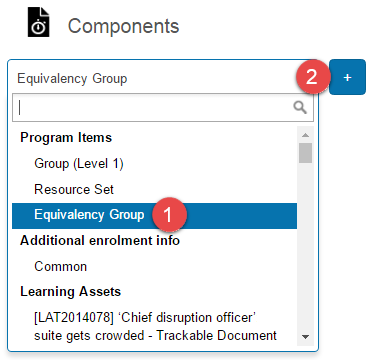
An equivalency group is displayed.
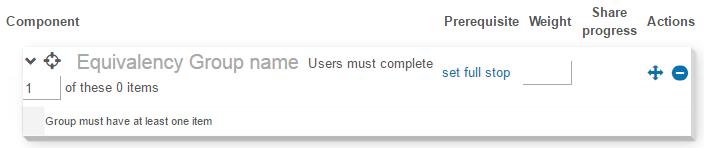
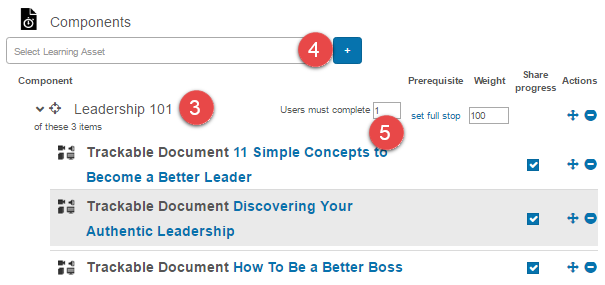
- Enter the Equivalency Group name.
- Select learning assets and the add icon.
-
Specify the number of components required.
-
Select Save Catalogue Item.

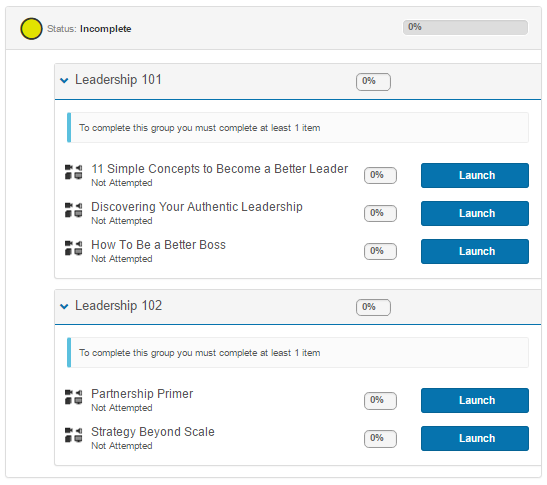
When a learner opens the catalogue item, a notification shows the number of components required.
Multiple equivalency groups can be added to a single catalogue item alongside other components.
Prerequisites and equivalency groups
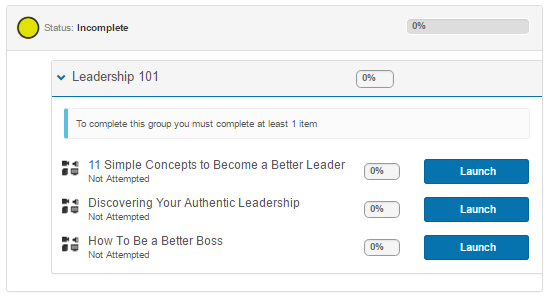
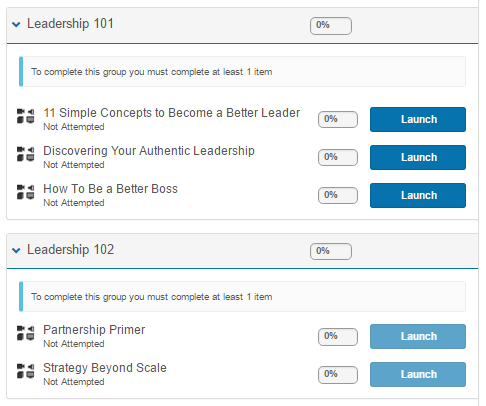
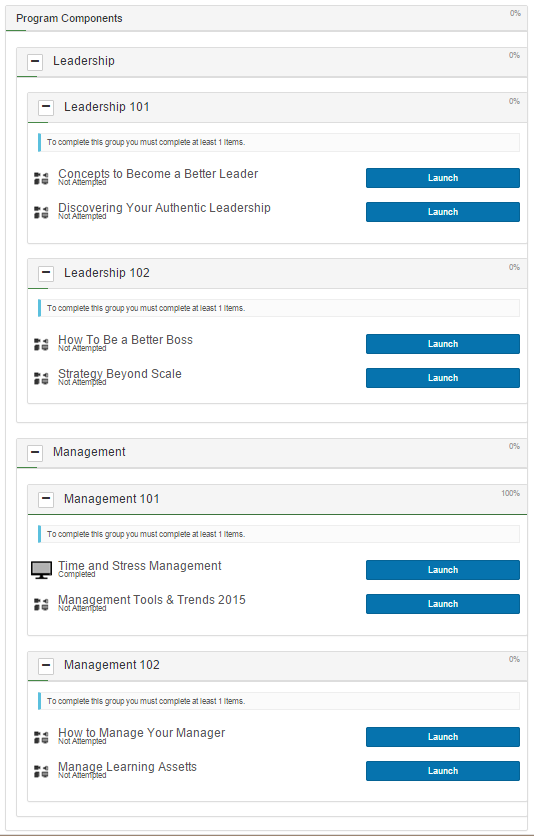
Prerequisites can be set between equivalency groups. In this example, Leadership 101 is a prerequisite for Leadership 102 — the Launch buttons stay inactive until the required components in 101 are completed.
Equivalency groups and component grouping
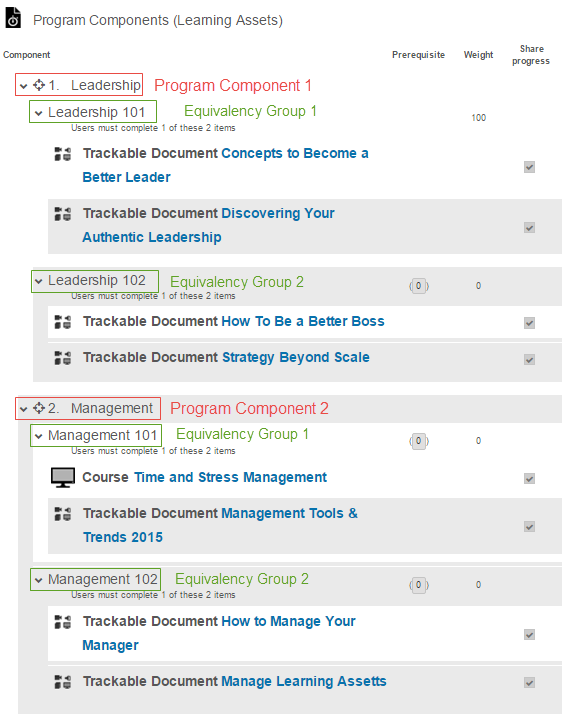
Equivalency groups can be added within catalogue component groups. The reverse isn't supported — catalogue component groups can't be added inside equivalency groups.
Notes on equivalency groups
- Resource Sets can't be added to equivalency groups.
- Weight is set for the equivalency group, not for each asset inside.
- The same asset added within different equivalency groups in a catalogue item has only one progress record (except for surveys).
Inspect catalogue item details
Inspecting a catalogue item shows information and lets you edit some sections.
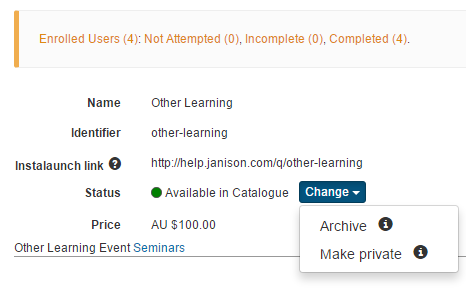
Select Manage Learning > Manage Catalogue and select the catalogue item.
Enrolment data is displayed:

- Enrolled Users in the catalogue item
- Users who have Not Attempted
- Users who have Incomplete progress
- Users who have Completed
Each piece of data links to the Enrolments section.
Instalaunch link
The Instalaunch link can be copied and emailed to learners. When the learner selects the link, they're taken to the login screen and then automatically enrolled in the catalogue item.

Note
Two requirements for Instalaunch:
- The learner must already have an account.
- The Default Enrolment Method in Self Enrolment Settings must be Self-enrolment (Free) or a No Approval option.
Catalogue status
The catalogue status controls enrolment access.
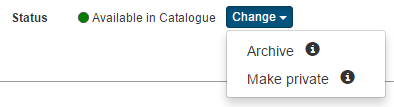
- Make Private — removes from Browse Learning, but learners can still be enrolled manually or via rules.
- Make Public — adds to Browse Learning.
- Archive — removes from Browse Learning and restricts further enrolments.
Link to learning asset
The linked learning asset is listed and is a link to the asset.

Metadata
This section covers workflow approval, tags, and custom pages.
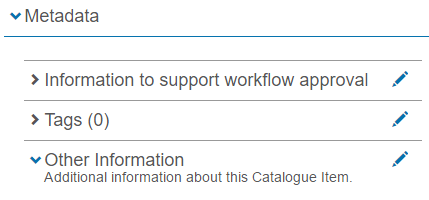
Information to support workflow approval
Gather information about a catalogue item so an approver can use it as approval criteria. For example, a developer may need to confirm they have permission to use the content.
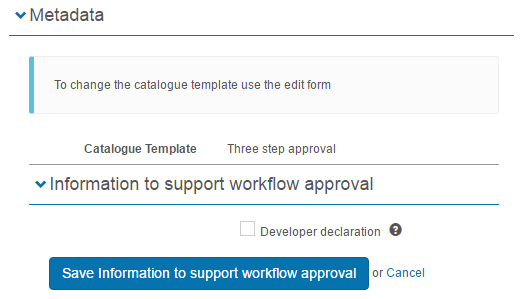

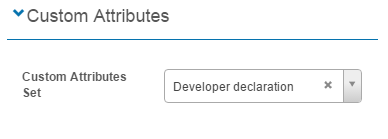
This section only appears when the catalogue item template has a custom attribute set selected. See Catalogue Item Templates.
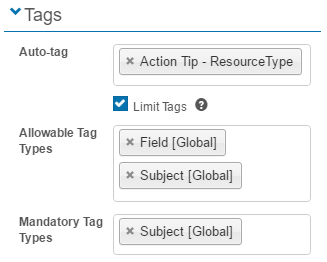
Tags
The main purpose of tagging catalogue items is to categorise them and make them searchable, especially in Browse Learning.
Tags can be controlled in catalogue item templates — set auto-tags, mandatory tags, and tag restrictions.
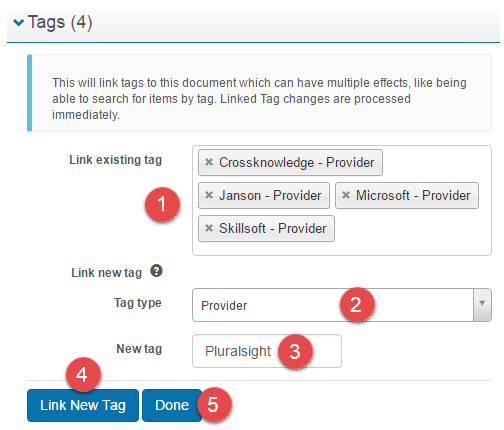
Select the edit icon to link new tags.
- Type the tag name to link an existing tag (multiple allowed). Steps 2–4 are optional.
- Select a Tag type.
- Enter a New Tag.
- Select Link New Tag.
-
Select Done.
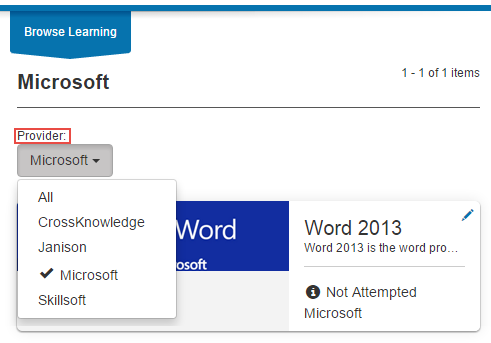
Tags appear in Browse Learning when the tag type is added as a top filter.
Tags can also be assigned to catalogue items in bulk — see Import catalogue item tags below.
Other information
Custom pages can be set using a custom attribute type of Custom Views. See the document on custom views.
Point allocation
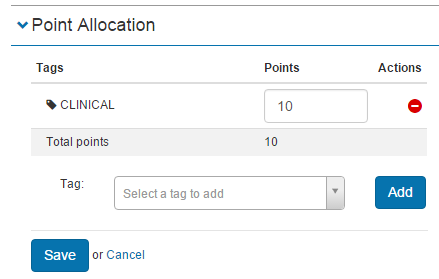
Points are numeric values used to set and achieve CPD requirements. See Continuing professional development.
Competencies
Competencies and competency sets can be linked to catalogue items so they're achieved on completion.
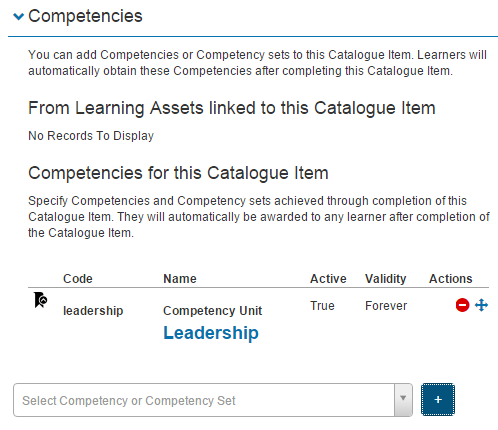
To add or edit competencies, edit the catalogue item.
Prerequisites between catalogue items
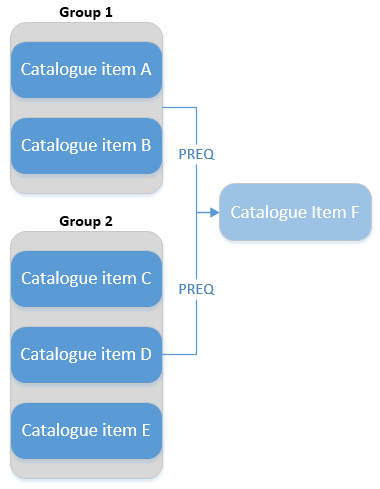
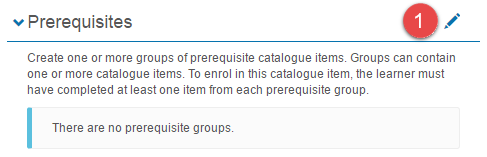
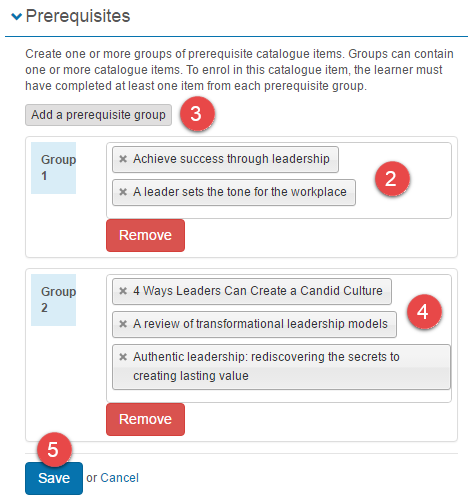
Prerequisites prevent learners from accessing catalogue items until they've completed other specified ones. They're managed using prerequisite groups. A learner must complete at least one item from one or more groups before they can enrol.
In the example below, a learner must complete one item from group 1 and one from group 2 before they can access catalogue item F.
Browse to Manage Learning > Manage Catalogue and open the catalogue item.
-
Select the add icon. A blank group is displayed.
-
Select inside Group 1. A list of catalogue items is displayed.
- Optionally select Add a prerequisite group.
- Add catalogue items to additional groups.
-
Select Save.
Learner experience
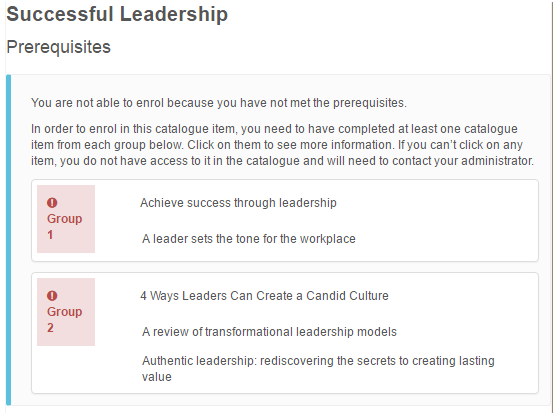
If a learner hasn't completed the prerequisites, they can't self-enrol. The items in the groups are links.
Bypassing prerequisites
Catalogue item prerequisites only apply when a learner self-enrols. Administrators bypass prerequisites when:
- Using Assign Learning
- Using enrolment rules
- Using enrolment imports
Prerequisites within catalogue items
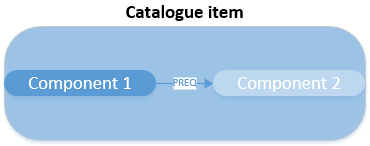
Prerequisites within a catalogue item prevent learners from accessing learning assets until they've completed others.
Enable prerequisites within catalogue items
Browse to Settings > Catalogue Item Settings.
-
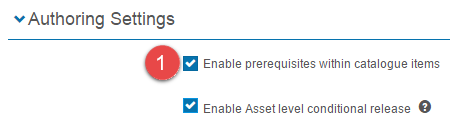
In Authoring Settings, select Enable prerequisites within catalogue items.
-
Select Save Settings.

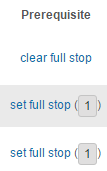
Prerequisites are controlled using set full stop and clear full stop links in the components section.
- set full stop — set a prerequisite for this component.
- clear full stop — remove the prerequisite.
-
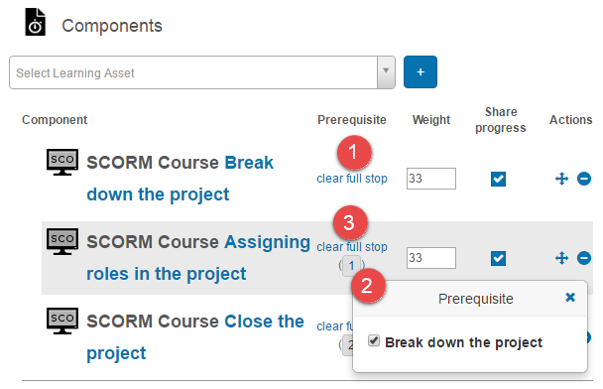
Select set full stop on the component to designate as a prerequisite. A number in brackets appears on the next component indicating the prerequisite.

-
Select the number to view the prerequisite — uncheck the box to remove it.
-
Continue setting prerequisites as required.
-
Select Save Catalogue Item.

Note
Component order matters — you can only set a component as a prerequisite to a later component. The first component has no number.
Learner experience
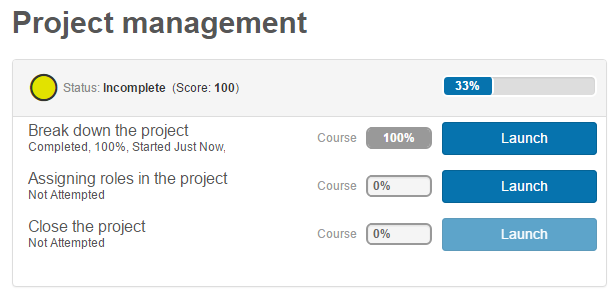
In this example, Break down the project is set as a prerequisite for Assigning roles in the project. The launch button for Break down the project is active; Assigning roles is inactive (lighter shade).
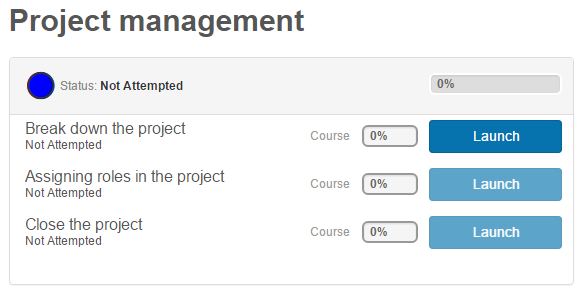
After completing Break down the project, Assigning roles becomes active, but Close the project stays inactive until Assigning roles is completed.
Thumbnails
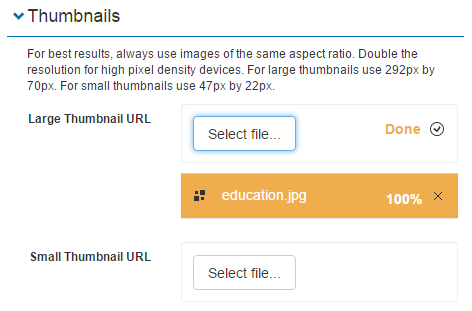
Large Thumbnail URL lets you add an image to the catalogue item tile.
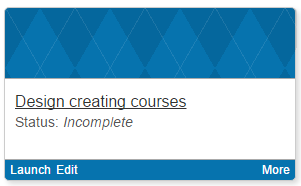
A catalogue item tile without a thumbnail:
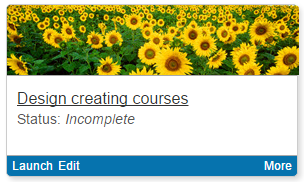
A catalogue item tile with a thumbnail:
Extended information
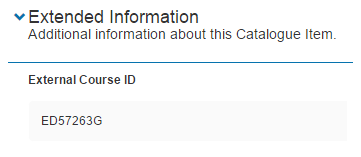
This section appears if a custom attribute is created with a Linked Object of Catalogue Item. See the document on custom attributes. A common use is for an external course ID linking the Janison catalogue item to another system.
Self-enrolment settings
These settings control how learners enrol.
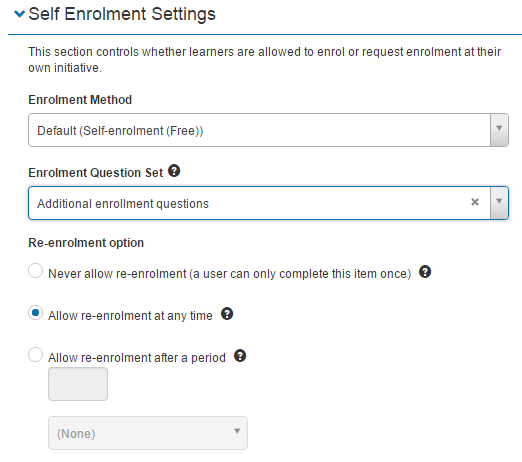
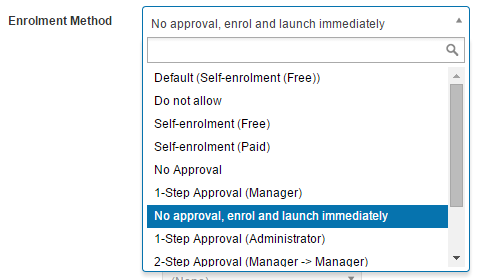
Enrolment method
Determines whether learners can automatically enrol or need a workflow or payment gateway.
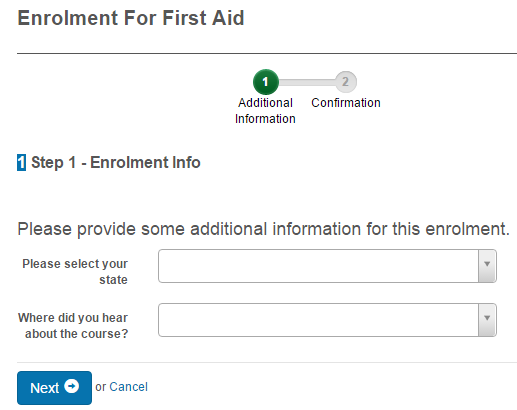
Enrolment question set
Select preconfigured questions displayed to learners during enrolment. See the document on custom attributes and self-enrolment questions.

Questions are presented during enrolment.
Re-enrolment options
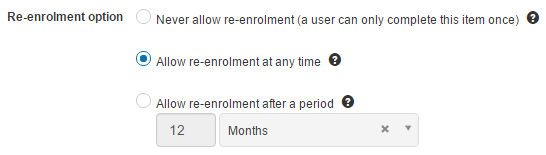
- Never allow re-enrolment — users can't self-enrol twice. Administrators can still re-enrol them.
- Allow re-enrolment at any time — users can self-enrol any time after completing.
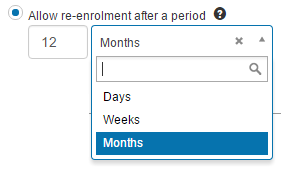
- Allow re-enrolment after a specified period — users can self-enrol a specified period after completing.
Additional enrolment settings
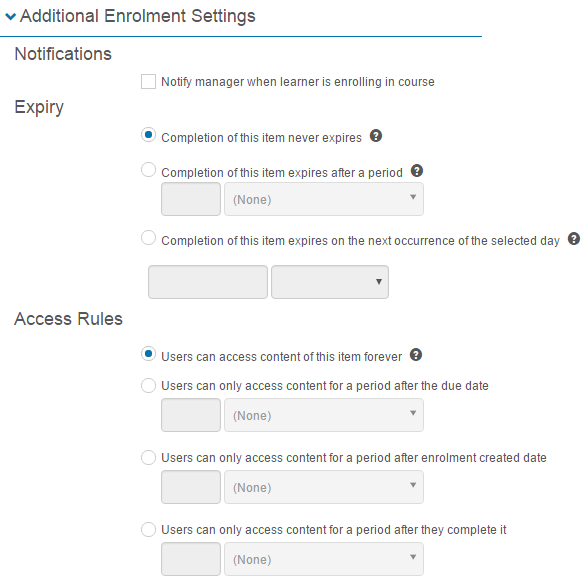
Notifications
When checked, triggers an email notification to managers when learners self-enrol. The message template is Enrolment-ManagerConfirmation.

Expiry
Set an expiry date if learning needs to be re-done periodically:
- Learning never expires.
- Learning expires after a number of days, weeks, or months.
-
Learning expires on a particular day of the year.
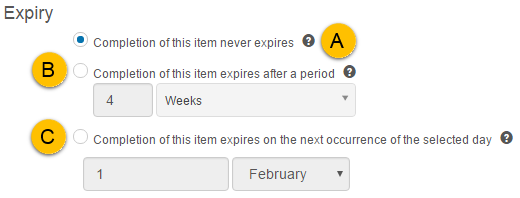
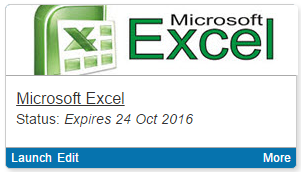
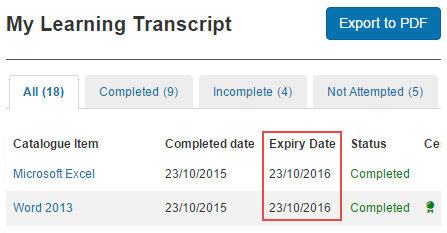
Expiry dates can be reported on via customisable reports. Learners see the expiry on the catalogue tile.
They also see it on My Learning Transcript.
Access rules
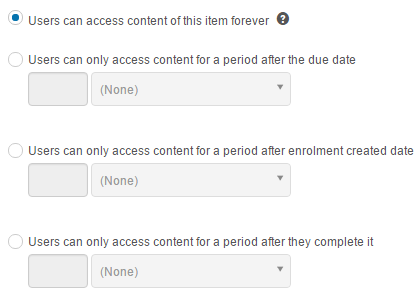
Restrict the amount of time a learner has to access content after they complete it.
Enrolment in a catalogue item
User enrolment can happen through:
- Self-enrolment settings — controls whether learners can enrol or request enrolment.
- Assign Learning — wizard for enrolling one or many users.
- Manage Catalogue — go to the Enrolments section of a catalogue item.
- Import enrolments via Excel — see Enrolments.
- User Enrolment Rules — see settings.
See Enrolments for managing enrolments.
Edit a catalogue item
Some sections can be edited inline; others via the actions dropdown.
- Sections with the edit icon can be edited inline.
-
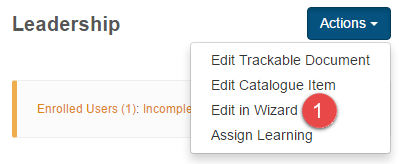
Other sections — select Edit Catalogue Item or Edit in Wizard from the actions dropdown.
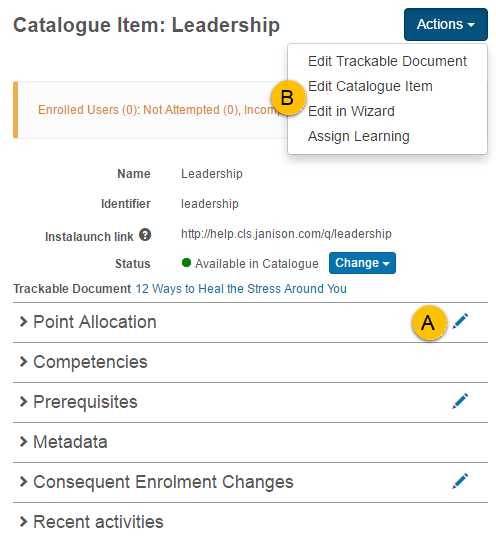
Edit catalogue item
Edit Catalogue Item opens a screen similar to the create screen.
Edit in wizard
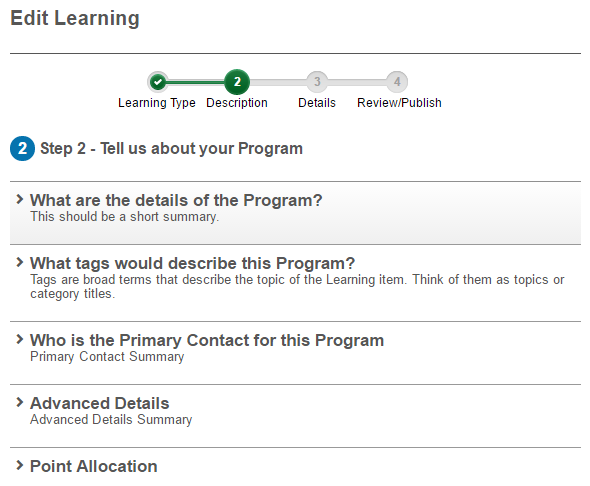
Edit in Wizard takes you to step 2 of the Add Learning wizard.
Copy and preview programs
Programs are catalogue items with more than one linked component.
Copy program
Browse to Manage Learning > Manage Catalogue and select the catalogue item.
-
Select Copy Program.
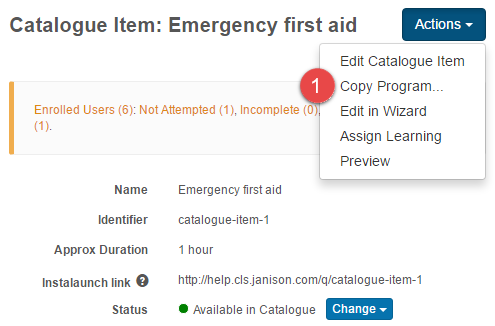
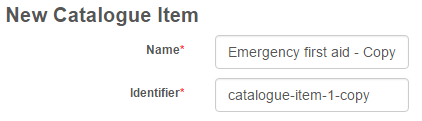
You're directed to a New Catalogue Item screen with Copy appended. Edit details as needed.
-
Select Save Catalogue Item.

Preview a program
Preview a program as a learner would see it.
Select Preview from the Actions dropdown.
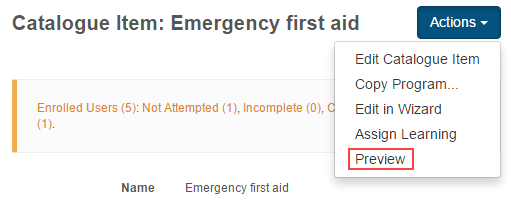
A separate window opens with the fully functional program.
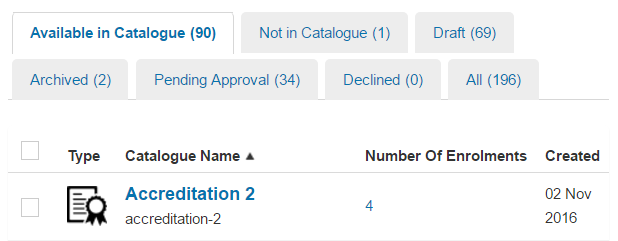
Catalogue manager
The catalogue manager provides access to manage catalogue items via tabs:
- Available in Catalogue — public, searchable in the library.
- Not in Catalogue — private, not searchable. Previously enrolled users still have access. Set via Make Private.
- Draft — newly created.
- Archived — unsearchable, no new enrolments.
- Pending Approval — workflow status. See Catalogue item workflows.
- Declined — workflow status.
- All — catalogue items of all statuses.
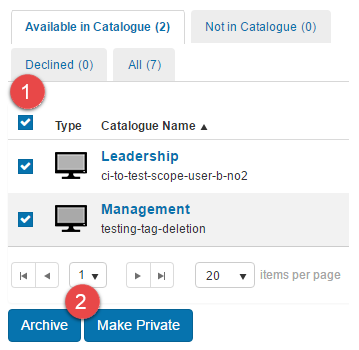
Set statuses in bulk
- Select one or more catalogue items.
-
Select one of the action buttons at the bottom.
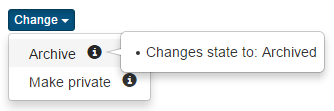
Set status on a single item
In the catalogue item, change the status via the dropdown.
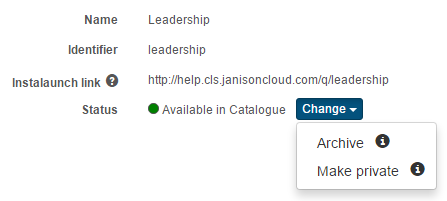
Hover over the info icon to view details of the status change.
Assign Learning
From within a catalogue item, run the Assign Learning wizard.
Browse to Manage Learning > Manage Catalogue and select the catalogue item.
-
Select Assign Learning.
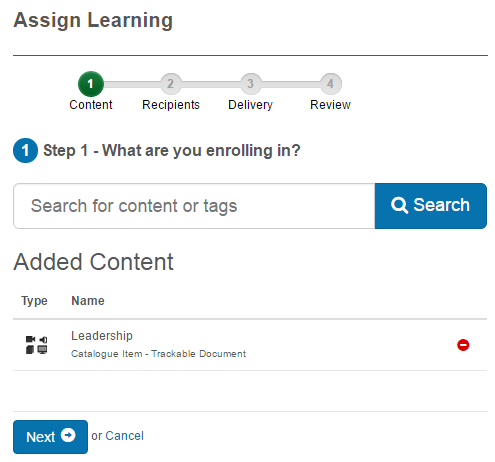
You're directed to step 1 of the wizard with the content pre-added.
Import catalogue item tags
Tags can be added to catalogue items in bulk from a spreadsheet.
Browse to Manage Learning > Manage Catalogue.
-
Select Import Catalogue Item Tags.

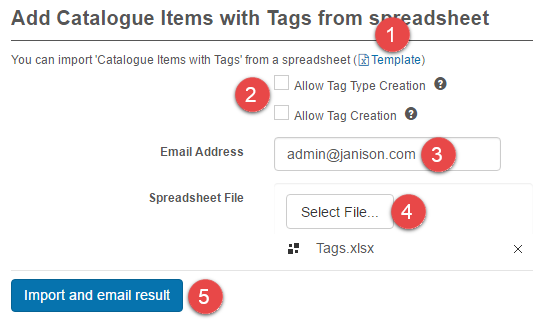
The Add Catalogue Items with Tags from spreadsheet screen is displayed.
-
Download the Template and populate it. See the Supported Attributes tab.
Note
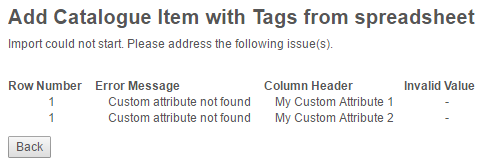
If you don't have custom attributes, delete the Custom columns or the upload will error.
-
Optionally select checkboxes to create new tag types and tags.
- Enter an Email Address for the log.
- Select your Spreadsheet File.
-
Select Import and email result.
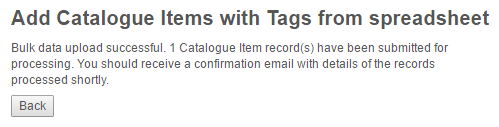
Feedback is displayed. If issues exist, an error message appears.
If no issues, success feedback is displayed.
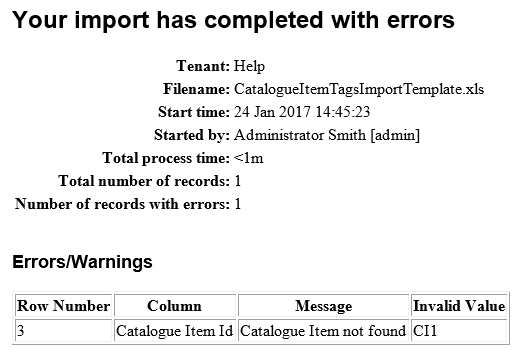
An email is sent with import feedback.
Consequent enrolment changes
This feature lets an administrator designate catalogue items for consequent enrolment changes — creating or expiring enrolments when a learner completes the catalogue item.
To activate, enable the setting in the catalogue item template.
- Open the template and expand Optional Inclusions.
- Select Consequent Enrolment Changes.
-
Select Update.
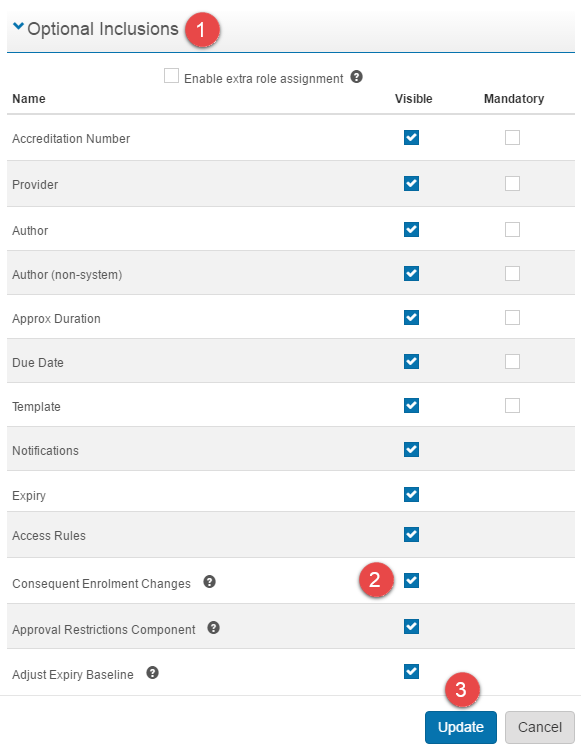
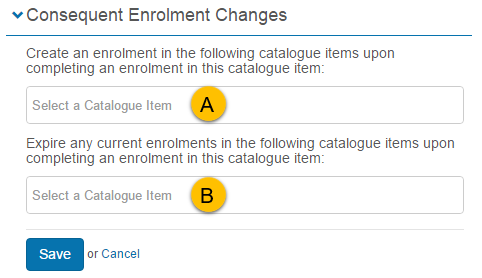
The Consequent Enrolment Changes section now appears in catalogue items using that template.
Two options control enrolment changes:
- On completion, auto-enrol learners in the selected catalogue items. The new enrolment isn't automatically completed (accreditations are an exception).
-
On completion, expire the selected catalogue items.
Settings
Several platform settings affect catalogue items.
Administrators can configure the following settings:
Catalogue Item Settings (Settings > Catalogue Item Settings) — control authoring settings (component grouping, equivalency groups, prerequisites within items, scope restrictions), and the available catalogue item templates.
Catalogue Item Templates (Settings > Catalogue Item Settings > Catalogue Item Templates) — define templates with default workflows, identifier patterns, tags, custom attributes, and optional inclusions.
Self-enrolment Settings (Settings > Self Enrolment Settings) — set the default enrolment method and approval workflows.
Payment Settings — configure payment gateways for paid catalogue items.
Providers (Settings > Providers) — define providers selectable on the catalogue item.
Browse Learning Settings (Settings > Browse Learning Settings) — control how catalogue items appear in Browse Learning, including tag-based filters and tile thumbnails.