Venues
A venue is a defined place, such as a training room. It's usually linked to a location — a physical place where there may be more than one venue. One location can be linked to multiple venues.
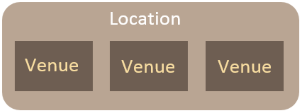
In the CLS, face-to-face training is provided through sessions. Sessions are usually assigned a venue, and the venue is linked to a location. To provide maps and location instructions to attendees, the venue must be linked to a location with a physical address.
You can set up venues and locations in several ways:
- Create a venue and create or edit its location on the same screen.
- Create a location, then create a venue and link it to the location.
- Import venues and locations using a spreadsheet.
- Use the QuickAdd Venue feature when creating a session — you can also create a location on the same screen.
Manage venues
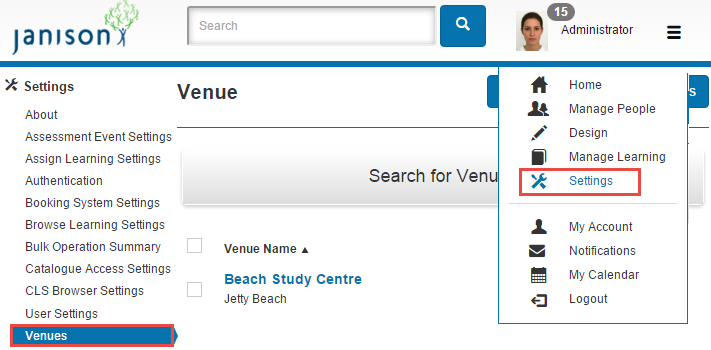
Navigate to Settings > Venues.
Delete a venue
Navigate to Settings > Venues and find the venue.
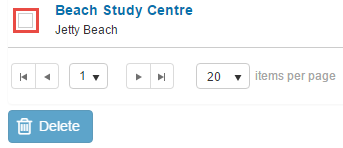
Select the checkbox next to the venue and select Delete.
Add a venue
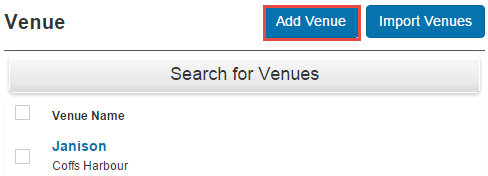
Navigate to Settings > Venues > Add Venue.
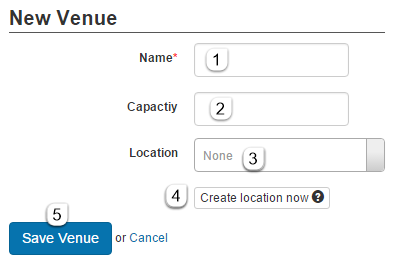
- Enter the Name of the venue.
-
Enter its Capacity — the number of people it can hold.
-
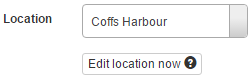
To select an existing Location, select from the dropdown. After selecting, you can edit the location by selecting Edit location now.
-
To create a new location on this screen, select Create location now — this opens a blank location form (see Create or edit location now).
- Select Save Venue.
Create or edit location now
This form lets you create a new location or edit an existing one. Reached from within venue creation or editing.
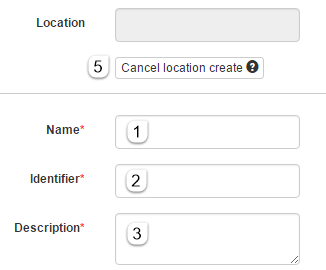
The first three fields are mandatory. Address details are essential if you want maps and location details at this location.
- Enter or edit the Name.
- Enter or edit the Identifier.
- Enter or edit a Description.
- Enter or edit the Address and other details.
- Select Cancel location create or Cancel location edit if you don't want to proceed.
Cancelling creation removes the name from the Location box on the venue. Cancelling edit leaves the location unchanged.
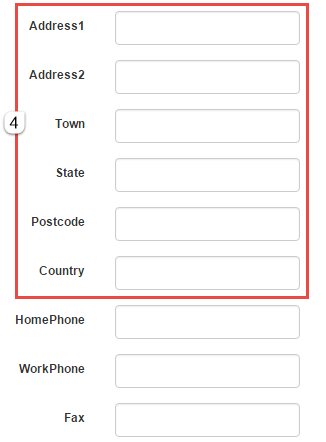
Select Save Venue — this also saves the created/edited location.
Inspect venue details
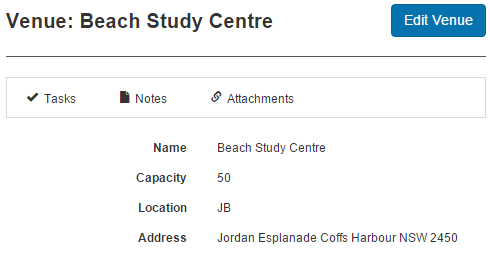
Navigate to Settings > Venues and select the venue name. The details screen shows:
- Venue name
- Capacity
- Location identifier (if linked)
- Location address (if it exists)
Edit a venue
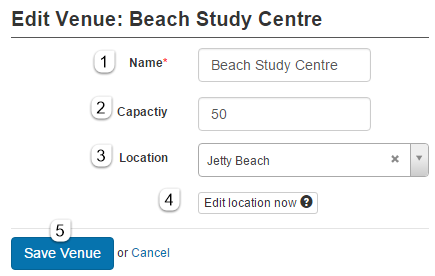
Navigate to Settings > Venues, select a venue, then Edit Venue on the details screen.

- Change the Name.
- Add or edit the Capacity.
- Change the Location by selecting another from the dropdown or selecting X to delete the link.
- If there's no linked location, Create location now lets you create a new one. If a location is linked, the button becomes Edit location now.
-
Select Save Venue when done.
Note
Selecting Save Venue also saves any changes to the linked location.
Import venues and locations
You can add new venues and locations using a batch import. The process uses a spreadsheet file that must follow the template format.
In an import you can create new venues:
- Without a location.
- With a new location.
- With an existing location.
You can't create a new location without a venue.
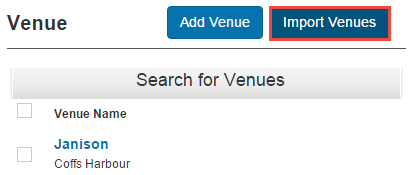
Navigate to Settings > Venues and select Import Venues.
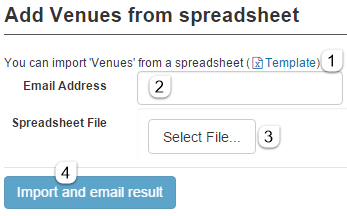
- Select Template to download the spreadsheet template.
- Enter an email address — a summary of the import is sent here. Exceptions and validation errors are shown in the email.
- Browse to select your spreadsheet file.
- Select Import and email result.
You can preview the import result by selecting View Import Log and then closing the popup.
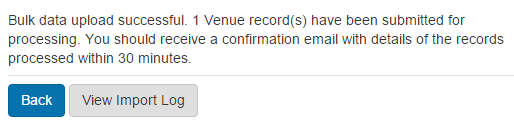
Selecting Back stops the import.
Venue import template
The second page of the template shows the column headings (in any order) and the data you can enter. Venues can't be assigned custom attributes.
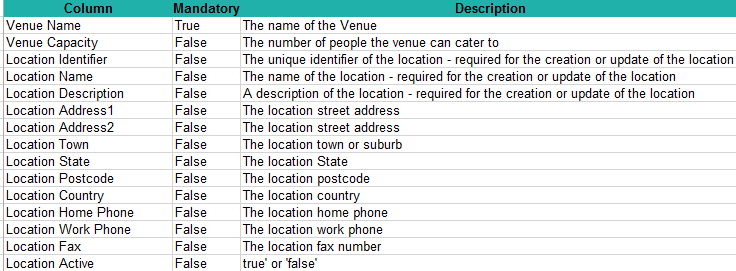
The first page gives sample data for a venue and its location.
Notes:
- If a venue matches an existing venue by name, the existing venue is updated with the spreadsheet data.
- If a venue doesn't match by name, a new venue is created.
- If a venue's Location Identifier matches an existing location, that location is updated and linked to the venue (if not already).
- If a venue specifies only a Location Identifier matching an existing location, the location is linked to the venue. If it's not in the CLS, an error is generated.
- If a venue specifies a Location Identifier that doesn't exist, the location is created with the spreadsheet details and linked to the venue. Location Identifier, Location Name, and Location Description are required.
- If a venue's Location Identifier matches a location already created in a previous row of the spreadsheet, that earlier location is linked to this venue.
- Import limit: 5,000 rows at a time.
Settings
This page is itself the Settings documentation for venues. All operations are at Settings > Venues.
Related settings:
Locations (Settings > Locations) — venues are linked to locations. See Locations.