Announcements
Announcements let administrators broadcast messages to users. Messages can be targeted to specific groups and delivered as emails or as a popup (sticky note) within the system.
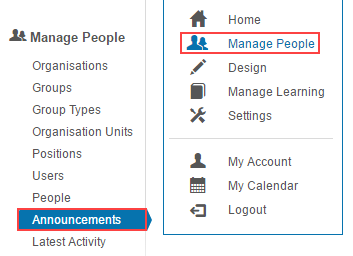
Create an announcement
Browse to Manage People > Announcements.
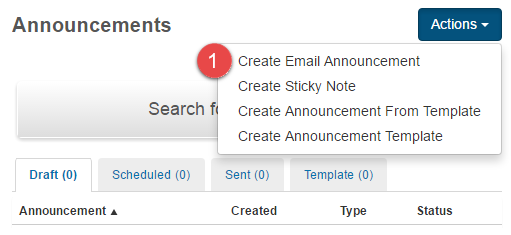
You can create email announcements and sticky notes from this screen.
-
Select Create Email Announcement.
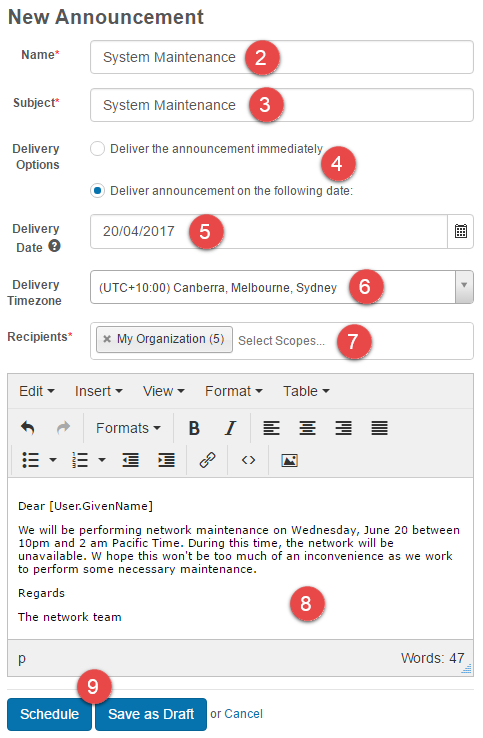
You're directed to the new announcement screen.
- Enter a Name.
- Enter a Subject. This is the subject of the email.
-
Select a Delivery Option.
- If Deliver the announcement immediately is selected, the fields in steps 5 and 6 are hidden.
- If Deliver announcement on the following date: is selected, the fields are displayed and you'll need to populate them.
-
Select a Delivery Date.
- Select a Delivery Timezone.
- Add Recipients. If a recipient is included in more than one selected scope, they only receive one announcement.
- Enter the body of the email.
-
Select Schedule or Save as Draft.
- Schedule sends the announcement.
- Save as Draft places it in the Draft tab where it can be edited and scheduled at any time.
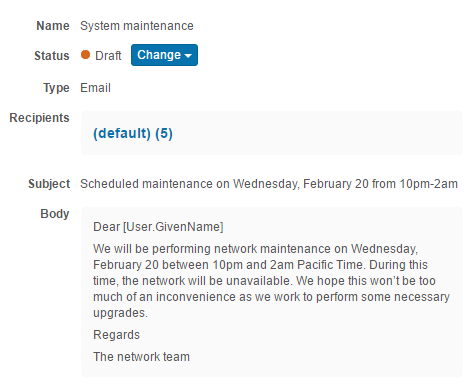
Previewing announcements
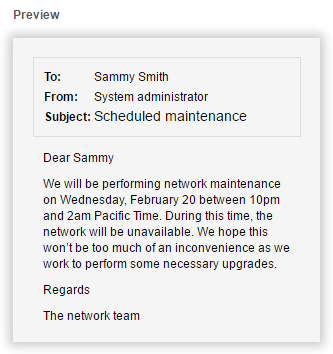
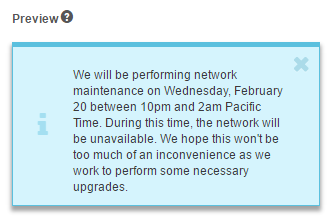
Announcements have a preview pane to the right of the form, giving you an accurate preview of the email or sticky.
Preview of an email:
Preview of a sticky:
Send a draft announcement
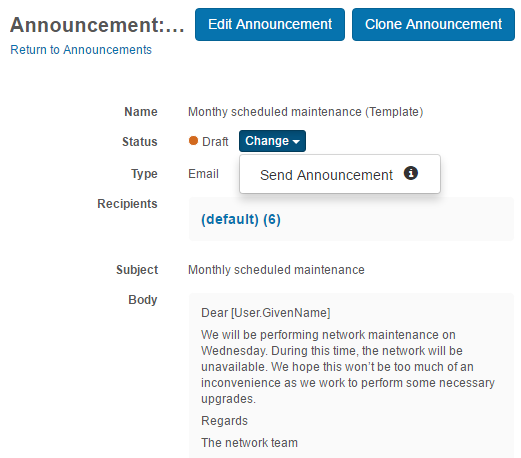
Draft announcements can be edited and cloned.
To send a draft announcement, select Send Announcement from the Change menu.
Clone an announcement
Cloning makes a copy of an existing announcement. It's a quick way to create an announcement identical to one that's been sent.
- Select the Scheduled or Draft tab.
-
Select an announcement.
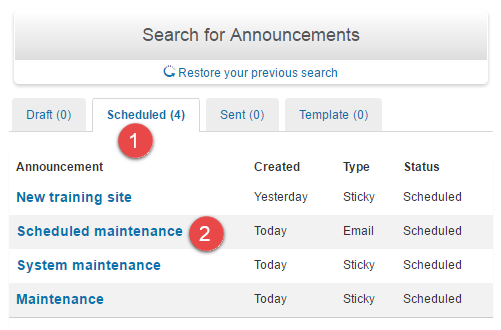
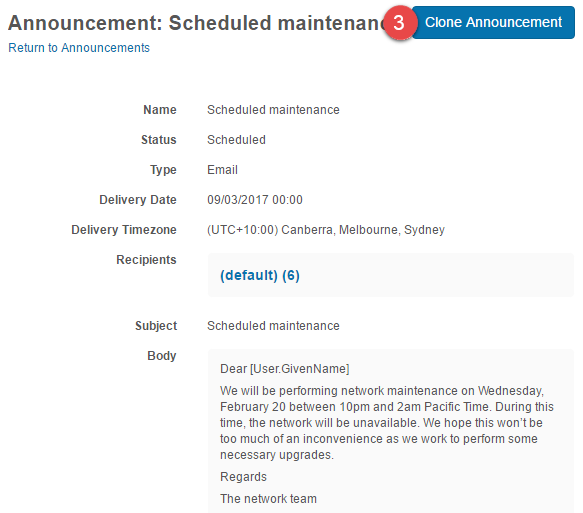
The details screen of the announcement is displayed.
-
Select Clone Announcement.
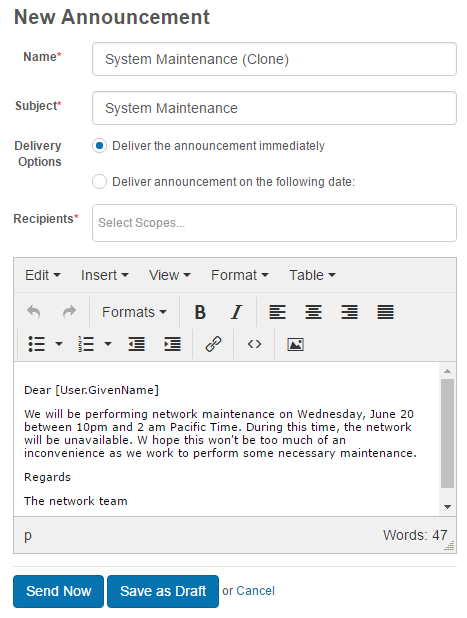
The New Announcement screen is displayed where you can edit and either send the announcement or save it as a draft.
Create an announcement template
Templates are useful if you regularly send announcements with the same or similar text and settings. Announcements can then be quickly created from the template.
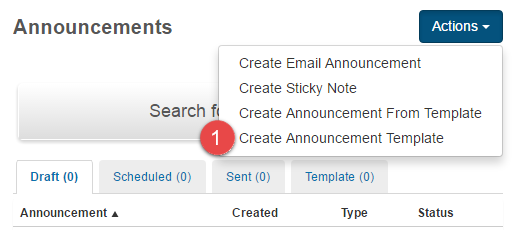
Navigate to Manage People > Announcements.
-
Select Create Announcement Template.
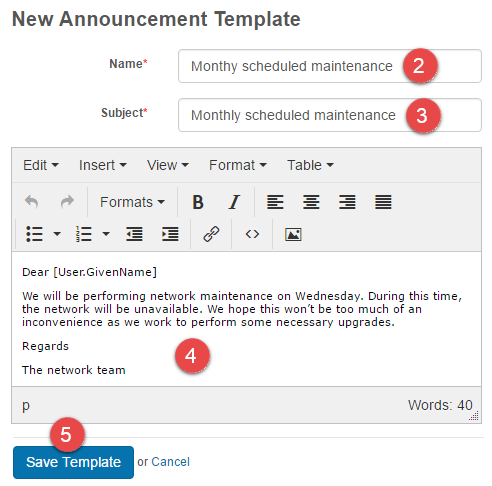
The new announcement template screen is displayed.
- Enter a Name.
- Enter the Subject. This is the subject of the email.
- Enter the email body.
-
Select Save Template.
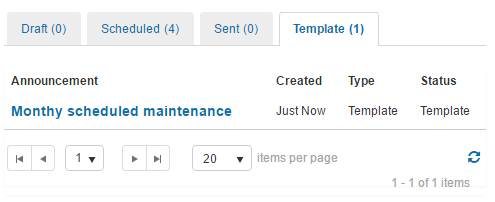
The template is listed in the Template tab and can be edited from there.
Create an announcement from a template
-
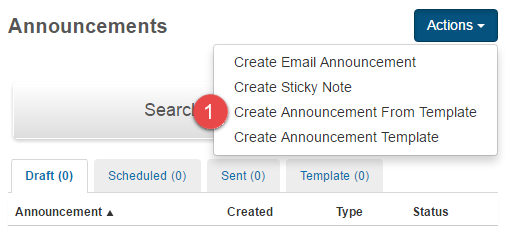
Select Create Announcement From Template.
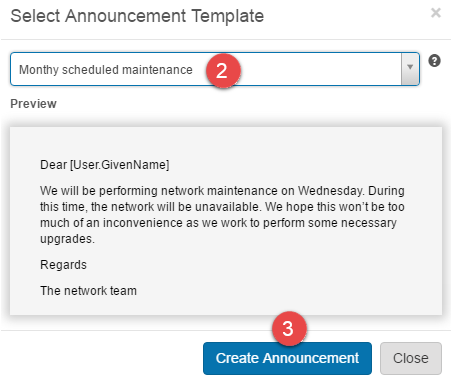
A popup is displayed.
- Select an announcement template.
-
Select Create Announcement.
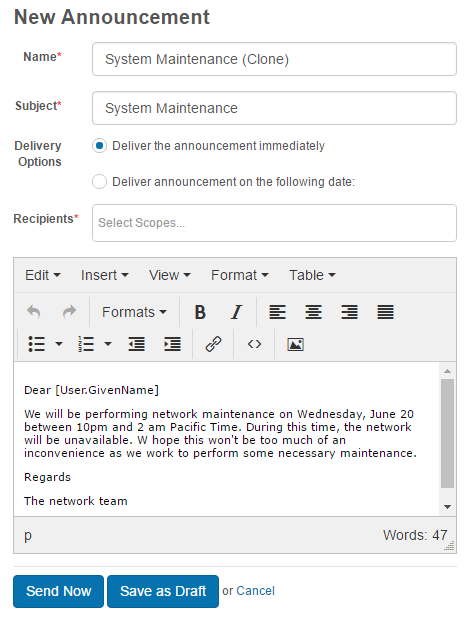
The new announcement screen is displayed where you can make edits and send or save as a draft.
Sticky notes
Users receive sticky notes via a popup within the system when they log on or navigate to a different page. Users can dismiss the announcement at any time. Once dismissed, the announcement isn't accessible again by the user.
To create a sticky note:
-
Select Create Sticky Note.
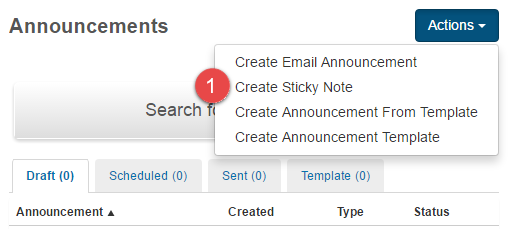
You're directed to the new sticky note screen.
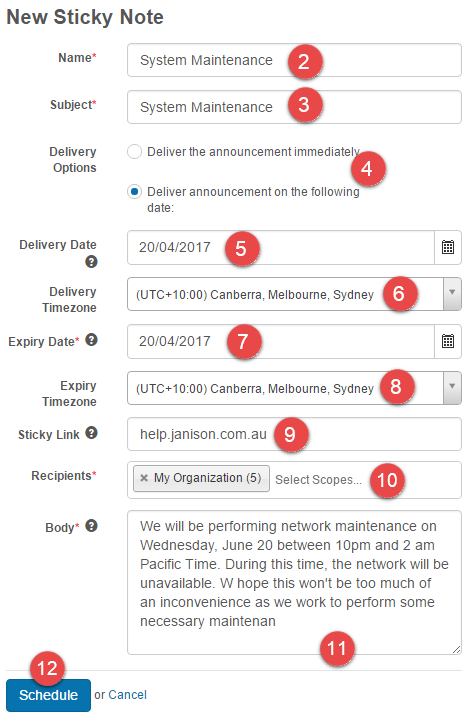
- Enter a Name.
- Enter a Subject. This is the subject of the message.
-
Select a Delivery Option.
- If Deliver the announcement immediately is selected, the fields in steps 5 and 6 are hidden.
- If Deliver announcement on the following date: is selected, the fields are displayed and you'll need to populate them.
-
Select a Delivery Date.
- Select a Delivery Timezone.
- Set an Expiry Date. The system won't permit you to make the notice available for more than seven days. The expiry date is based on the delivery timing input and expiry date specified.
- Select an Expiry Timezone.
- Optionally select a Sticky Link. You can specify a URL to direct users to view more information about the announcement.
- Select Recipients.
- Enter the notice. This field doesn't support tokens or HTML.
-
Select Schedule.
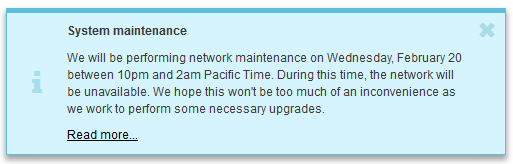
The delivery option set determines when users see the notice. Read more is a link that directs users to the URL specified in the sticky link field. The notice can be dismissed by selecting  .
.
Settings
Several platform settings affect how announcements behave.
Administrators can configure the following settings:
Message Templates (Settings > Message Templates) — control the styling and tokens available in announcements.
Email settings (Settings > Email Settings) — set the sender address and email-delivery options.