Authentication
The CLS needs to know the identity of all existing users who try to enter the system. Every time a user enters the CLS, they must go through authentication — the process of proving identity. The exact method depends on the configuration of the Authentication of the site.
The CLS offers several authentication methods, most commonly:
- User Name in Database — standard username and password.
- Single Sign-On (SSO) using SAML 2.0.
- Microsoft Azure OAuth 2.0 — see Enable Azure AD Login.
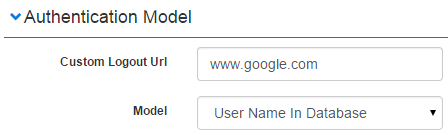
Both methods include a Custom Logout URL field, which specifies where users go when they log out or are logged out of the CLS.
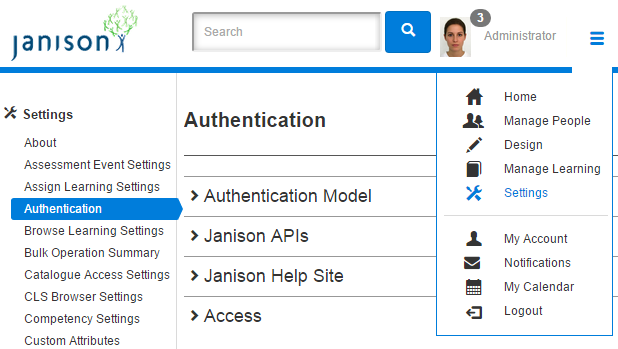
The authentication model is specified at Settings > Authentication.
Username in Database
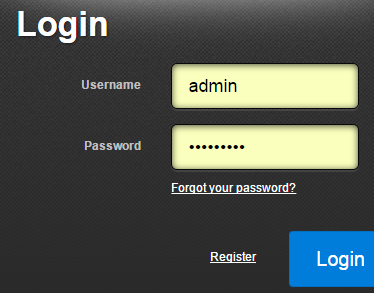
In this model, identity and authentication information is held within the CLS. Users access the site via a login screen and use account details existing in the CLS.
SAML
The CLS supports single sign-on (SSO) using the SAML 2.0 protocol. Identity and identification information is held on a separate server — the Identity Provider.
With this system, users can securely log in to the CLS from within another user management system where they've already signed on. The SAML system also allows:
- Automatic creation and update of user information during authentication.
- Passing of group membership information during authentication.
This means the first time an SSO user reaches the CLS, they can be registered as a new CLS user without needing another form of registration (such as a spreadsheet import). The CLS can also update existing user accounts based on Attribute Statements in the authentication process.
The Public Identity Provider setting can be used to make the browser check whether the Identity Provider can be reached. If it can't, the CLS presents the standard login screen.
A typical SAML flow
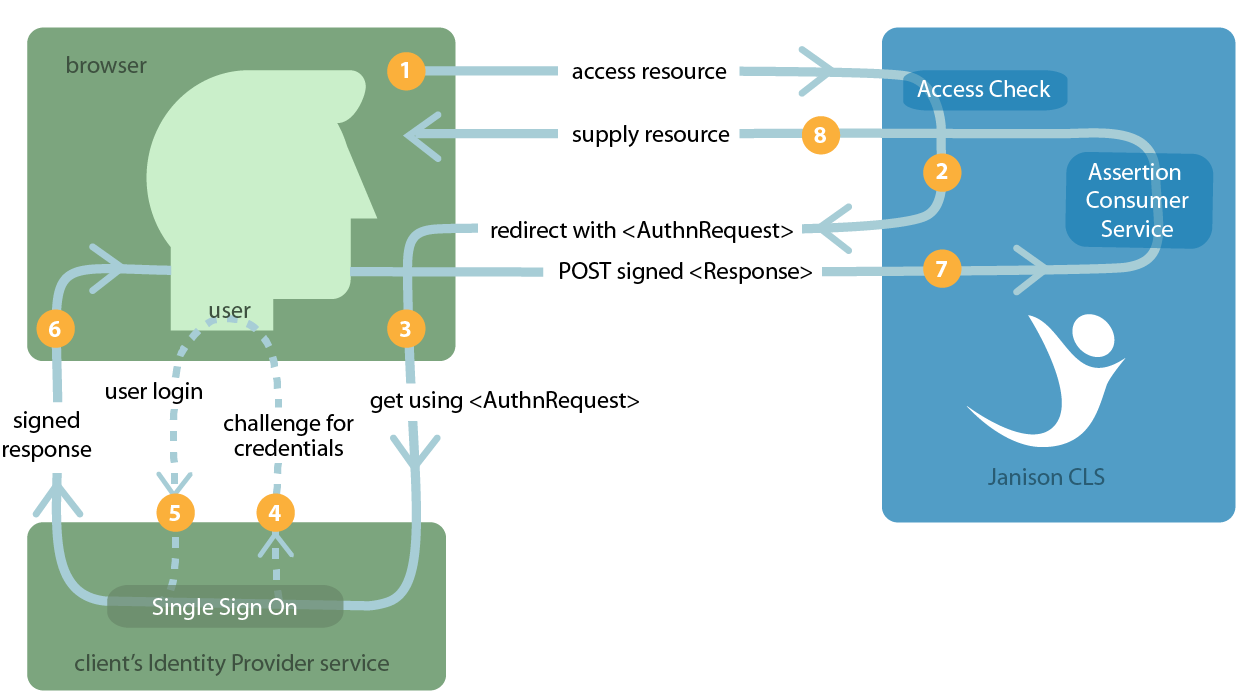
A simplified flow for a registered CLS user not already authenticated:
- The user tries to access the CLS.
- The CLS determines that the appropriate authentication method is SAML.
- The CLS sends an authorisation request to the Identity Provider.
- If the user doesn't have an existing login, the Identity Provider asks them to provide credentials.
- The user supplies credentials.
- The Identity Provider sends a response.
- The CLS Assertion Consumer Service receives the response.
- The requested resource (CLS access) is supplied.
The browser acts as the broker in these transactions.
About SAML
Security Assertion Mark-up Language (SAML) is an XML-based framework for communicating user authentication, entitlement, and attribute information. At a minimum, SAML exchanges take place between:
- A SAML asserting party — a system entity that makes SAML assertions.
- A SAML relying party — a system entity that uses the assertions it receives.
These entities can play these roles:
- Requester — makes a direct request to another SAML entity.
- Responder — receives a direct request from another SAML entity.
Communication relies on a trust relationship being previously configured between the two entities.
Janison SAML operates as the relying party in SAML interactions and refers requests to a third-party Identity Provider operated by the client. The SAML standard is maintained by the Security Services Technical Committee of OASIS — see https://www.oasis-open.org/committees/tc_home.php?wg_abbrev=security.
SAML profiles
SAML profiles define how assertions, protocols, and bindings are combined for greater interoperability.
Web Browser SSO Profile — defines how SAML entities use the Authentication Request Protocol and SAML Response messages to achieve single sign-on with standard web browsers. Defines two roles: an IdP (Identity Provider) and an SP (Service Provider — Janison SAML plays this role). Two scenarios are supported:
- IdP initiated — the user first accesses the Identity Provider.
- SP initiated — the user first accesses the Janison system.
Single Logout Profile — once single sign-on is achieved, several individual sessions with service providers share an authentication context. The Single Logout Profile can log out from multiple federated service providers at once. Janison SAML can either initiate a global logout or respond to one.
Setting SAML configuration options
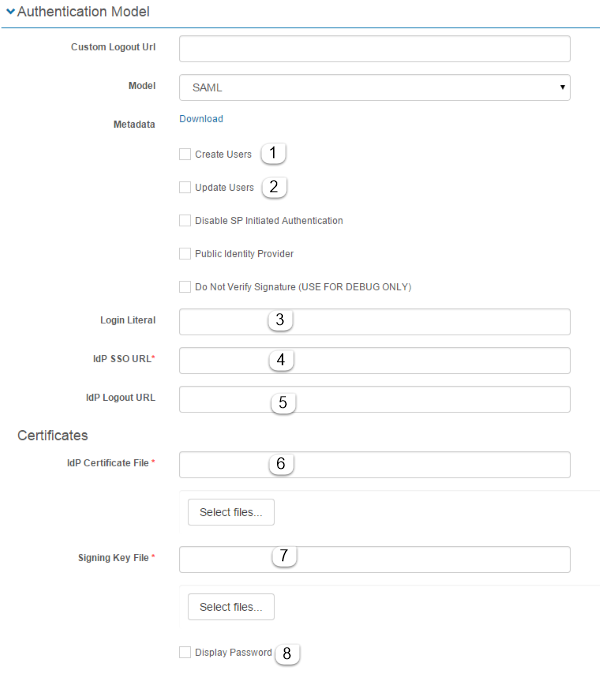
- Create Users — if checked, the system creates new user accounts in the CLS when a user is authenticated via SAML and isn't found in the database.
- Update Users — if checked, updates existing user accounts based on Attribute Statements in the Identity Provider response.
- Login Literal — wording used to refer to the SAML Identity Provider. Often set to SSO; useful to let users know which authentication service they're using.
- Identity Provider SSO URL — URL for the Identity Provider single sign-on service.
- Identity Provider Logout URL — URL for the Identity Provider single sign-out service.
- Identity Provider Certificate File — public certificate used to verify signatures on messages from the configured Identity Provider.
- Signing Key File — SSL signing certificate used to sign assertions made by this server when communicating with the Identity Provider.
-
Display Password — when checked, displays the password for the Signing Key File.
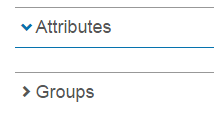
Attributes sets the mapping between supported properties in the Janison database and specific Attribute statements in the Identity Provider SAML response.
Groups lets you link Attribute names with group types and specify whether old memberships are inactivated or new groups are created as part of the Identity Provider SAML response.
User API
The Janison CLS has an API endpoint that can create and update users in the CLS based on a third-party data source. For example, users created in an organisation's HR system can be dynamically created and updated in the CLS.
Note
The user API pushes data from third-party software to the CLS. The CLS also has a related method for pulling data via the HR import — see Manage users.
Setup involves:
- Configuring the CLS.
- Creating an application that bridges the third-party software and the CLS. This requires a developer with integration programming skills.
A sample file is available — contact support for the Janison User API Sample.cs.
The API only creates or updates a single user at a time. There's no support for bulk operations.
Workflow
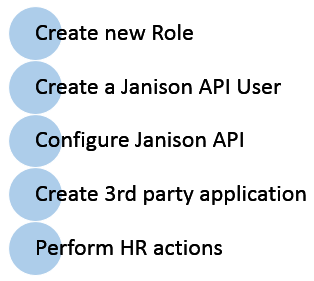
Create a new role
A new role is required to authenticate the API.
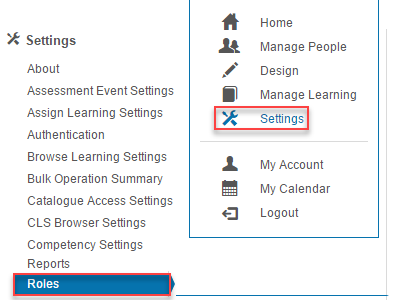
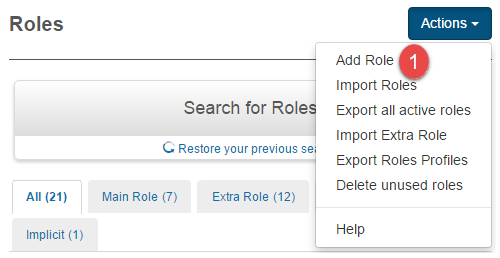
Navigate to Settings > Roles.
-
Select Add Role from the Actions dropdown.
-
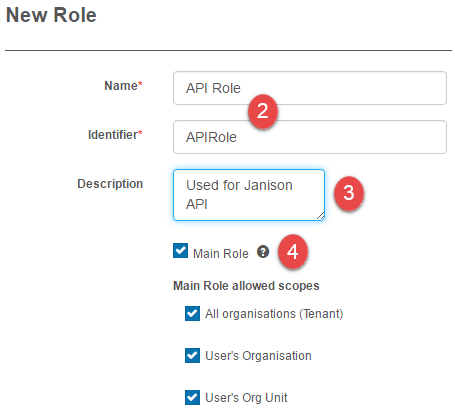
Enter a Name and Identifier.
- Enter a Description (optional).
-
Check Main Role.
-
Select Save Role.

Set securable areas of the role
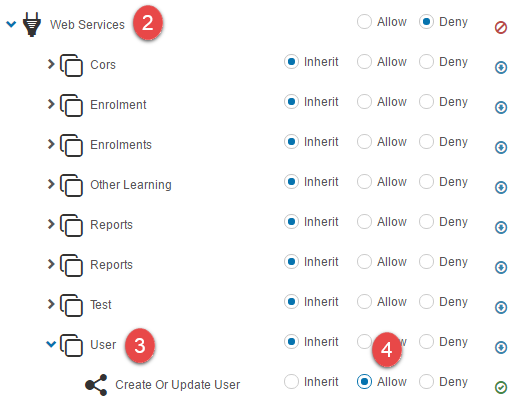
For the API to work, the Web Services securable areas need to be set in the role. See Roles.
-
In the Securable areas of the application section of the new role, select the edit icon.

-
Expand Web Services.
- Expand User.
-
Set Create or Update User to Allow.
Create a Janison API user
The Janison APIs need to be authenticated as a user. This user's main role must be the newly created API role.
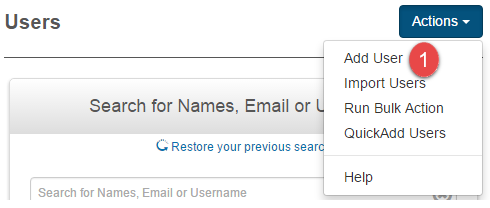
Navigate to Manage People > Users.
-
Select Add User from the Actions dropdown.
-
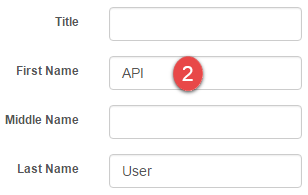
Enter the details for the new user. See Manage users for details.
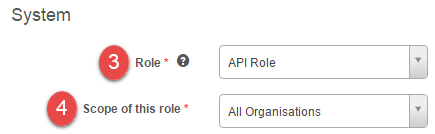
In the System section, select the API role:
- Select your new role (for example, API Role) from the Role dropdown.
-
Select All Organisations from the Scope of this role dropdown.
-
Select Save User.

Configure Janison APIs
Navigate to Settings > Authentication.
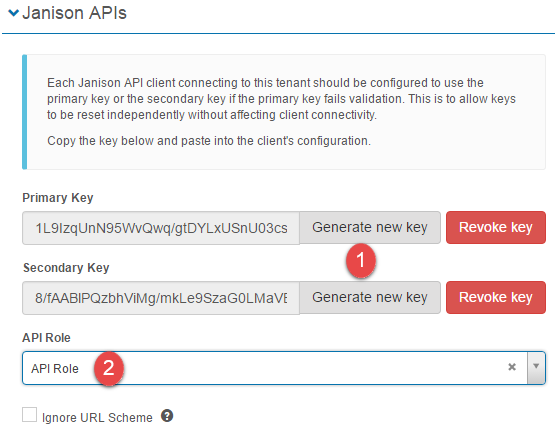
- Under Janison APIs, select Generate new key for the primary and secondary keys.
- Select the API role.
One of these keys is entered into the third-party application. This step ensures only users with this role can authenticate with the Janison API.
Create third-party application
Contact your support team or account manager to discuss the use of the API and obtain sample code to get started.
Settings
This page is itself the Settings documentation for authentication. Administrators configure all options at Settings > Authentication.
The related Roles setting (Settings > Roles) drives both standard role-based permissions and the role required for the Janison APIs.