Assessment module tests
Janison Academy provides a powerful interface that lets you test and analyse results. There are many test options but all follow the same principle: tests are linked to questions that belong to the same module.
Tests can belong to:
- Learning modules — limited question types
- Assessment modules — all question types
Important
Decide how you want to deliver the test to the learner — this determines which kind of test and module to create.
Search for tests
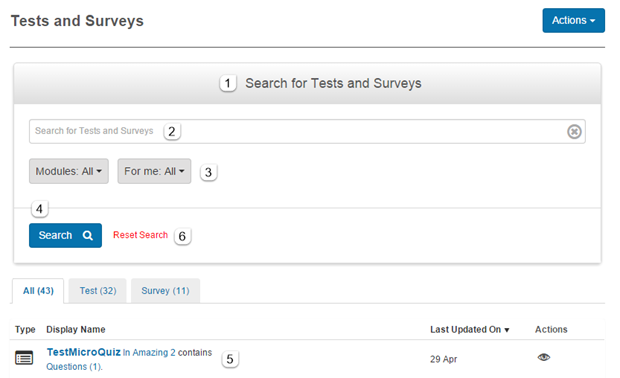
To search for a test, select Design > Tests and Surveys.
- Select Search for Tests and Surveys to display the search field.
- Enter your search term.
- Filter options: search within specific modules, or search for tests created, edited, or flagged by you.
- Select Search.
- Results appear under the Display Name column.
-
To perform another search, select Reset Search.
Inspect test details
Navigate to Design > Tests and Surveys and select the test.
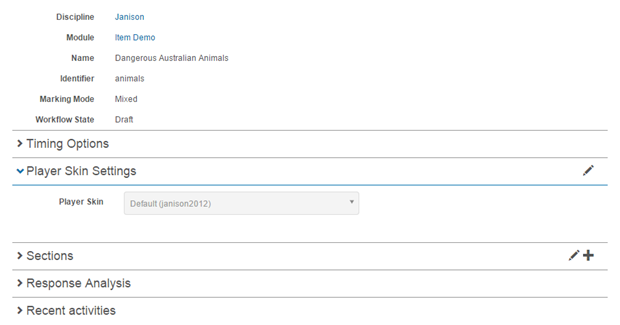
The form shows linked entities (test sections, questions, stimuli, resources) as clickable links.
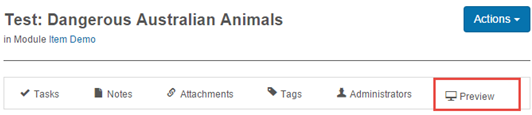
The widget bar at the top includes:
- Tag — tests can be tagged to categorise them.
- Administrators — set permissions against the test.
- Preview — present the test in preview mode, including introductory test section sequences.
- Workflow — if enabled, allows workflow management.

A number of collapsed windows at the bottom:
- Timing Options — minutes available to the candidate.
- Player Skin Settings — visual design of the test player.
- Questions or Sections — if multi-section, Sections is shown; otherwise Questions. Randomisation options are located at the top of the questions window for single-section tests.
- Response Analysis — attempt details.
- Recent activities — recent activity on the test.
Preview an assessment test
Tests can be previewed at any time. Attempts in preview mode aren't saved.
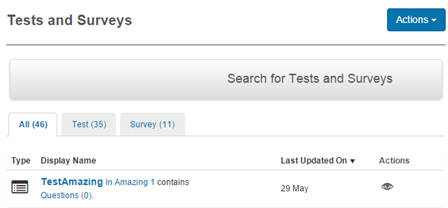
Navigate to Design > Tests and Surveys, select the test, and select Preview.
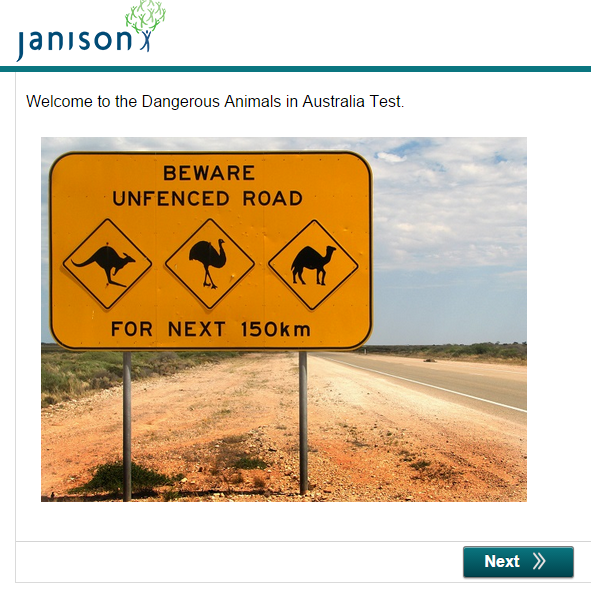
The test player opens in a new window.
Create a test
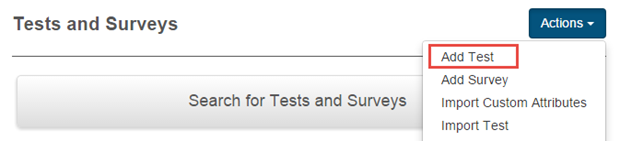
Navigate to Design > Tests and Surveys and select Add Test from the Actions dropdown.
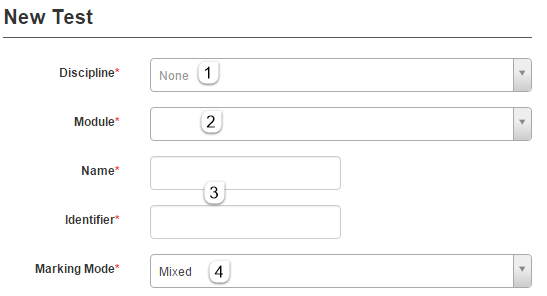
Complete the form:
- Select a Discipline.
- Select an assessment Module in that discipline (can't be changed once saved).
- Enter a Name and Identifier — must be unique. Use a naming convention.
-
Select a Marking Mode from the dropdown:
- Mixed — auto-marked questions are handled by the system; manually-marked types display to markers.
- Automatic — all questions are automatically marked.
- Manual — all questions are manually marked.
- Do Not Mark — the test won't be marked.
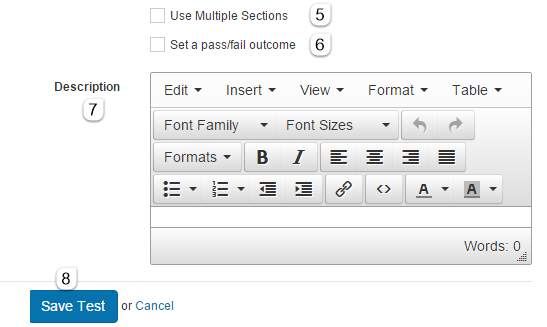
- Use Multiple Sections — organise questions into multiple test sections. Once saved you can't change a multi-section test back to single-section.
- Set pass/fail outcome — configure pass/fail rules at the test details screen.
- Optionally enter a Description.
-
Select Save Test.
The test is created but doesn't contain questions yet. From here you can link questions, add and edit test sections, and configure timing, randomisation, and pass/fail settings.
Link questions to a test
Three ways to add questions:
- Add a new question from the Actions dropdown (the discipline and module are pre-filled).
- Add a new question via the + icon on the Questions window.
-
Link an existing question via the pencil icon — you can re-use questions in the same module.
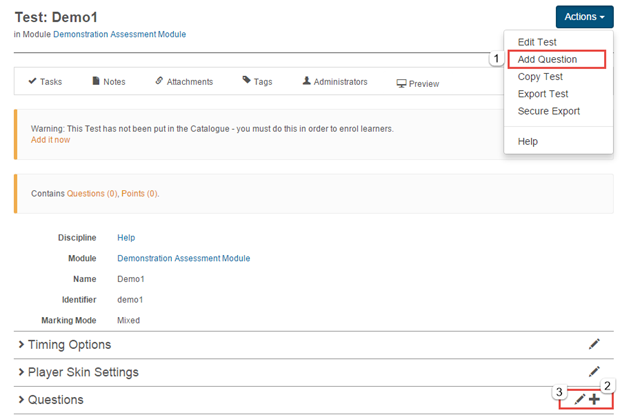
Select the pencil icon and a search menu loads.
- Enter a keyword and select Search.
-
Scroll through results. Select the + icon to add or the eye icon to view first.
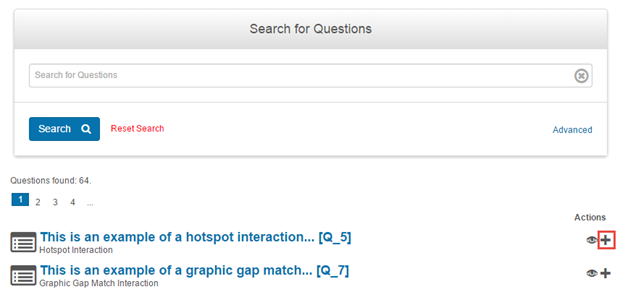
Once linked, additional settings are available — Weight (0 means the question isn't part of the calculated mark) and Mandatory (candidates can't continue until answered).

Scroll down and select Save.
Note
To add questions to a section, inspect the section details and locate the Questions window on the section screen.
Edit a test
Navigate to Design > Tests and Surveys and select the test name.
Select Edit Test from the Actions dropdown.

Change details as required. You can't add sections to a test if you didn't specify Use Multiple Sections when first creating it.
Test sections
By default, questions are in a single section. When you create a test you can choose multiple sections — useful when the test is long, covers different topics, randomisation needs to be restricted to groups, or introduction/exit sequences are required.
- A single-section test shows Questions in a collapsible window.
- A multi-section test shows Sections — inspect a section to find its questions.
View, edit, or add a test section
Edit or view
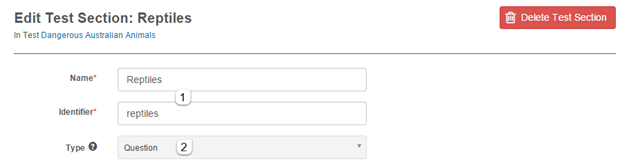
Navigate to the test details screen, open the Sections window, and select the section. Select Edit Test Section to edit.

Sections contain:
- Name and Identifier (unique).
-
Type — determines the section's role in the test player. Notable types:
- Exit if failed — shown after exit with a fail.
- Exit if passed — shown after exit with a pass.
- Introduction — shown at the beginning. Use a Comment question type for instructions.
- Question — candidates answer assessment questions.
- Survey — candidates answer survey questions.
Note
The type can't be changed once the section is created.
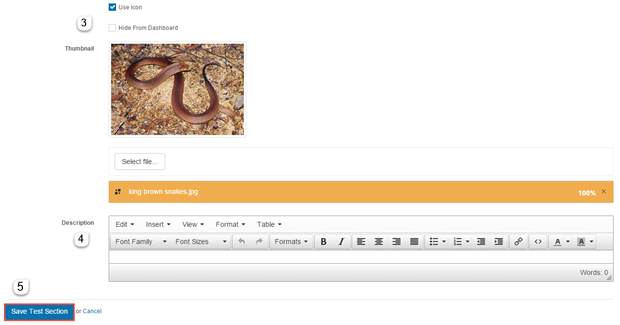
- Use Icon, Hide from Dashboard, Thumbnail — control how the section appears as a tile in the test player. Select Hide from Dashboard for sections of type Introduction.
- Description — optional.
-
Select Save Test Section.
Add a section
To add a section to a multi-section test, go to the test details, open the Sections window, and select the + icon.

Fill out the form and Save Test Section.
Pass/fail and attempts
If Set pass/fail outcome was checked when the test was created, this window is available.
Navigate to the test details, open Pass/Fail and Resit Settings, and select the pencil icon.
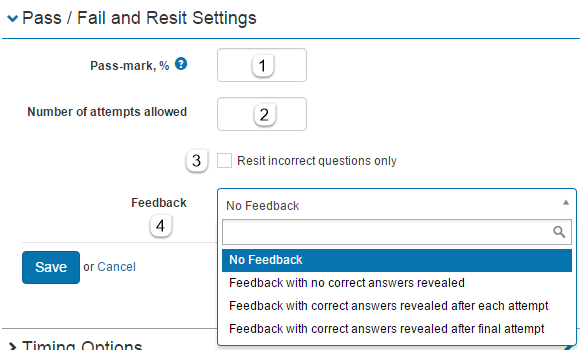
Available fields:
- Pass-mark — percentage required to pass. Mandatory for automatically marked tests.
- Number of attempts allowed.
- Resit incorrect questions only — only presents questions answered incorrectly in earlier attempts.
- Feedback — options to give feedback or not.
Warning
Be careful changing these settings for tests currently in use.
Timing options
Set how long a learner has to complete the test. Timing settings can be overridden at the assessment event level and for individual test attempts.

Randomisation and optional questions
You don't have to deliver the questions in the same order to every candidate.
Within a question you can specify that distractors are shuffled (Multiple Choice, Order, Drag n Drop, Multiple Choices).
For lists of questions in a test or section, you can:
- Randomise the order
- Randomly select which questions are presented
- Use a pool of optional questions (if enabled in Test Designer settings)
- Use subsections with random selection from each (if enabled)
Configuration
For multi-section tests, configure within the Questions window of an individual section. For single-section tests, configure within the Questions window of the test.
At the top is a dropdown next to Randomisation and optional questions.
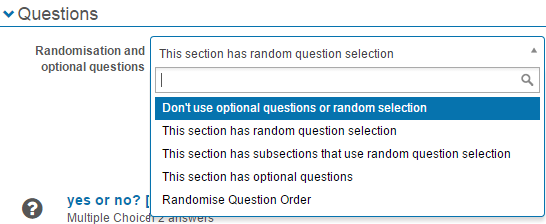
Options:
- No randomisation — the test is presented the same way every time.
- Randomise the Questions selected — specify the number of questions to select. This also randomises the order.

-
Subsections with random Question selection — create multiple subsections, drag questions into them, and define random selections from each.
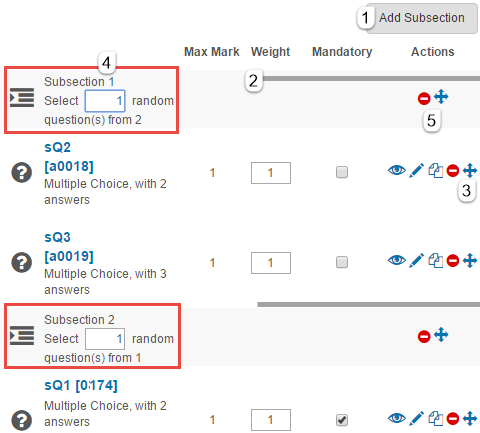
- Select Add Subsection.
- The subsection contains a list of questions.
- Drag a question into a subsection via its crosshair icon.
- Specify the random selection from the subsection.
- Move or delete subsections with their icons.
-
Optional Questions — specify the number candidates must answer. They choose which.

-
Randomise the order the questions are presented.
Note
- Questions from the random pool must all have the same weighting.
- Questions from the random pool must all be either mandatory or not mandatory.
Using a test
Users can't enrol in learning assets until they're enrolled in catalogue items.
A test from an assessment module can be made available in three ways:
- Include it in a program (multi-component catalogue item) — could also include other learning assets.
- Create a catalogue item for the test — no option to schedule a specific window. Suitable for small-scale or on-demand delivery.
- Create an assessment event linked to the test — a scheduled instance.
Settings
Several platform settings affect assessment module tests.
Administrators can configure the following settings:
Test Designer Settings (Settings > Test Designer Settings) — enable multiple graded responses, optional questions, subsection randomisation, comments, workflow, and other authoring features.
Player Skin Settings — set the visual design of the test player at the module or test level.
Workflow Definitions (Settings > Workflow Definitions) — define workflows applied to tests.