Certificates
The system supports two types of certificate:
- Certificate of Completion
- Statement of Attainment
Certificates can be linked to catalogue items and generated when users complete the learning (Certificate of Completion) or are part way through (Statement of Attainment).
Certificates are based on PDF templates containing form fields populated with user and learning details. A default certificate can be uploaded to the system, or specific certificates per learning asset type.
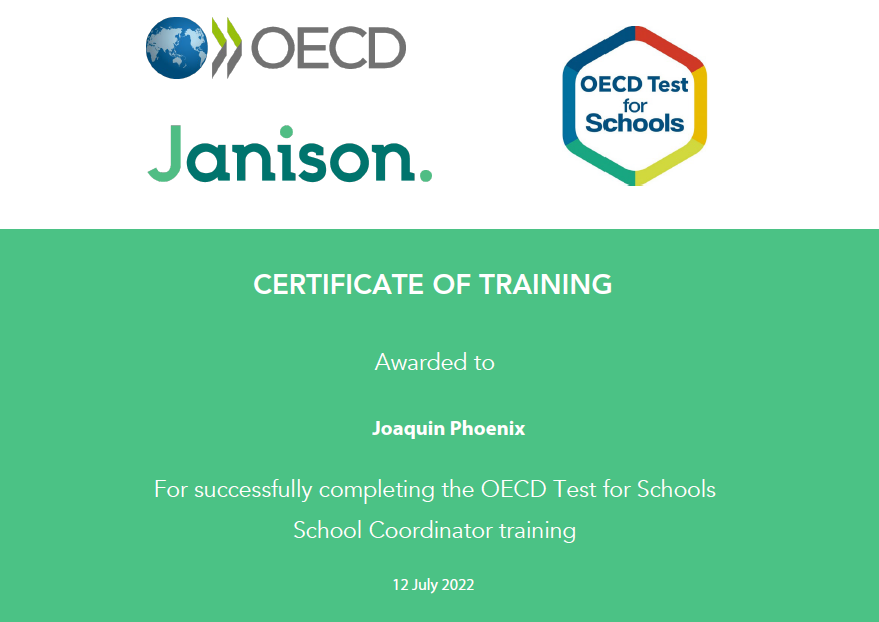
You'll need two applications to complete a certificate template:
- A document editor such as Microsoft Word
- A PDF editor such as Adobe Acrobat Pro DC
Create a certificate template
Step 1 — create your document layout
Use a document editor to create the layout, then export to PDF.
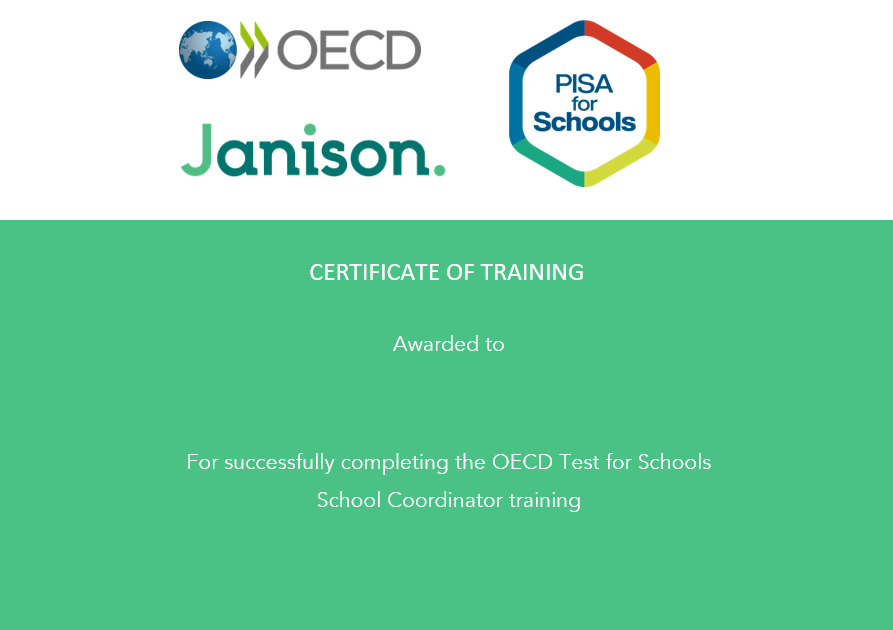
- Open your document editor.
- Create the certificate layout. Leave blank spaces where merge fields (such as the learner's name) will be added.
- Save as a Word document.
- Re-save as PDF.
Step 2 — add form fields to the PDF
Use a PDF editor to add form fields to the PDF. Each field must be named correctly to match an available form field in the system (see Certificate form fields below).
Example using Adobe Acrobat Pro DC:
- Open the PDF created in step 1.
- Go to the Tools tab. Under Forms and Signatures select Prepare Form.
- The PDF should be automatically selected (if not, select Change File and choose it). Select Start.
- Adobe Acrobat scans the file and adds form fields where it determines they should go. Use the Prepare Form toolbar to edit, delete, or draw new fields.
-
For each field:
- Right-click the field and select Properties.
-
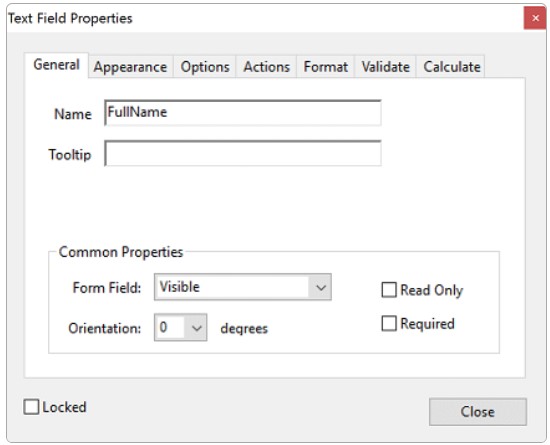
On the General tab, enter the field name in the Name text box. For example, FullName for the user's given name and surname.
-
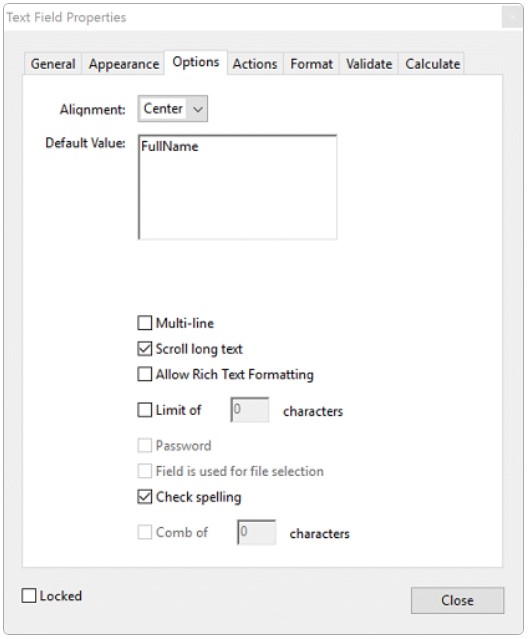
On the Options tab, enter the same field name in the Default Value text box.
-
Repeat for all required fields.
-
Save the PDF.
Certificate form fields
The available form fields are listed below. They can also be viewed in the system via Settings > Tenant Settings > Certificate Templates.
| Name | Field name in certificate | Description |
|---|---|---|
| Given Name | GivenName | The user's first name |
| Surname | Surname | The user's last or family name |
| Full Name | FullName | The user's given and surname |
| Address | Address | Various address fields |
| Mobile Phone Number | MobilePhone | The user's mobile number |
| Name of Course | NameOfCourse | The course the user has completed |
| Date of Completion | DateOfCompletion | The date the course was completed |
| Date of Birth | DateOfBirth | The user's date of birth |
| Student Number | StudentNumber | The user's student number |
| Organisation Unit | OrgUnit | The user's unit or department |
| Organisation | Organisation | The user's organisation |
| Group Type | GroupType | The group the user is a member of |
| Group type group name | GroupType[GroupTypeName] | User's active group membership for the specified group type |
| Course Completed Date | CourseCompletedDate | The date the course was completed |
| Course Completed Year | CourseCompletedYear | The year the course was completed |
| Course Completed Month | CourseCompletedMonth | The month the course was completed |
| Course Completed Day | CourseCompletedDay | The day the course was completed |
| Certificate Number | CertificateNumber | Certificate number for the user's certificate |
| Score | Score | The total score in a test |
| List of answers in course | ListOfAnswersInCourse | Lists the user's answers |
| Expiry Date | ExpiryDate | The date the learning asset expires |
| Catalogue Item Duration | CatalogueItemDuration | The duration of the catalogue item |
| Custom entity name | Custom.EntityName.FieldName | A custom attribute |
| Points | Points | Includes continuing professional development (CPD) points |
| Today's Date | TodaysDate | The date the certificate is downloaded |
| Competency | Competency.Fieldname | Competency information (Statement of Attainment only) |
| Asset | Asset.Fieldname | Specific asset names associated with the enrolment |
| Asset (Session) | Asset.SessionFieldName | Session details |
Include QR codes on certificates
Janison Academy can generate and include QR codes on certificates.
Important
When a certificate's QR code is scanned, an unauthenticated preview page is displayed without needing to be logged in. The page contains an overview of the learner's enrolment and completion. Once QR codes are enabled, these preview pages are available to unauthenticated users even without them having scanned an authorised QR code.
Enable QR codes on certificates
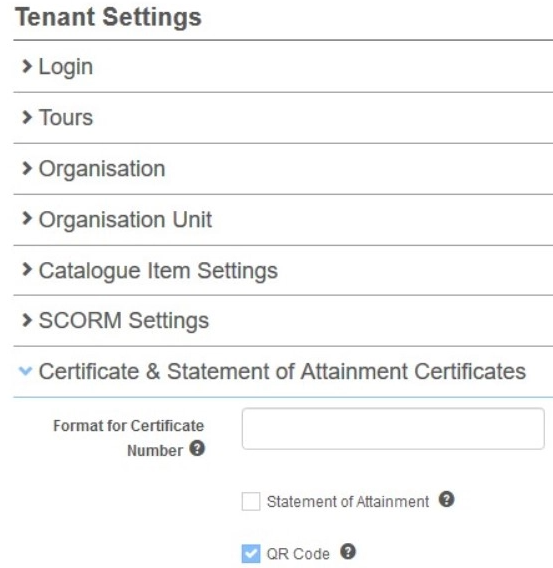
- Go to Settings > Tenant Settings.
- Select Certificate & Statement of Attainment Certificates to expand the panel.
- Select the QR Code checkbox.
- Select Save Settings.
Include the QR code token on a template
To include a QR code on a certificate, add an image field with the token QRCode to the certificate template. Only one QR code can be added per certificate.
Upload certificate templates in tenant settings
Certificate templates can be linked at the tenant settings level or per catalogue item. Templates uploaded to a catalogue item override templates uploaded in tenant settings.
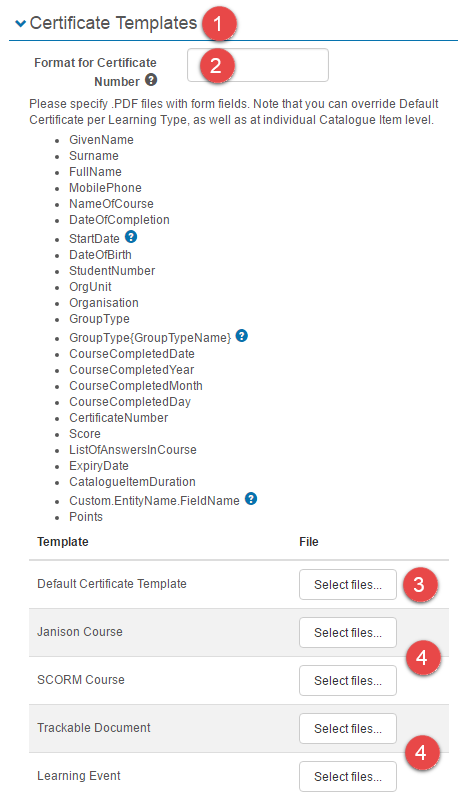
Browse to Settings > Tenant Settings.
- Select Certificate Templates.
- Optionally enter a Format for Certificate Number — see Certificate number generation below.
- To use one certificate template for all learning types, upload to the Default Certificate Template.
-
To use unique templates per learning type, upload a separate certificate to each learning type.
-
Select Save Settings.

Attach certificates to a catalogue item
Linking a certificate template directly to a catalogue item overrides the template uploaded in tenant settings.
- Browse to Manage Learning > Manage Catalogue.
- Search for and select the required catalogue item.
- Select Edit Catalogue Item from the Actions menu.
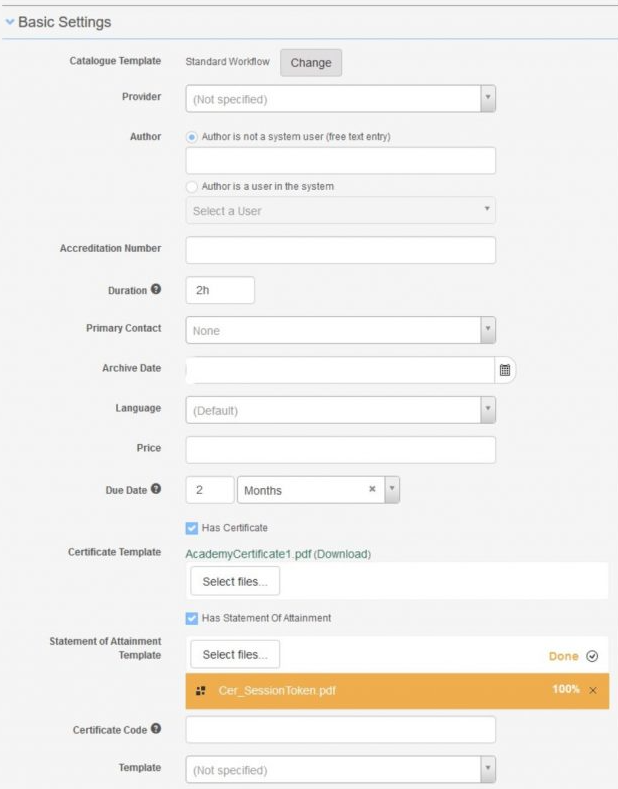
- Scroll to and expand the Basic Settings section.
- Select either Has Certificate or Has Statement of Attainment.
- Two additional fields appear: Certificate Code and Certificate Template (the PDF you created with layout and merge fields).
- Select Save Catalogue Item.
Certificate number generation
Each certificate has a unique number generated by the system. Once a certificate has been generated for a user, the number doesn't change.
By default the number includes three tokens: {code}{########}/{year}.
- {code} — the first four characters of the catalogue item identifier
- {########} — the numbers from the unique user enrolment GUID
- /{year} — the current year
For example, WHAT00000055/2017:
- WHAT is the catalogue item identifier
{code} - 00000055 are the eight user enrolment numbers
{########} - /2017 is the year
{/year}

Customise the certificate number format
You can include or exclude any of the three tokens by editing the Format for Certificate Number field.
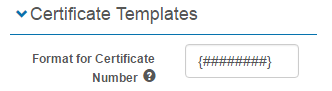

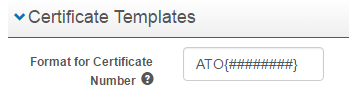
You can also add characters alongside one or more tokens.

Customise the certificate number at the catalogue item level
Whatever you enter at the catalogue item level replaces the {code} token. With Format for Certificate Number left blank in tenant settings:
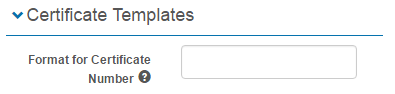
Enter Sydney in the Certificate Code field at the catalogue item level:
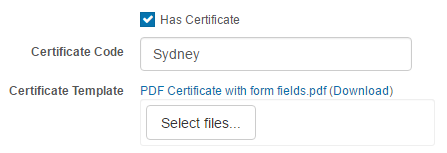
The certificate is generated with Sydney replacing the {code} token. With a custom Format for Certificate Number including the {code} token, and Sydney still set as the Certificate Code, the number appears as:

View certificates
There are several places in the system where learners can access their certificates.
My Learning Transcript
Certificates can be accessed from My Learning Transcript. See the document on My Learning Transcript for how to enable the Certificate column.
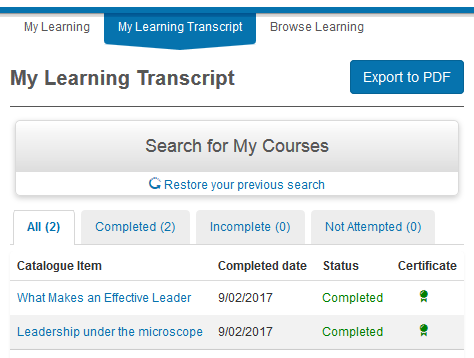
When launching a catalogue item
When a learner launches a catalogue item, an interim screen is displayed where the certificate can be accessed.
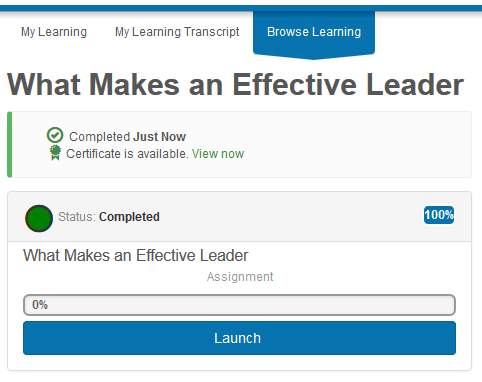
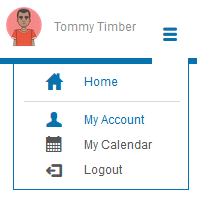
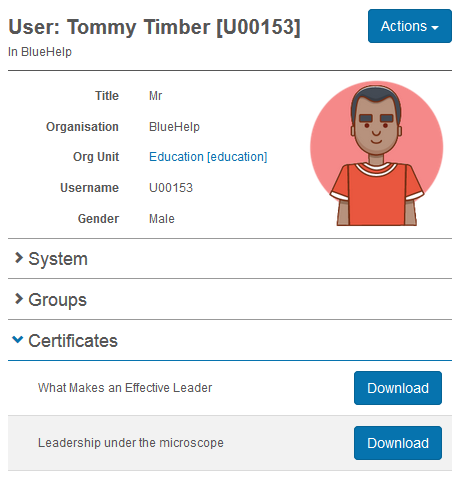
My Account
Learners can view certificates by accessing account details from the home menu. The certificates field must be made visible in the details view of user settings.
Statement of Attainment
The progress of competencies attached to a catalogue item or learning asset can be shown on the Statement of Attainment (SOA). An SOA can be downloaded before the learner has completed the catalogue item.
Important
Prerequisites:
- SOAs must be enabled in tenant settings before an SOA template can be attached to a catalogue item.
- SOAs require competencies to be linked to the catalogue item or learning asset.
- All linked competencies for the catalogue item must be included on the SOA template.
Enable SOAs
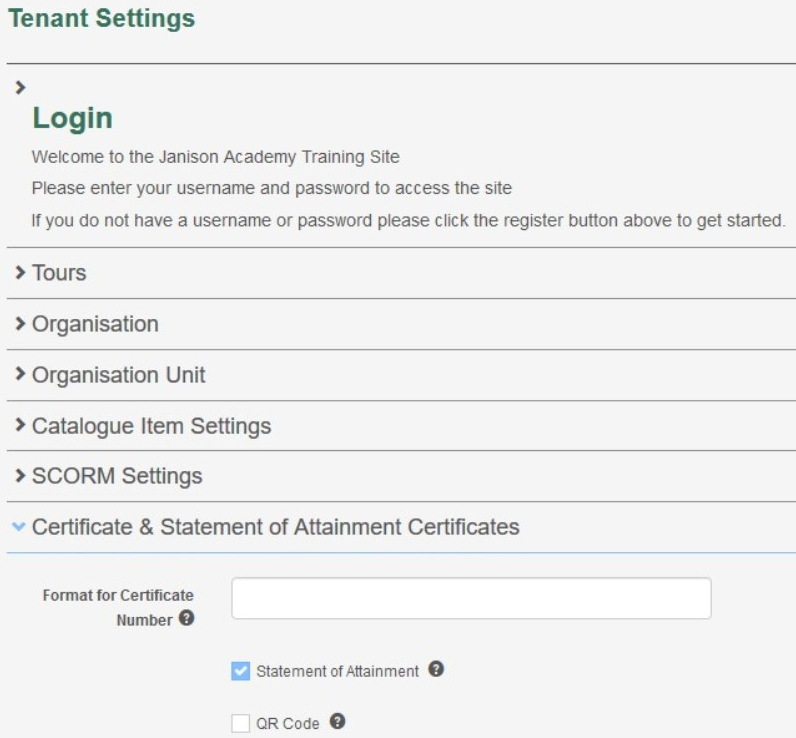
- Go to Settings > Tenant Settings.
- Select Certificate & Statement of Attainment Certificates to expand the panel.
- Select the Statement of Attainment checkbox.
- Select Save Settings.
Create an SOA template
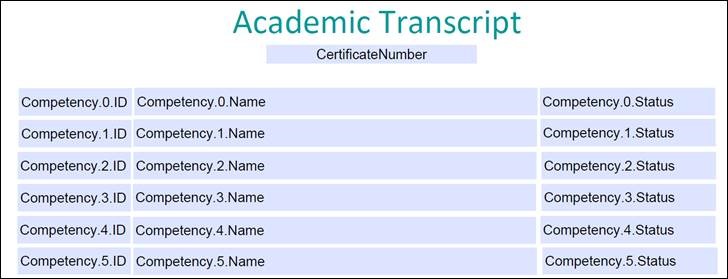
SOA templates are created the same way as certificate templates and can include the same tokens, but must include references to all linked competencies for the catalogue item. Each linked competency needs three fields:
- Competency ID — for example
Competency.0.ID - Competency name — for example
Competency.0.Name - Competency status — for example
Competency.0.Status
Attach an SOA template
Note
Default certificate templates can be set at the tenant level and overridden at the catalogue item level. SOA templates can only be attached at the catalogue item level.
- Navigate to Manage Learning > Manage Catalogue.
- Select the required catalogue item.
- Select Actions > Edit Catalogue Item.
- Under Basic Settings, select the Has Statement Of Attainment checkbox.
- The Statement of Attainment Template section appears. Select Select files… to browse and select the SOA template.
- Once uploaded, the Done and 100% messages display along with the template's file name.
- Select Save Catalogue Item to save the SOA template.
Settings
Several platform settings affect certificates.
Administrators can configure the following settings:
Tenant Settings (Settings > Tenant Settings) — under Certificate Templates, upload default and per-learning-type templates and set the Format for Certificate Number. Under Certificate & Statement of Attainment Certificates, enable QR codes and Statements of Attainment.
User Settings (Settings > User Settings) — make the certificates field visible in the details view of My Account.
String Resources (Settings > String Resources) — edit text shown on certificates such as the institute name.