Roles
A role is a collection of rights that can be assigned to users, determining what they can see and do in the system. Users have one Main Role and may be allocated a number of Extra Roles that give them rights over particular entities. Users never see more functions than they need. For example, someone with a Marker role can mark tests but can't manage users; a System Administrator can do everything.
The Security Manager plugin provides UI screens for administrators to configure roles.
Note
Managing roles is not trivial — it's typically completed by the Janison Client Services team.
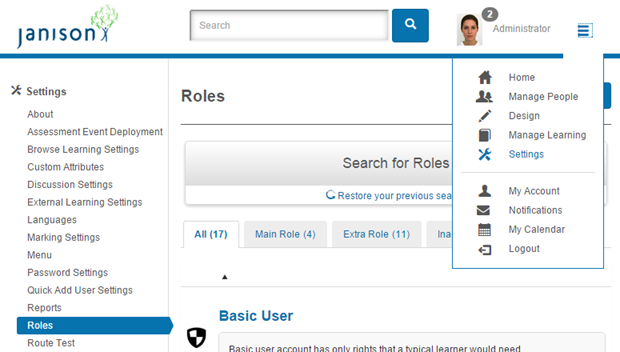
Navigate to Settings > Roles.
Concepts
-
Rights — actions that can be performed in the system (Add User, Create Course).
-
Roles — a collection of rights, referring to a set of actions or responsibilities a user can perform (Content Reviewer, Tenant Administrator).
- Entities — objects in the system protected by security rules (questions, modules, users, organisations).
- Role membership — when a user is assigned a role, they can perform the rights for that role.
- Role membership scope — the scope of entities a role membership applies to (Content Reviewer for a course; Marker for a particular test).
- Role inheritance from global tenant — security roles aren't inherited from the global tenant. When a new tenant is created, roles are created on the new tenant.
The CLS has fundamental rules to maintain data integrity:
- A user must always belong to an organisation unit.
- A user must always have a main role. By default, the main role is Basic User.
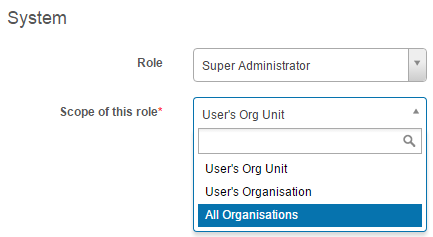
- Every role is granted within a scope. The default scope for Basic User is the user's organisation unit.
- Users can have multiple roles — a main role plus extra roles.
Security hierarchies
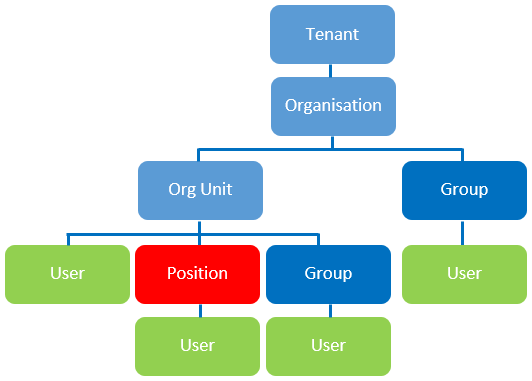
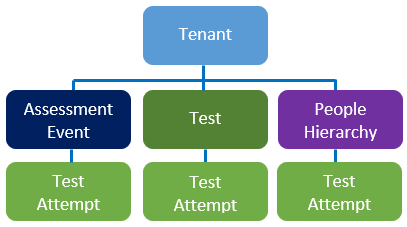
There are several access-control hierarchies in the CLS.
People security hierarchy
Content security hierarchy
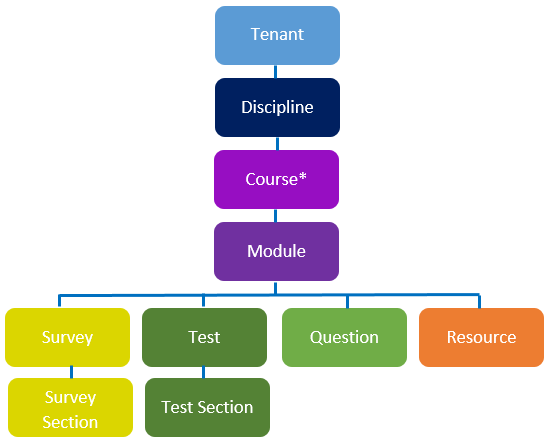
Courses are only relevant for learning modules — see Learning Modules.
Assessment event security hierarchy
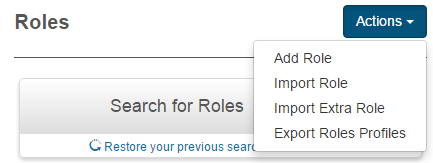
Key actions
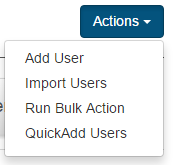
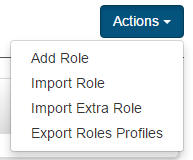
- Add Role — create a new role.
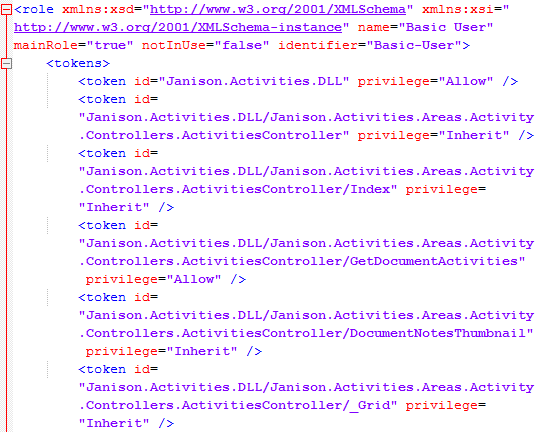
- Import Role — import an XML role definition. Useful for sharing role configurations between systems and tenants.
- Import Extra Role — import roles via a spreadsheet.
- Export Roles Profile — export all roles to an XML file.
Menu items and buttons
Menu items and buttons are automatically hidden for users without access — a design choice for simplicity.
List form
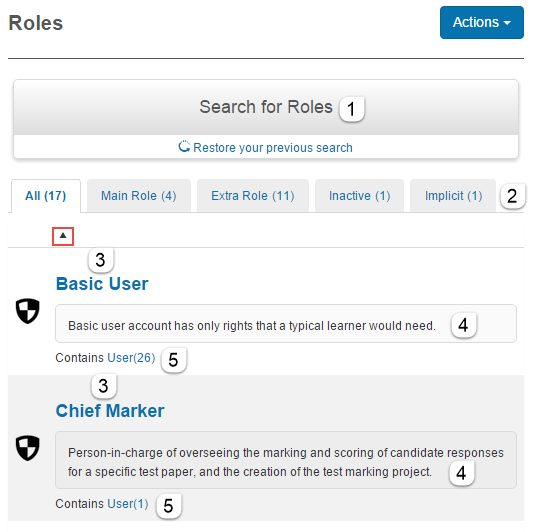
The list of roles is at Settings > Roles. On this page you can:
- Search for roles.
- View categories: All, Main Role, Extra Role, Inactive, Implicit.
- View the list, sortable alphabetically.
- Read the role descriptions.
-
Follow a link to users who are members of the role.
Inspect a role
To inspect a role, navigate to Settings > Roles and select a role.
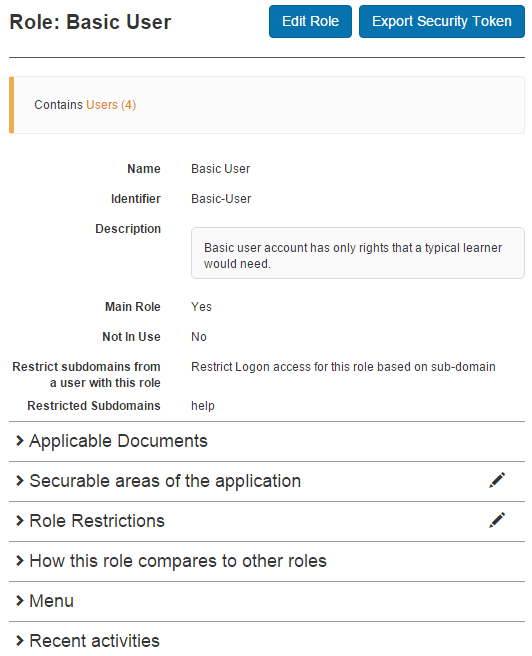
Role form
Top section
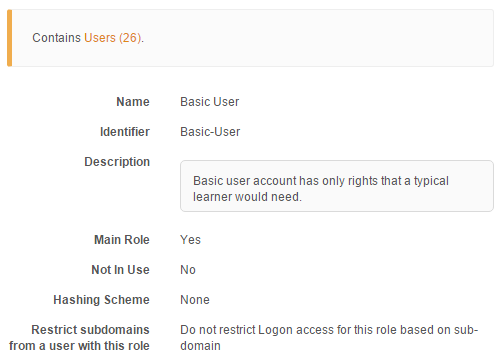
Contains users
Provides a link to all users with this role assigned.

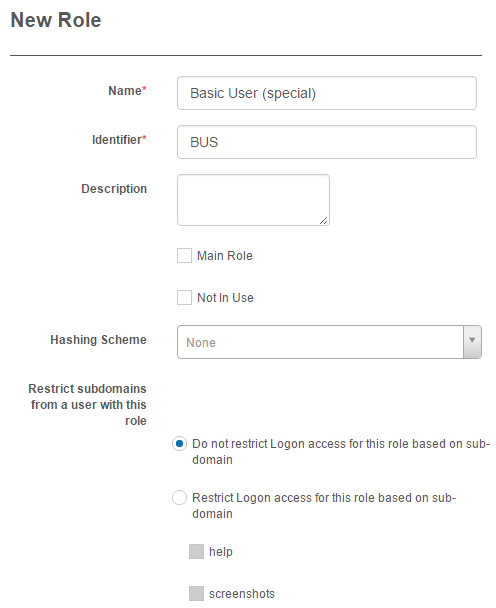
Name, identifier, description
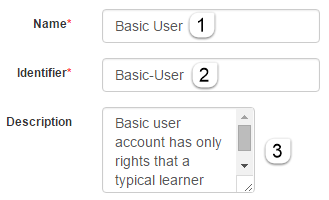
- Name — the name of the role.
- Identifier — unique identifier.
- Description — optional but useful for explaining the purpose.
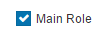
Main role
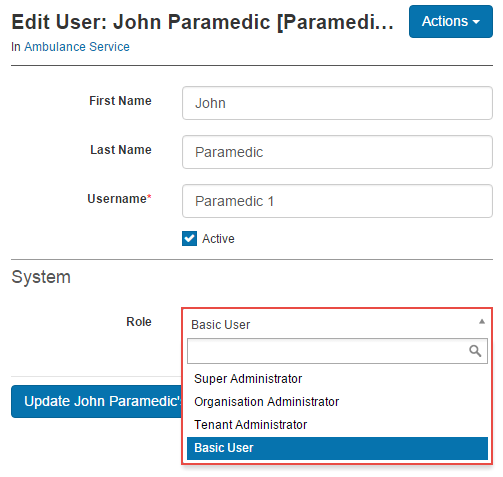
If checked, the role appears in the dropdown in the System section of the user edit form — it can be set as a main role for users on the site.
Not in use
If checked, the role becomes inactive.

Hashing passwords
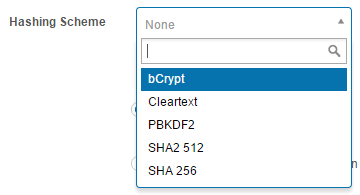
Hashing schemes secure passwords. Any passwords stored in the database can be stolen if the database is compromised. Applying a hashing algorithm makes it improbable for an attacker to determine the original password.
Schemes are available per role.
Restrict subdomains from a user with this role
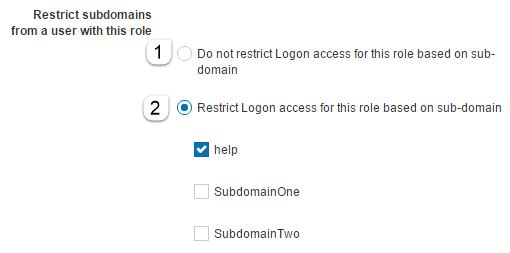
- Do not restrict logon access for this role based on subdomain — allows users with this role to log into any subdomain.
-
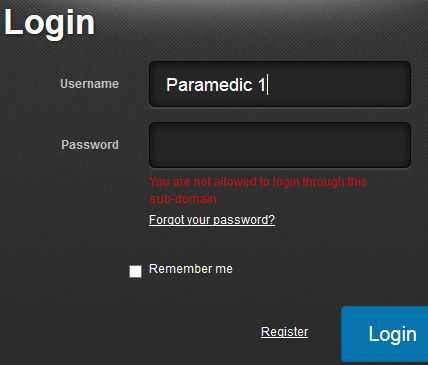
Restrict logon access for this role based on subdomain — allows users only to log into the selected subdomains. Attempts to log into other subdomains return You are not allowed to login through this subdomain.
Applicable documents
Specifies the entities/documents that appear in the Role dropdown of the Administrators widget.
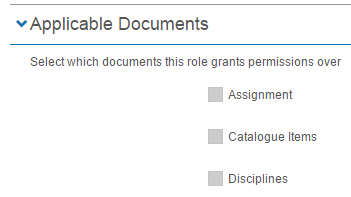
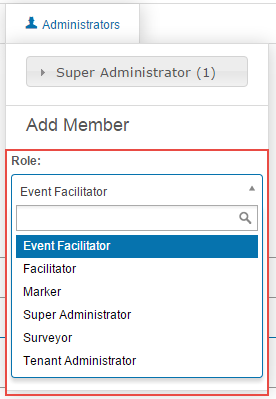
To edit applicable documents, select Edit Role on the role's page.

Securable areas of the documents
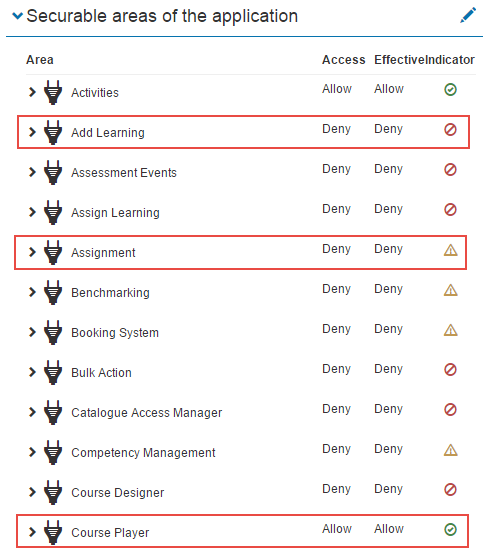
Specifies what a user with the role can see and do. There are 4 columns:
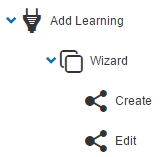
Area — areas of the CLS where permissions relate. Can contain sub-areas with child values.
Access — the value of the area:
- Allow — allows access.
- Deny — denies access.
- Inherit — inherits the parent's value.
Effective — to make the inherited value obvious, this column lists the actual value.
Indicator — three icons:

- Green check — users are allowed in this area.
- Red — users are not permitted.
- Mixed — users are allowed in some sub-areas but not others.
Example — Basic User role:
- Add Learning — set to Deny (basic users undertake learning but don't add it).
- Assignment — Mixed (basic users submit but don't create or edit).
- Course Player — Allow (required to undertake courses).
Editing securable areas
Select the edit pencil in the Roles section.

- Check Allow or Deny. Values cascade to sub and child areas by default (the Inherit radio buttons become active).
-
If required, override child options.
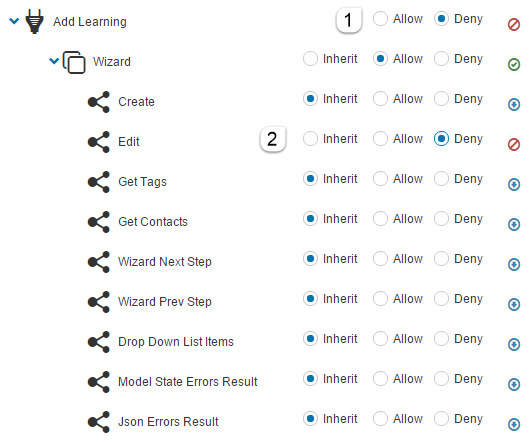
Identifying which area to set
Some areas (like Add Learning) are easy to find; others aren't. For example, to give a tenant administrator access to User Enrolment Rules:
- Log in as a user with access and navigate to Settings > User Enrolment Rules.
-
Copy the end section of the URL.
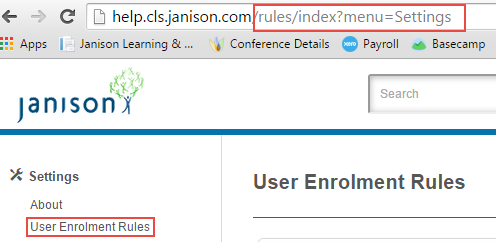
-
Log in as a user without access and paste the URL onto the site URL. An Access Denied page appears.
-
Examine the Access Information — the area is listed (in this case, Rules Manager).
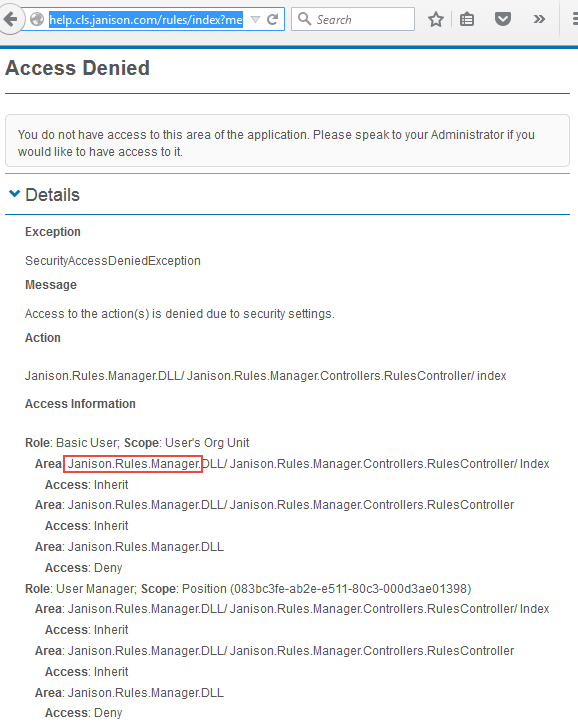
You now know the area to allow.
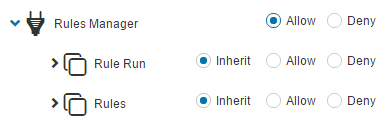
Restrictions
Role restrictions let you set specific times when users can access the system.
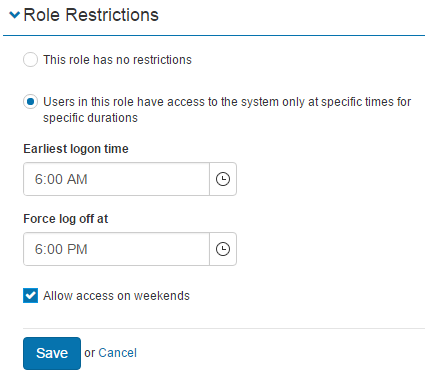
This role has no restrictions
No access restrictions.

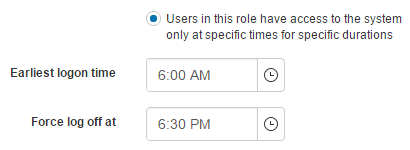
Users in this role have access at specific times for specific durations
Set an Earliest logon time and a Force log off at time.
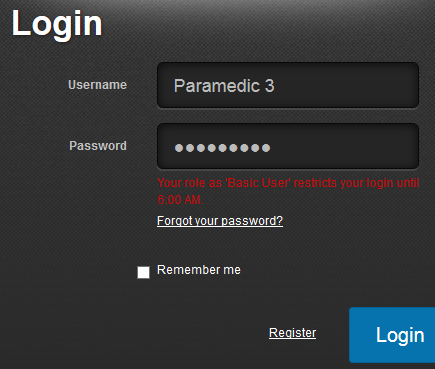
If a user attempts to log on outside these hours, a message like Your role as 'Basic User' restricts your login until 6:00 AM appears.
Allow access on weekends
Overrides the time restrictions on weekends.

Compare roles
Administrators can compare a selected role to others in 3 ways:
- Actions allowed in other roles but not in this role.
- Actions denied in other roles but not in this role.
- Actions in other roles with effective access different to one in this role.
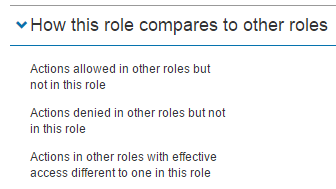
Example — opening Basic User and selecting Actions allowed in other roles but not in this role shows what additional access Content Designer has, such as Asset Browser and File Browser.
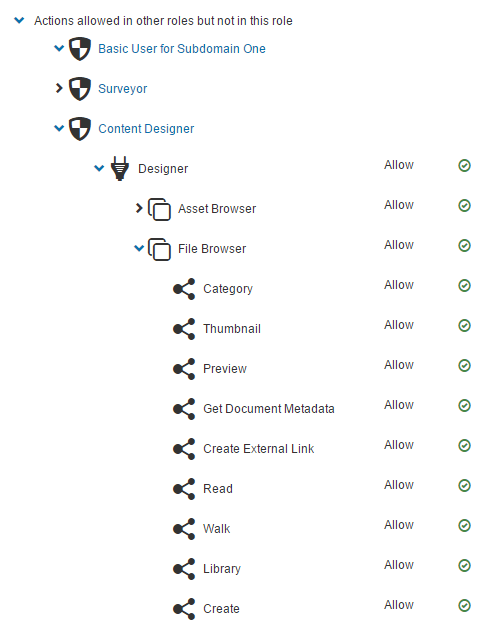
If you open Super Administrator and expand the same link, nothing is listed — Super Administrator has full permissions.
Menu
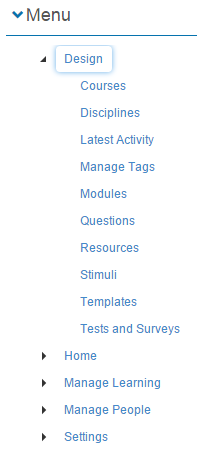
The Menu section displays the menu items a user with this role will see.
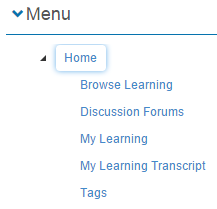
The Tenant Administrator menu has many more items.
Add a role
The CLS ships with built-in roles, but you can create additional ones. 3 steps:
- Create the role with a unique name and description.
- Specify applicable entities — securable entity types that make sense for the role.
- Navigate the securable areas tree and allocate Inherit, Allow, or Deny permissions.
Export and import
- Export Role — exports an XML role definition (available once a role is opened). Useful for sharing configurations between systems and tenants.
- Import Role — imports an XML role definition.
- Import Extra Role — imports roles via a spreadsheet.
- Export Roles Profile — exports all roles to an XML file.
User Extra Roles widget
The widget lets authorised users view and manage extra roles for a given user from the user's profile.
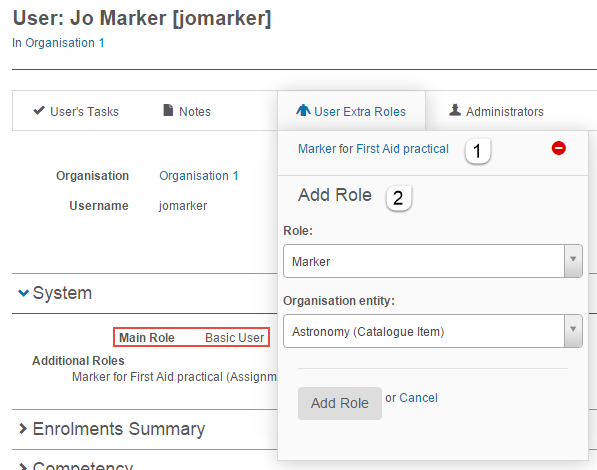
Two sections:
- Existing extra roles — remove with the minus icon.
- Add new extra roles.
For example, applying the Marker role as an extra role limits a basic user's marking access to only the stipulated learning assets.
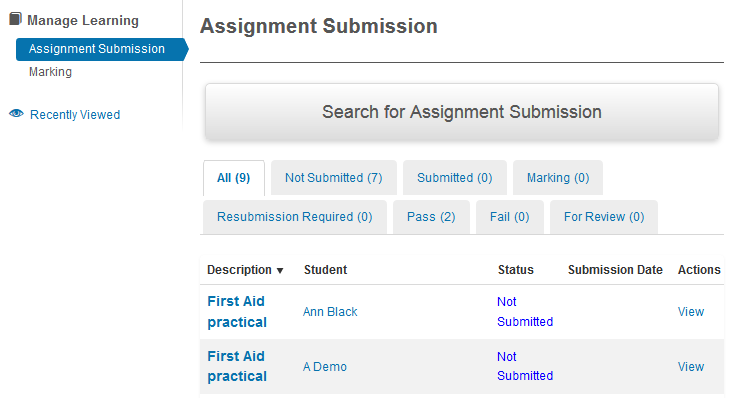
Another example — set a Content Designer for a discipline.
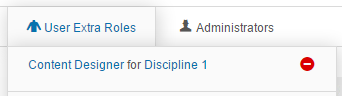
This gives access to the Design menu for that discipline.
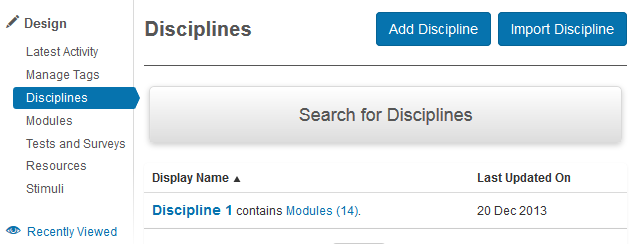
Finding the right user extra role
- Create a test user with Main Role of Basic User.
- Log in as that user in a different browser or identity.
- Assign an extra role as admin.
- Refresh and check whether the access is as required.
- If not, try another role or adjust securable areas.
Administrators widget
The Administrators widget lets authorised users view and manage extra roles for users within the scope of the entity it's configured in. Available on details forms for these securable entity types: Organisations, Groups, Organisation Units, Users, Disciplines, Modules, Tests, Surveys, Test sections, Questions, Resources, Stimuli.
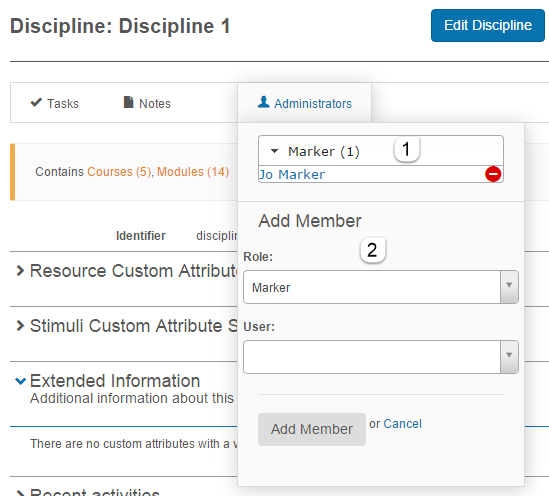
For example, a user assigned Marker from within a discipline can only mark tests created in that discipline.
Why can't I edit someone?
The CLS enforces a rule that one user can't edit another user with more rights. For example, a Content Administrator can't edit a Tenant Administrator's profile. This prevents a user hijacking system access by changing another user's email or resetting their password.
Email changes require validation through the user's own email address.
Explicit roles vs implicit roles
Explicit roles are explicitly allocated to users — most roles in the system are explicit.
Implicit roles are automatically assigned to users when they have staff reporting to them. There's one implicit role: User Manager. See Positions for user reporting.
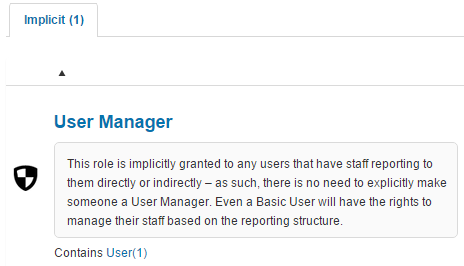
Settings
This page is itself the Settings documentation for roles. All operations are at Settings > Roles.
Related settings:
Passwords (Settings > Password Settings) — the Hashing Scheme option here is set per role.