Scheduling
Scheduling lets you set up different job types to run at specific times or regular intervals. For example, you could email a custom report to someone every day or update users on a weekly basis.
The job types available depend on your site setup.
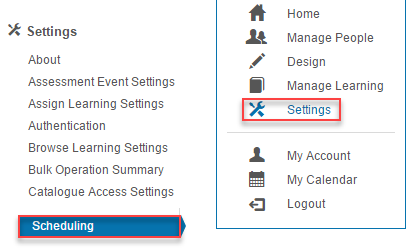
Navigate to Settings > Scheduling.
Schedule a job
-
Select Schedule a Job.
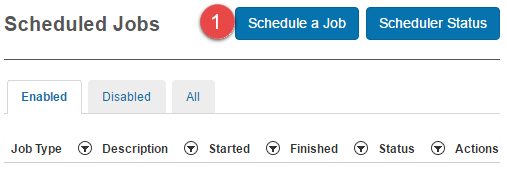
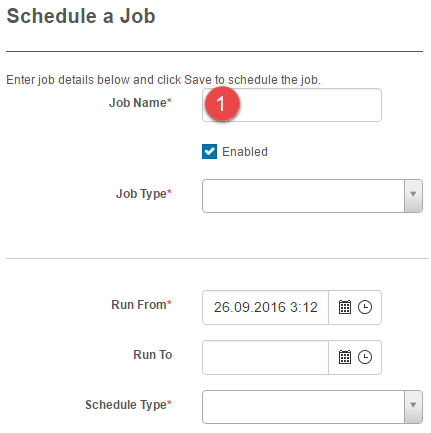
The Schedule a Job screen is displayed.
-
Enter a Job Name.
-
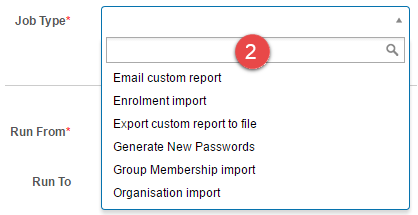
Select a Job Type.
Note
The options in the dropdown may differ depending on site configuration. Additional fields appear based on the selection.
-
Set the timing options and select Save Scheduled Job.

Timing options
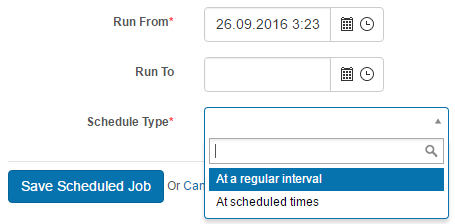
Two Schedule Types are available: At a regular interval or At scheduled times.
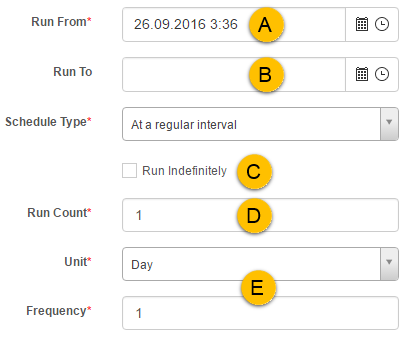
At a regular interval
- A — Run From — the date the schedule begins.
- B — Run To — optional date the schedule ends.
- C — Run Indefinitely — the schedule runs with no end time. Run Count is disabled.
- D — Run Count — only active if Run Indefinitely is unchecked. Sets the number of times the schedule runs.
- E — Unit — relates to the Frequency field. A common setting is a unit of Day with Frequency of
1, meaning once per day.
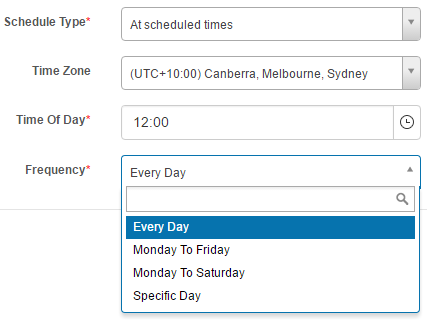
Scheduled times
Email custom report
Sends a custom report to a specific email address. You'll need to create a custom report first — see Customisable Reports.
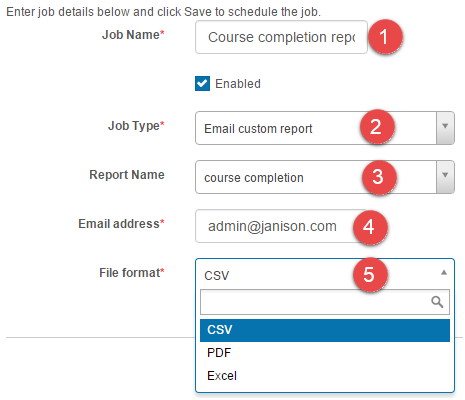
- Enter a Job Name.
- Select Email custom report from the Job Type dropdown.
- Select a report from the Report Name dropdown.
- Enter the destination Email address.
-
Select the required File Format — CSV, PDF, or Excel.
-
Set the timing options and select Save Scheduled Job.

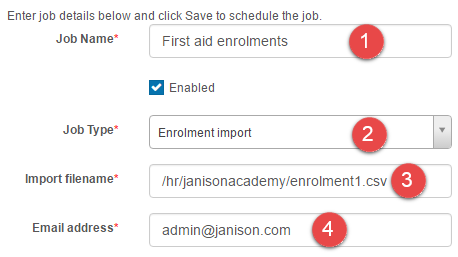
Enrolment import
Schedules an enrolment import from a file placed in a directory on the system by a third-party HR system. The schedule automatically enrols users into one or more catalogue items. See Enrolments.
Important
Before scheduling, contact the Janison customer support team to arrange an account to access the HR directory.
- Enter a Job Name.
- Select Enrolment import from the Job Type dropdown.
-
Enter an import filename — for example
/hrdata/tenant/filename.csv./hrdata— the same for all clients./tenant— your tenant name./filename.csv— your import file name. Must be lowercase with no spaces. Can contain a wildcard (filename*.csv) for flexibility (for example, including a date).
-
Enter an address for the email log.
-
Set the timing options and select Save Scheduled Job.

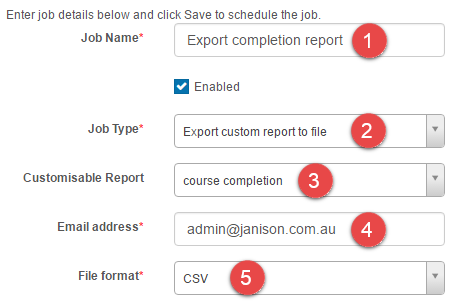
Export custom report to file
Schedules a custom report to be placed in a specific location in the system.
Important
Contact the Janison customer support team to arrange access to the directory where the file will be placed.
- Enter a Job Name.
- Select Export custom report to file from the Job Type dropdown.
- Select a report from the Customisable Report dropdown.
- Enter an Email address.
-
Select the required File Format.
-
Set the timing options and select Save Scheduled Job.

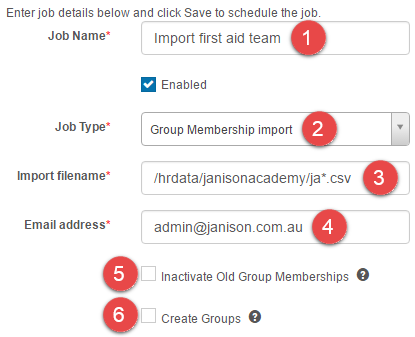
Group membership import
Schedules a group membership import from a file placed in a directory by a third-party HR system. See Groups.
Important
Contact the Janison customer support team to arrange HR directory access.
- Enter a Job Name.
- Select Group membership import from the Job Type dropdown.
- Enter an import filename (same conventions as enrolment import).
- Enter an email address for the log.
- Check the box to inactivate existing group memberships not found in the imported file.
-
Check the box to create groups if they don't exist.
-
Set the timing options and select Save Scheduled Job.

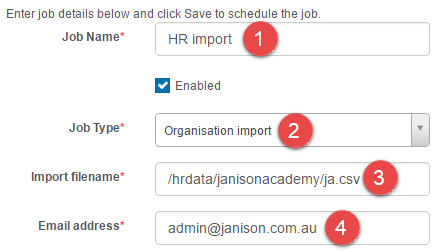
Organisation import
Schedules a user (HR) import from a file placed in a directory by a third-party HR system. The schedule automatically adds or updates users in the CLS. See Manage users.
Important
Contact the Janison customer support team to arrange HR directory access.
- Enter a Job Name.
- Select Organisation import from the Job Type dropdown.
- Enter an import filename (same conventions as enrolment import).
-
Enter an email address for the log.
-
Set the timing options and select Save Scheduled Job.

Settings
This page is itself the Settings documentation for scheduling. All operations are at Settings > Scheduling.
Related settings:
Customisable Reports — must exist before scheduling Email custom report or Export custom report to file — see Customisable Reports.
Bulk Action — Password Settings (Settings > Password Settings) — bulk password actions can also be scheduled. See Bulk Action.