Manage users
A user is anyone with an account in the system. Users can belong to organisations, groups, and more. The parts of the CLS a user can access depend on their allocated role — for example, basic users can't see or access many of the forms an administrator can.
Note
The fields and columns shown in this document may differ from your site depending on the options you've set. You can read more about customising the user screens in the document on user settings.
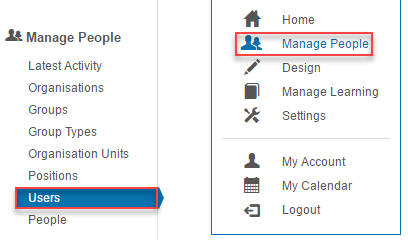
To manage users, select Manage People > Users.
Add a single user
Browse to Manage People > Users.
-
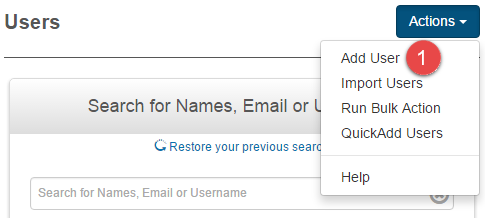
Select Add User from the Actions dropdown.
-
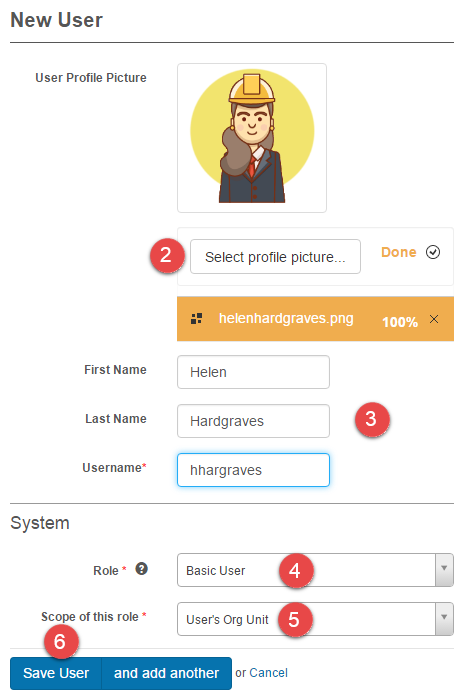
Select a profile picture.
- Enter the User details.
The System section lets you set the Role for the user. See the document on Roles for more on this setting.
- Select the Role.
- Select the Scope of this role.
-
Select Save User.
Quick add users
Quick add lets you add users with a limited set of fields. This feature is a plugin and won't be available unless the plugin is active — contact your account manager for more information.
Quick add users settings
You can customise the quick add user form using the available settings.
Navigate to Settings > Quick add users settings.
Username
Three options are available for how usernames are created.
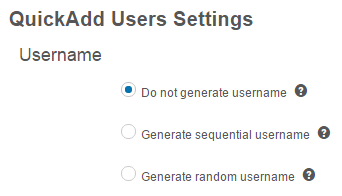
Do not generate username — the user must manually specify a unique username.
Generate sequential username — generates sequential usernames based on a prefix concatenated with the next number in the sequence. When selected, an additional field appears to enter the prefix.
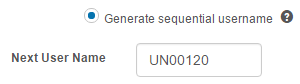
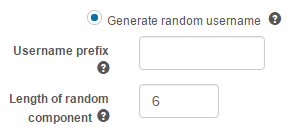
Generate random username — generates a random username with an optional prefix (which helps identify usernames created this way). Consonant characters are used and usernames aren't case sensitive.
When selected, two additional fields appear:
- Username prefix
- Length of random component
Password
This section relates closely to password settings. You can read more about setting password requirements in the document on password settings.
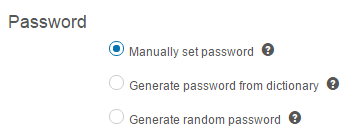
Manually set password — the user must set a password that complies with the password complexity requirements.
Generate password from dictionary — generates passwords from the dictionary specified in Password Settings (only available if Password Settings have this option).
Generate random password — generates passwords that meet the complexity requirements specified for manually set passwords.
User details
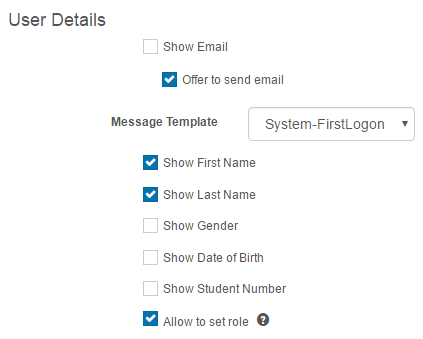
This section lets you set the fields visible on the quick add form, and select an email to send to users when their account is created.
Quick add a user
Browse to Manage People > Users.
-
Select QuickAdd Users from the Actions menu.
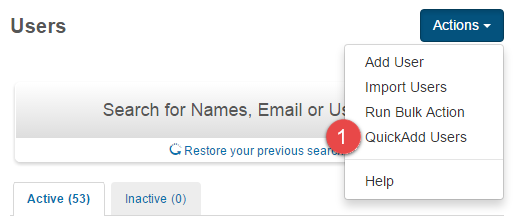
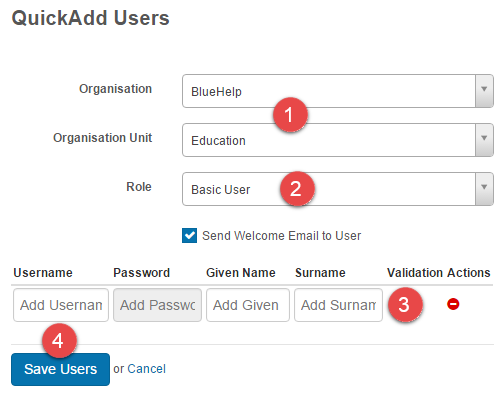
The quick add user screen is displayed. The fields available depend on the Quick add users settings described above.
- Select the Organisation and Organisation Unit.
- Select a Role.
- Populate the user fields.
-
Select Save Users.
Import users
You can add users in bulk using an import. There are two types of import:
- Add or synchronise users from a spreadsheet
- Sync data from an HR system
Browse to Manage People > Users.
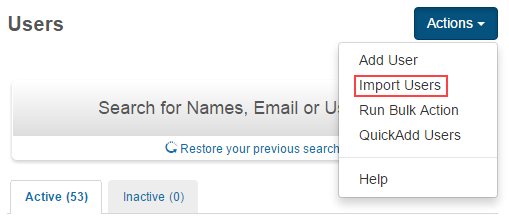
Select Import Users from the Actions dropdown.
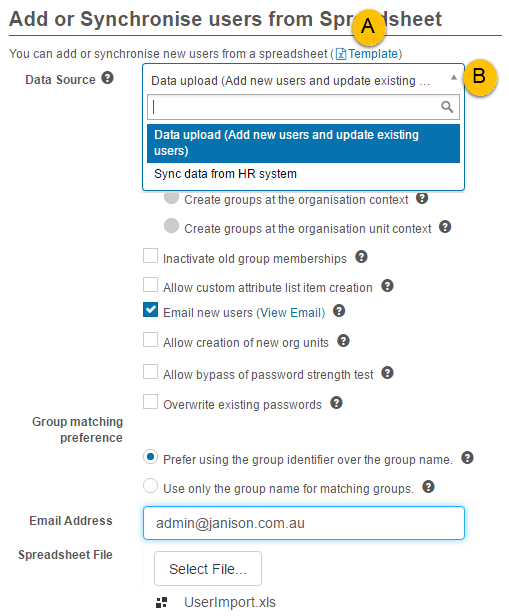
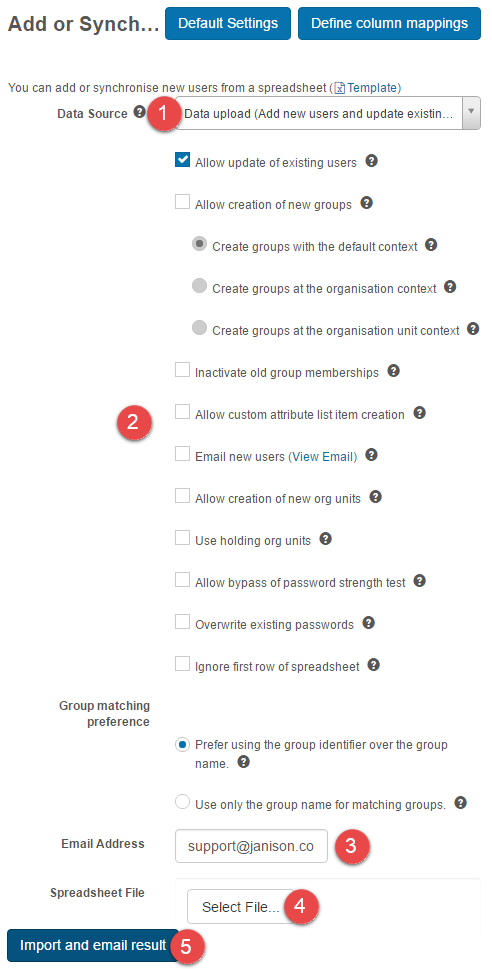
The Add or Synchronise users from Spreadsheet page is displayed.
- A link to the spreadsheet template — download it and populate it with your user data, ready for import.
- A Data Source selector to toggle between spreadsheet import and HR import.
Information on the options can be viewed by hovering over the  icons.
About the import template
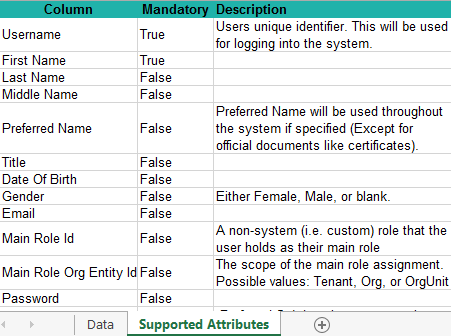
The Supported Attributes tab of the template describes the data field requirements and lists the mandatory fields.
Add or synchronise users from a spreadsheet
Important
Syncing users from an HR system will deactivate any users in the Janison system if they aren't in the HR spreadsheet. The data upload option won't deactivate users in the Janison system if they aren't included on the spreadsheet — they'll only be deactivated if the Is Active column is set to no.
- Ensure the default Data Source, Data upload (Add new users and update existing users), is selected.
- Check the required boxes beside the list of additional settings. For more detail about these options hover over the info icon.
- Enter an Email Address.
- Select your Spreadsheet File populated with the user data you'd like loaded or updated.
-
Select Import and email result.
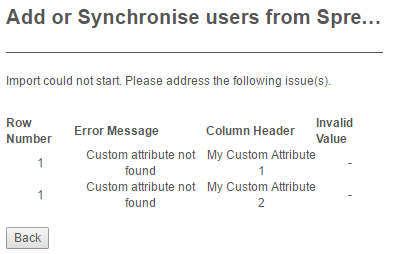
If an error is encountered, feedback is displayed.
If the import is submitted for processing, feedback is displayed with a link to the import log.
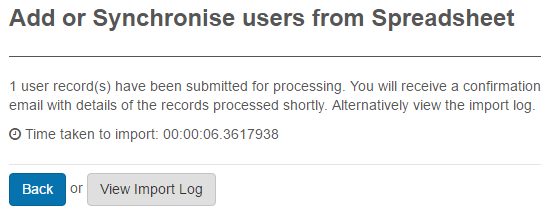
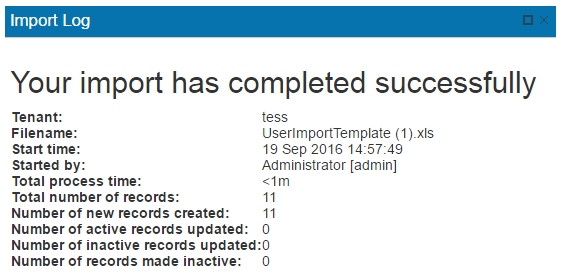
Selecting View Import Log opens the log — the same log sent by email.
Spreadsheet import settings
You can save your preferences for the import settings as default.
-
Select Default Settings.
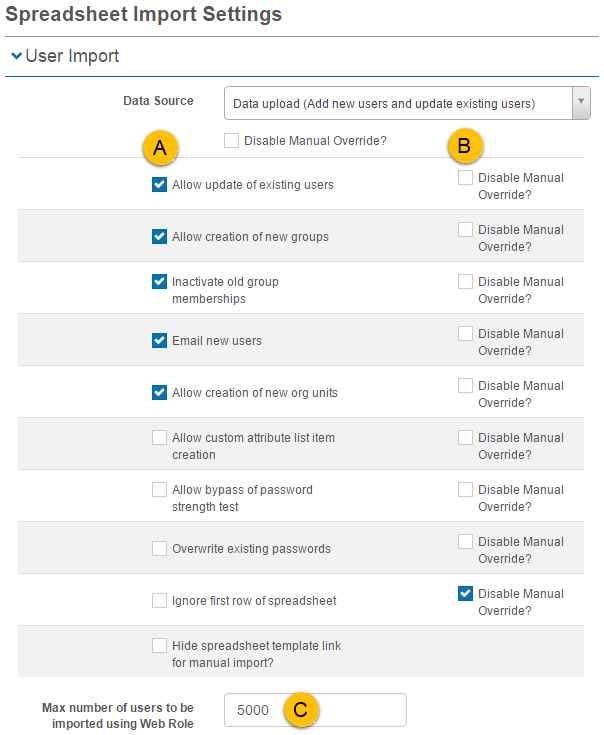
A Spreadsheet Import Settings screen is displayed.
- Selecting one or more options in this column makes that option selected by default on the Add or Synchronise users from Spreadsheet screen.
- Selecting the option to Disable Manual Override removes the setting from the Add or Synchronise users from Spreadsheet screen.
-
You can limit the number of users to be imported by entering a number into this field.
-
Select Save.

Sync data from an HR system
Important
Syncing users from an HR system will automatically deactivate any users in the system if they aren't in the HR spreadsheet. The data upload option won't automatically deactivate users in the system if they aren't included on the spreadsheet — they'll only be deactivated if the Is Active column is set to no.
-
Select Sync data from HR system.

-
Set the Default Settings as described above.
-
Select Define column mappings.
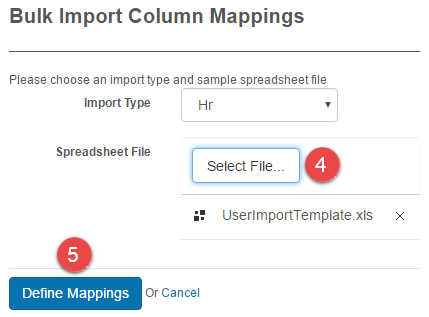
The Bulk Import Column Mappings screen is displayed.
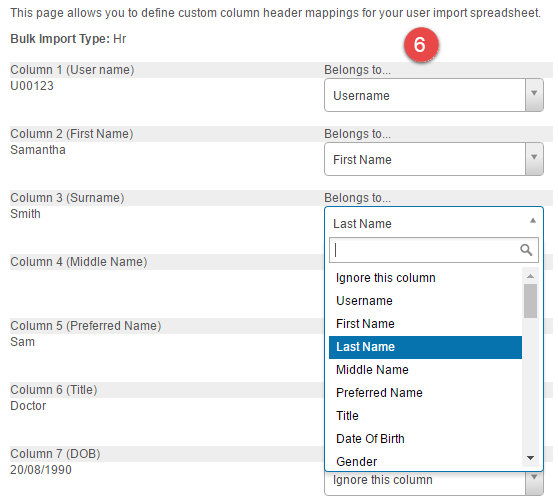
On this screen you can match the fields between the two systems. In the example below, if the HR system uses 'Surname' you can match it with the CLS field 'Last Name'.

- Select your spreadsheet with the fields from your HR system.
-
Select Define Mappings.
A page to define custom columns is displayed.
-
Use the dropdowns in the second column to select the fields they belong to.
-
Select Save.

The HR import will then need to be scheduled. See the document on Scheduling for further information.
Archive users
Archiving a user sets them to inactive and removes their access to the system. You can archive users individually in the edit screen or in bulk from the user list. You can also set them to inactive via user import. See the document on importing users for more on setting users to inactive via an import.
Archived users can be un-archived.
Archive a user via edit user
Select Manage People > Users.
-
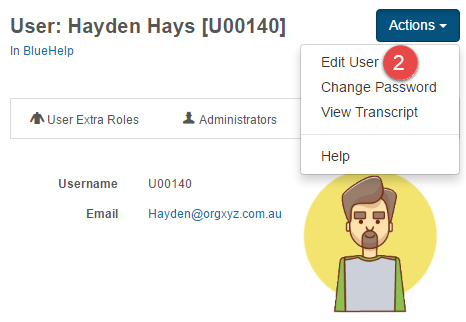
Select a user. If the Actions menu is available you can select the
 icon to go straight to edit mode.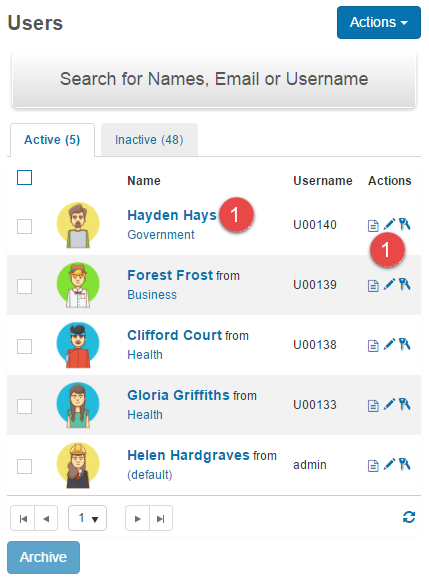
The user details screen is displayed.
-
Select Edit User from the actions menu.
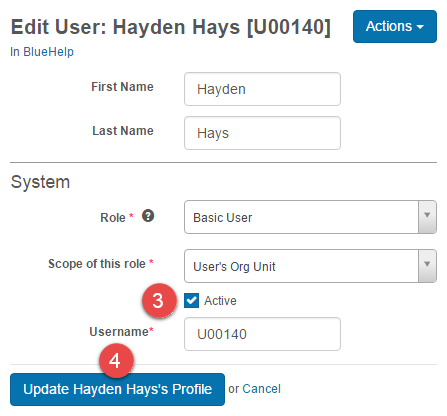
The edit user screen is displayed.
- Uncheck Active.
-
Select Update (user's name) Profile.
Archive a user via the user list
Select Manage People > Users.
- Select the checkbox to the left of the user. Selecting the top box selects all users.
-
Select Archive.
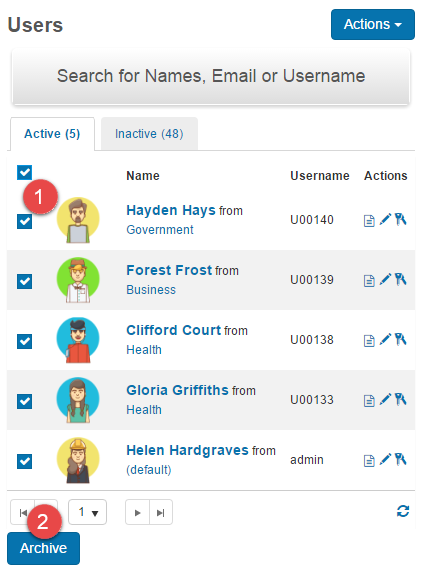
Archived users are moved to the Inactive tab.
Unarchive users
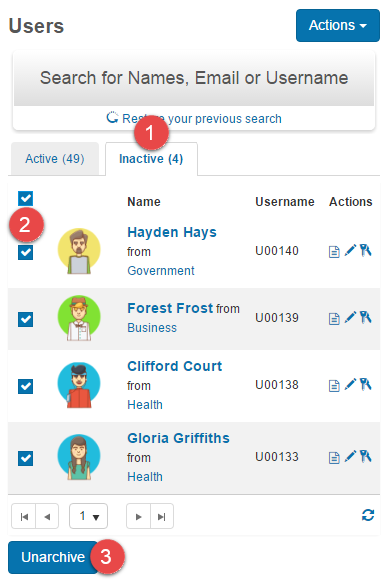
- Select the Inactive tab.
- Select the checkbox next to the user you'd like to unarchive. Selecting the top checkbox selects all users.
-
Select Unarchive.
Change user password
Learners can change their passwords.
Select Manage People > Users.
-
Select the user from the users list. If the Actions column is active, you can enter the password reset screen by selecting the
 icon.
icon.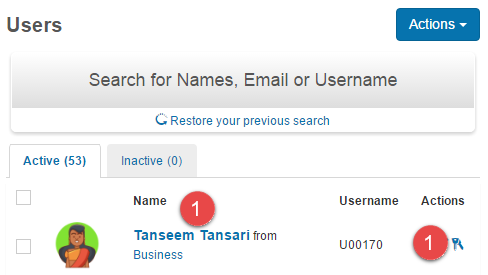
-
Select Change Password.
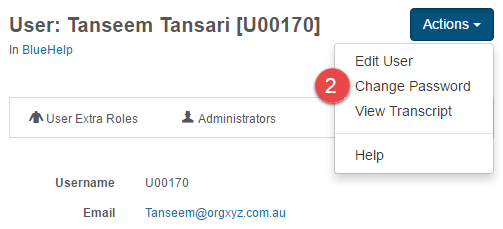
The change password screen is displayed.
- Enter and confirm the new password.
- Select Save Password.
Note
The password hint may differ depending on the password rules. See the document on password settings.
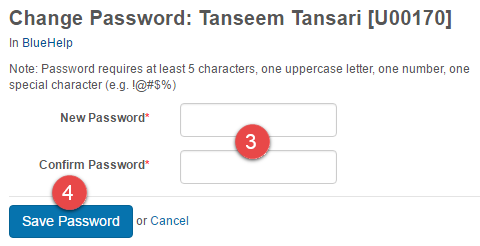
Inspect user
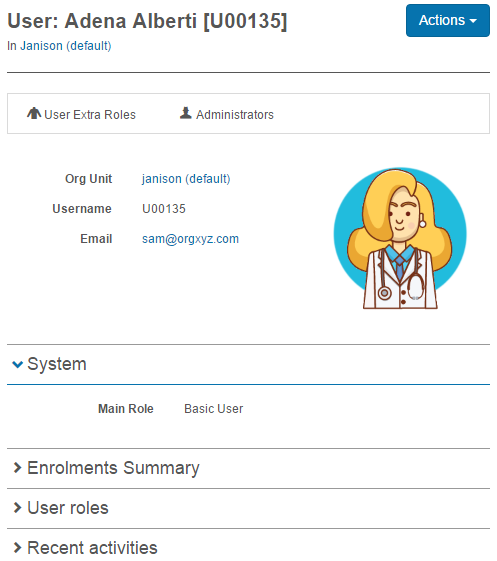
Selecting a user gives you access to their details.
Browse to Manage People > Users.
-
Select a user from the Name column.
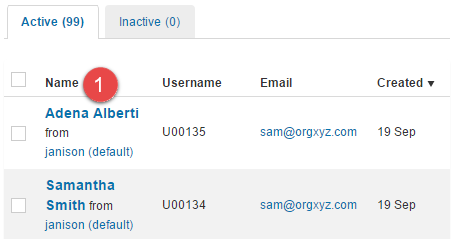
The details of the user are displayed.
Settings
Several platform settings affect how users are managed.
Administrators can configure the following settings:
User settings (Settings > User Settings) — control which fields and columns appear on the user screens, customising the user experience.
Quick add users settings (Settings > Quick add users settings) — control how usernames and passwords are generated by the quick add form, and which fields are visible.
Password settings (Settings > Password Settings) — set the password complexity rules and dictionary used for generated passwords.
Roles (Settings > Roles) — define the roles that can be allocated to users.