Organisations
Organisations are the top-level structures for organising people in the CLS and are directly attached to the tenant. Organisations are set up using a strict tree structure.

Consider a tiny company with four sections — management (1 staff member), office (2), sales and marketing (1), and factory (3). Starting from the HR diagram:
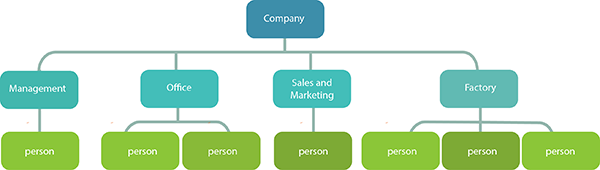
In the CLS organisations model, the company becomes the Organisation. Within it are several specific categories of people — Organisation Units — and their staff are the CLS users.
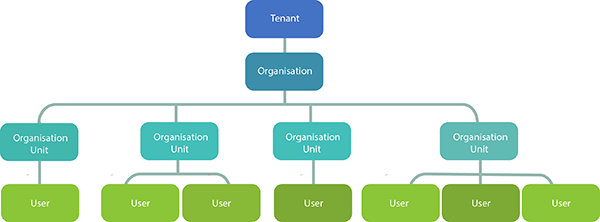
Merged into the diagram below, the organisation units are Management (1 user), Office (2 users), Sales and Marketing (1 user), and Factory (3 users).
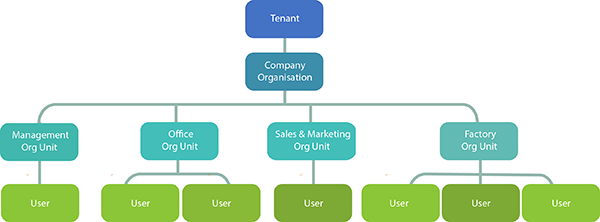
The strict tree structure means each user belongs to one and only one org unit, and each org unit belongs to one organisation. This kind of strict tree is also used elsewhere in the CLS, for example with Position-to-Position reporting hierarchies (see Positions). Groups use a more flexible structure to augment or bypass this organisation hierarchy.
Every CLS user is a member of one organisation, one organisation unit, and possibly one or more groups. A user may also have a position. Combining these makes it possible to model the HR structures of health, government, education, and corporate organisations.
Note
Most users can't see the Manage Organisations screens because the CLS security system uses scope-based roles. Only high-level administrators with the appropriate scope will see them.
Organisations and groups
While organisation structures follow a strict tree, groups use a more flexible structure — a user can belong to more than one group, and groups aren't necessarily tied to the organisations hierarchy.
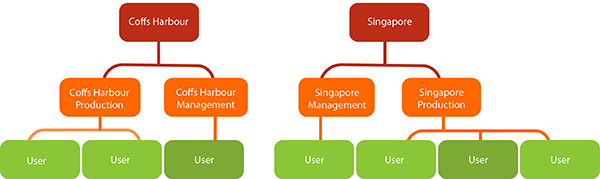
Groups can augment an organisations hierarchy. Consider the tiny company growing in size and complexity, now with two factories with their own management and production sections — introducing two new HR levels:
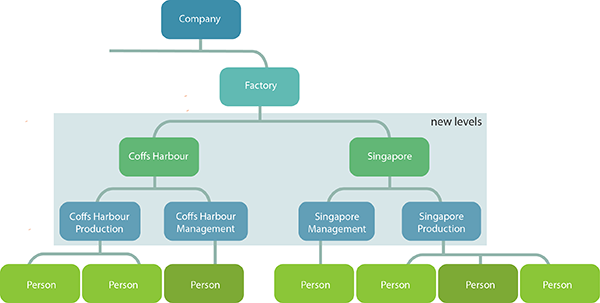
The CLS organisations structure is two levels deep, so to match this new HR structure we add groups and group types as the extra levels. In this example, Coffs Harbour and Singapore are group types containing the Production and Management groups for each site.
The diagram below overlays the new groups and group types (in red and orange) on the original organisations hierarchy. All four groups are linked to the Factory org unit. All the factory staff in both locations are members of the same Factory org unit.
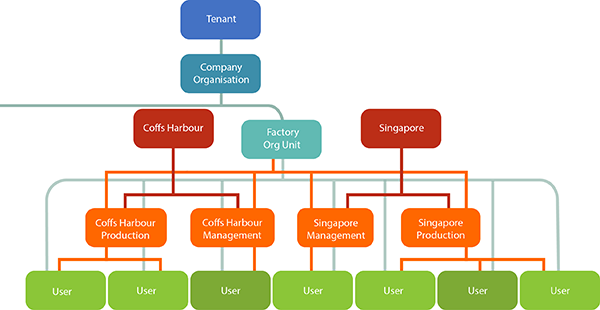
A group/group type hierarchy lets you target cohorts of staff within one org unit through group memberships. For example, all Singapore factory staff could be targeted through the Singapore group type.
There's no single right way to manage multi-level HR structures in the CLS. Another approach would be to create multiple organisations in the tenant. Discuss configuration options with Janison based on:
- How HR data is already set up
- The reporting and management functionality you need
- Which cohorts you need to enrol, manage, assess, or report on
Manage organisations
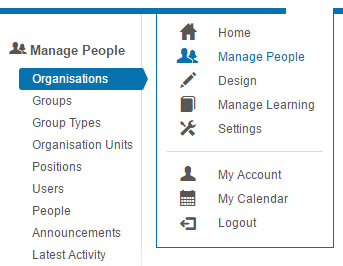
Access organisations by selecting Manage People > Organisations.
The screen shows a list of organisations in the tenant.
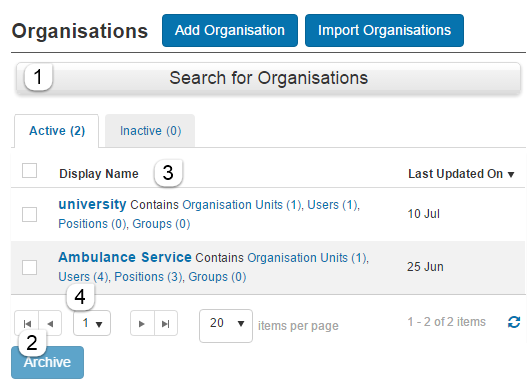
From this screen you can:
- Search for organisations.
- Archive organisations.
- Examine the list.
Each organisation is listed along with the number of organisation units, users, positions (if position management is enabled), and groups attached to it. Each count is a link to further information. Selecting Users for an organisation leads to a list of those users with links to email, inspect, or edit each one.
You can reorder the list by Display Name or Last Update by selecting the column heading.
Inspect organisation details
To inspect an organisation, navigate to Manage People > Organisations, locate the organisation, and select its name.
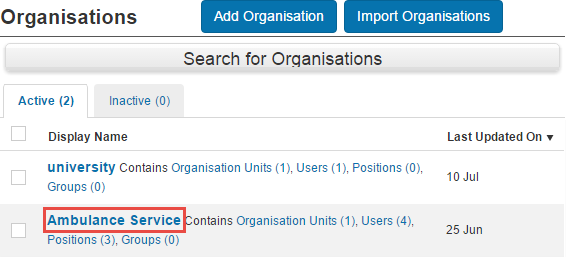
The details screen shows the identifier and title of the organisation as well as the number of organisation units, users, positions, and groups attached to it. These are all links to lists of those entities.
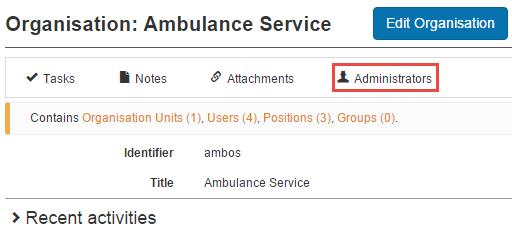
You can also select Administrators to add users with various roles over the organisation. For example, setting a user as a marker gives them access to Manage Learning > Marking where they can mark any test attempts users in the organisation produce.
Create an organisation
Organisations can be added manually or by importing a CSV file.
Tip
Organisations support linking to custom attributes, which is useful for reporting. Set up the custom attributes for the Organisations entity first, then enter values for them in the manual edit form or spreadsheet import.
Manually add an organisation
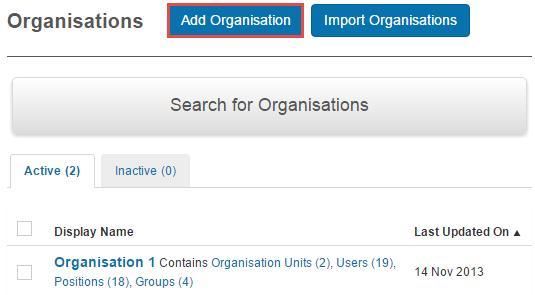
Select Manage People > Organisations > Add Organisation.
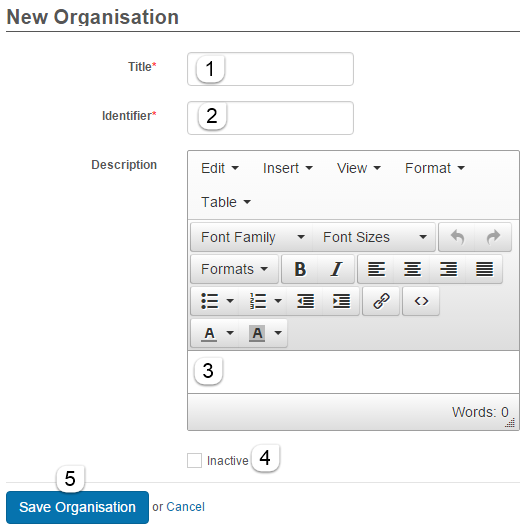
- Create a Title for the organisation.
- The Identifier automatically loads to match the title but can be changed. Like many CLS entities, organisations have a mandatory and unique human-readable identifier — it shouldn't be changed often as it's used during spreadsheet import to match existing organisations.
- Optionally enter a Description.
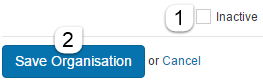
- The organisation is active in the system unless the Inactive box is checked.
-
Select Save Organisation.
Import organisations
Select Manage People > Organisations > Import Organisations.

-
Select Template to download the example spreadsheet.
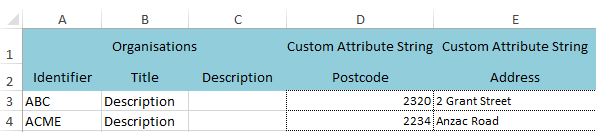
Populate the template with your organisation data and save it. Custom attributes may be included in the upload — see the section on the import template below.
- Select Select File to browse and choose your CSV.
-
Select Upload.
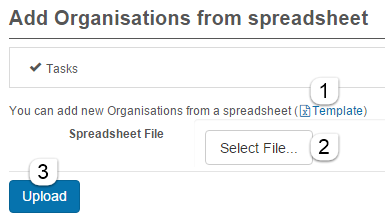
After validation, organisations new to the system are listed under New Organisations From Spreadsheet, and existing ones under Update Organisations from SpreadSheet. Review the details, select Ignore next to any organisations to skip, and select Save Organisations to confirm. A success message displays after the import.
Editing the import template
When editing the file, note:
- Custom attributes may be included. The required custom attributes must already exist in the system and be linked to the organisation entity.
- The first row of the custom attribute string column must contain the text Custom Attribute [Attribute type] — replace [Attribute type] with the custom attribute type (e.g. String, Boolean, Number).
- The identifier in the second row of the spreadsheet for any custom attribute must match the identifier already in the system — identifiers are case sensitive.
- Delete any custom attribute columns you don't need to avoid errors.
If you upload a spreadsheet with custom attributes that don't already exist in the system, or aren't linked to the organisation entity, an error message is displayed.
Search for an organisation
The search feature helps you find an organisation when there are many in the list.
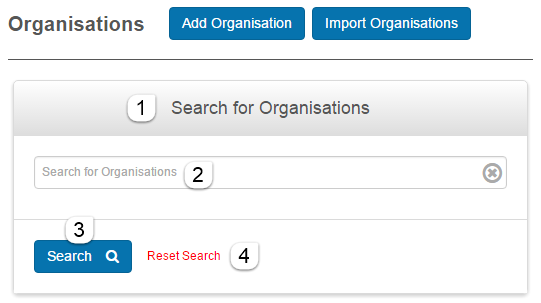
Select Manage People > Organisations.
- Select Search for Organisations to display a search field.
- Enter a search word.
- Select Search. The results appear in the Display Name column.
-
To perform another search, select Reset Search.
Edit an organisation
Inspect the organisation and select Edit Organisation.
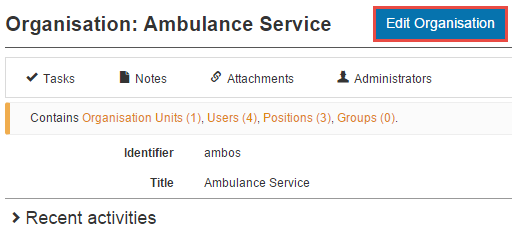
Change details as required and select Save Organisation.
Archive an organisation
Organisations should be archived rather than deleted. You can archive via edit or via the organisation list.
Archive via edit organisation
Search for the organisation or select it from the Display Name list.
- Check the box beside Inactive.
-
Select Save Organisation.
Archive via organisation list
Select Manage People > Organisations.
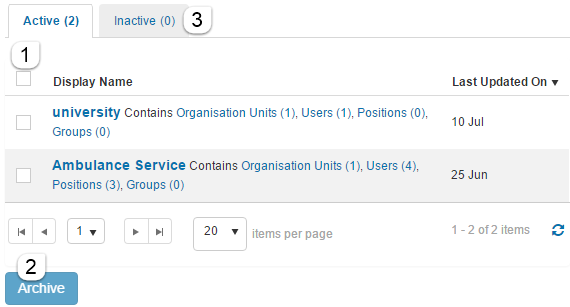
- Locate the organisation in the list and check the box to its left.
- Select Archive.
-
The organisation is now listed as inactive. View the list by selecting the Inactive tab. Use the Unarchive button at the bottom to reverse the archive.
Settings
Several platform settings affect organisations.
Administrators can configure the following settings:
Custom Attributes (Settings > Custom Attributes) — link custom attributes to the organisation entity so they appear on the add/edit forms and can be imported via spreadsheet.
Roles (Settings > Roles) — define the roles available to assign as organisation administrators.