Marking
A large amount of learning and assessment test marking is done automatically in the CLS, based on the specifications set for the questions (correct answers, etc.) and tests (pass marks, etc.). The Marking section displays the results of automatically marked test attempts and lets you inspect, re-mark, and edit those results if desired.
However, certain types of learning assets must be marked manually:
- Face-to-face training in Learning Event sessions — marked as part of managing sessions. See Mark a session.
- File-based submissions (Assignments) — marked as part of Assignment Submission. See Assignments.
- Manually marked test attempts — marked in the Marking section, described below.
As with automatically marked test attempts, the Marking section also displays the results of these marked attempts and lets you inspect, re-mark, and edit them.
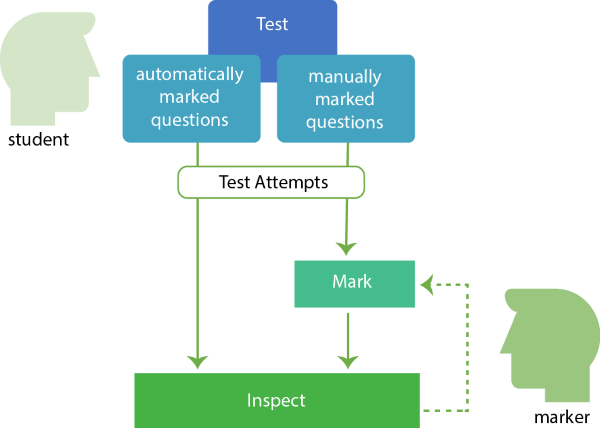
Tests have these marking options:
- Automatic — the CLS does the marking
- Manual — a marker must do the marking
- Mixed — partly automatic, partly manual
- Do not mark — non-assessable, won't be marked
Tests in the Manual and Mixed categories are those from:
- Learning Module tests containing short-answer questions
- Assessment Module tests containing short-answer and/or file-upload questions
When learners submit these test attempts, the appropriate marker is notified by email (if notifications are enabled). When the marker logs in, the attempts to be marked are displayed.
Note
An Assessment Event — an assessment test at a specific time and place — requires an additional role, Chief Marker, who oversees the marking and scoring of responses for this specific test paper.
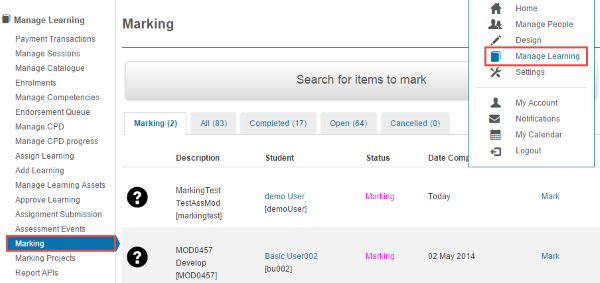
Marking is managed by selecting Manage Learning > Marking.
Inspect marking
Select Manage Learning > Marking.
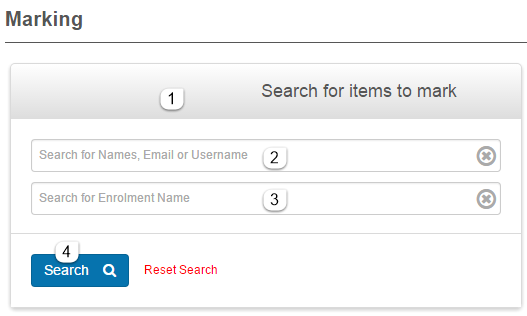
The top of the screen lets you search:
- Select the search bar to expose the search fields.
- Enter user names, email addresses, or usernames.
- Enter all or part of the enrolment name (the test name).
- Select Search.
The bottom of the screen shows matching items.
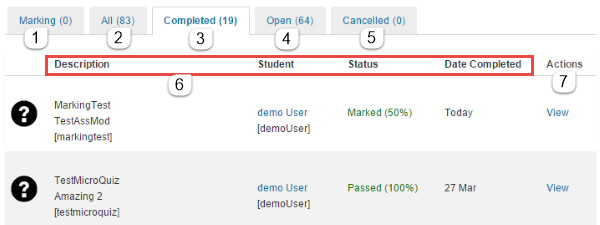
The bottom lists items in tabbed sections:
- Marking — yet to be marked.
- All — all items.
- Completed — items already marked.
- Open — started by a student but not submitted.
- Cancelled — cancelled items.
Select the tabs to view each category.
-
Each heading can be selected to sort the list.
-
The options under the Actions heading vary depending on whether the item can be marked (Marking tab) or just viewed (other tabs).
View marking
Selecting View for a test attempt shows its details and lets you make changes. Items under the Marking tab aren't available for View yet — they will be after marking.
Select Manage Learning > Marking. Select any tab except Marking, then View in the Actions column.
View completed items
- Select Mark to re-mark the test attempt.
- Select Export to PDF to save the attempt to a PDF.
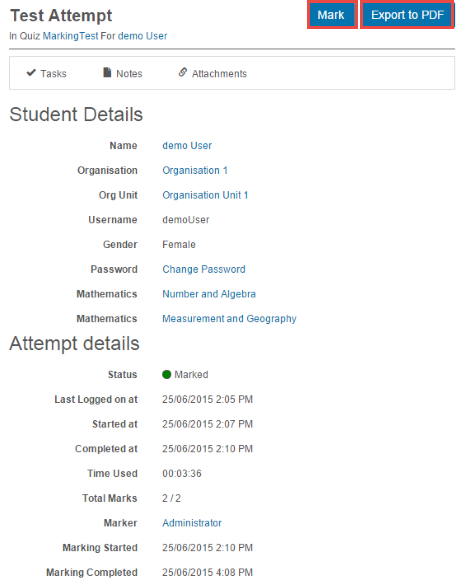
View open items
An Open item has been started but not submitted, so it can't be marked.
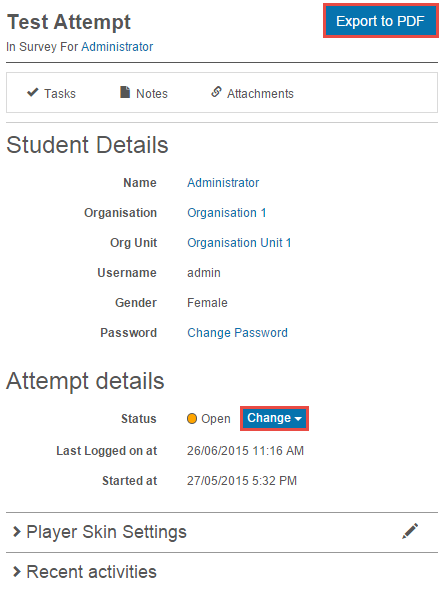
- Select Change to alter the status. Options: Exempt, Complete, Absent, Reset (stops the current attempt and starts again), Withdrawn, No longer enrolled.
- Select Export to PDF to save the attempt.
Mark a test attempt
Go to Manage Learning > Marking.
- Select the Marking tab to see all attempts you can mark.
- Select Mark in the Actions column.
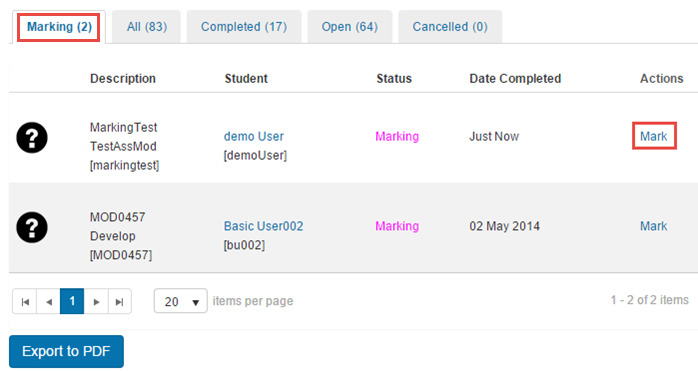
The screen shows the attempt details and a list of the user's answers.
- Automatically marked questions display with their marks and can be examined — no further action needed.
- The total number of answers that need marking is listed.
-
Answers that need marking are indicated.
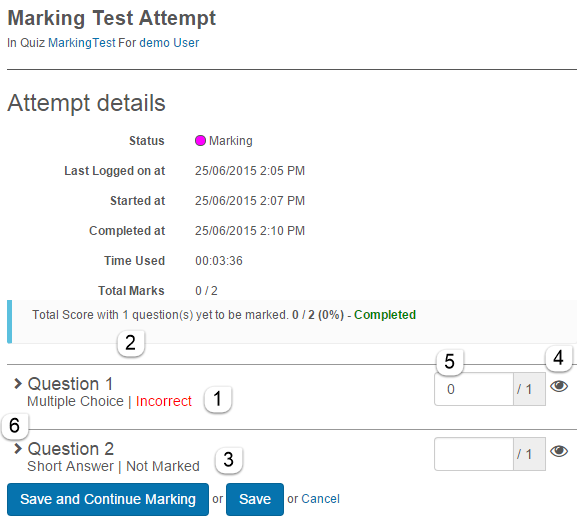
For each answer that needs marking, two options:
Without feedback:
- Select the eye icon to view the attempt.
- Enter the mark in the marking box.
With feedback:
- Select the chevron to open and view the attempt.
- Add feedback.
- Optionally add marker notes.
-
Enter the mark in the marking box.
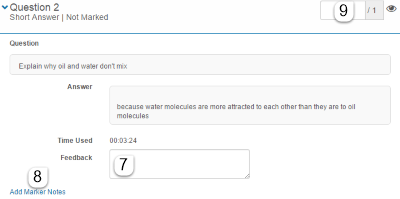
For either option, finish at the bottom with:
- Save — saves entries but the item still needs marking, or
- Save and Continue Marking — then offers Submit Marks to complete.
Assign markers
Marking can be done by users with high-level roles or by basic users with the extra role of Marker. Set up the Marker role and Applicable Documents first.
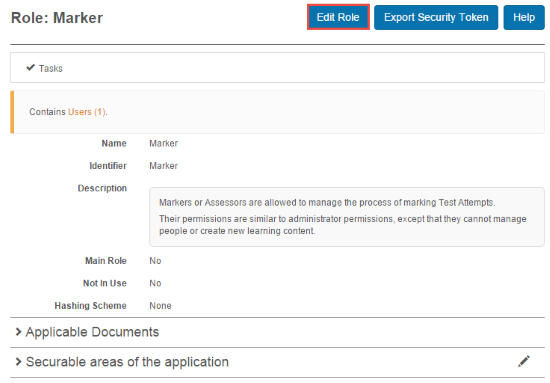
Select Settings > Roles, find Marker, and select it. Select Edit Role.
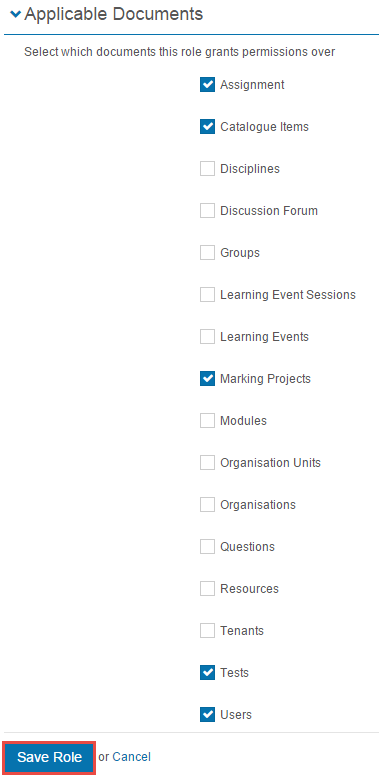
Expand Applicable Documents and check the boxes for all system entities you want markers to be assigned to. Select Save Role.
Markers can then be assigned in two ways:
- Via a system entity — nominate users as markers for an entity (e.g. a test or a group)
- Via a user — add the extra Marker role to a user and allocate it to one entity
Assign a marker to a system entity
-
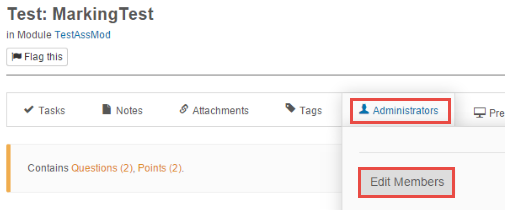
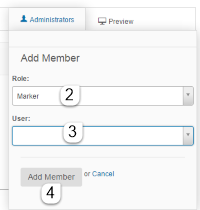
Inspect the entity. Select Administrators, then Edit Members.
-
Select Marker from the role dropdown.
-
Select a User.
- Select Add Member.
-
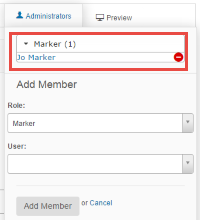
The marker is now listed under Administrator. Delete a user from the marker list with the minus icon.
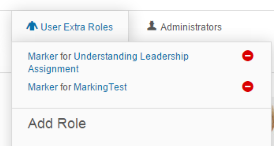
The marker role appears under the user's Extra Roles:
Add a Marker extra role to a user
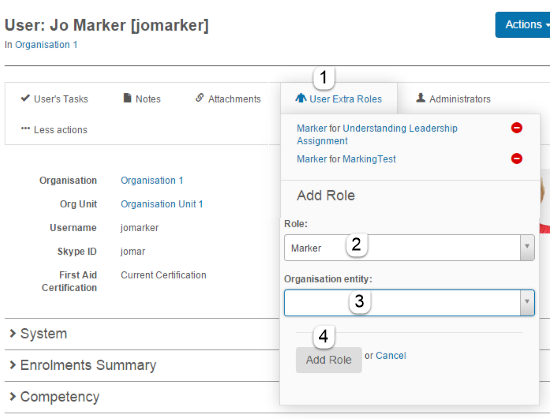
- Inspect the user. Select User Extra Roles.
- Select Marker from the role dropdown.
- Select the organisational entity (you can search to narrow options).
-
Select Add Role.
Email settings for marking
Select Settings > Email Settings > Marking.
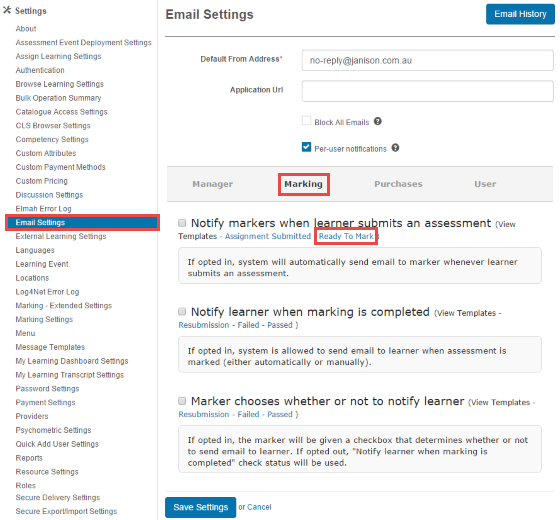
Check the boxes next to the available options and select Save Settings. You can also change the templates for these emails.
For example, select the Ready To Mark template to customise the message sent to markers when a new attempt needs marking. This takes you to Message Templates. Select Create Local Message Template to create a custom version.
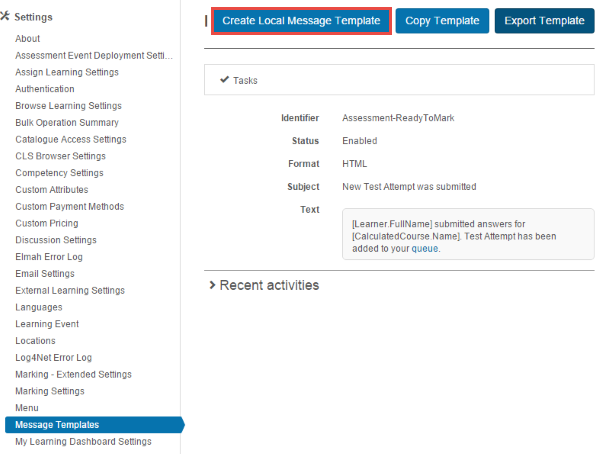
You can customise body text and insert tokens to include CLS data such as the learner's email address.
Export test attempts to PDF
At the bottom of every inspection screen you can select Export to PDF.
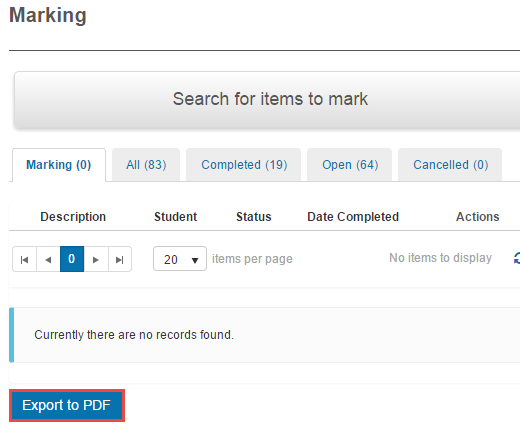
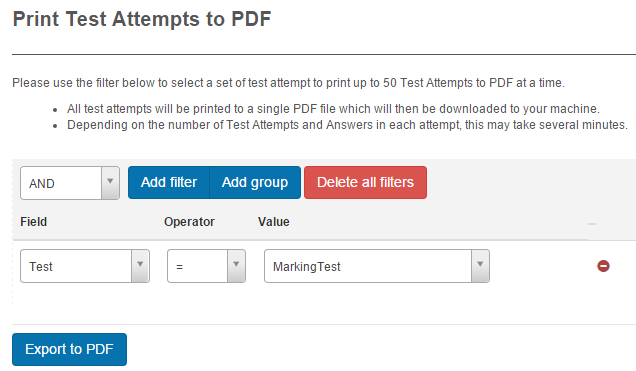
Specify which attempts to save using filters. Build rules that operate alone or combine logically. The example rule below filters to a test named Marking Test.
For details on filters, see the document on building filters.
Select Export to PDF to save the file.
Settings
Several platform settings affect marking.
Administrators can configure the following settings:
Roles (Settings > Roles) — configure the Marker role and its Applicable Documents to make potential markers assignable to specific entities.
Email Settings (Settings > Email Settings > Marking) — enable email notifications for the various marking events.
Message Templates (Settings > Message Templates) — customise the Ready To Mark and related marking emails.