Speaking item
Speaking items require test-takers to discuss one or more topics. Their verbal responses are recorded and later evaluated. This item type is designed to assess language proficiency by examining the test-takers' ability to articulate ideas, use appropriate vocabulary, and demonstrate correct grammar.
They can also be used to demonstrate specific skills, such as greeting customers or explaining how they would perform a particular task.
Launch the practice test below to see this item type in action.
Practice test
Open this test in the Janison test player and complete a speaking item.
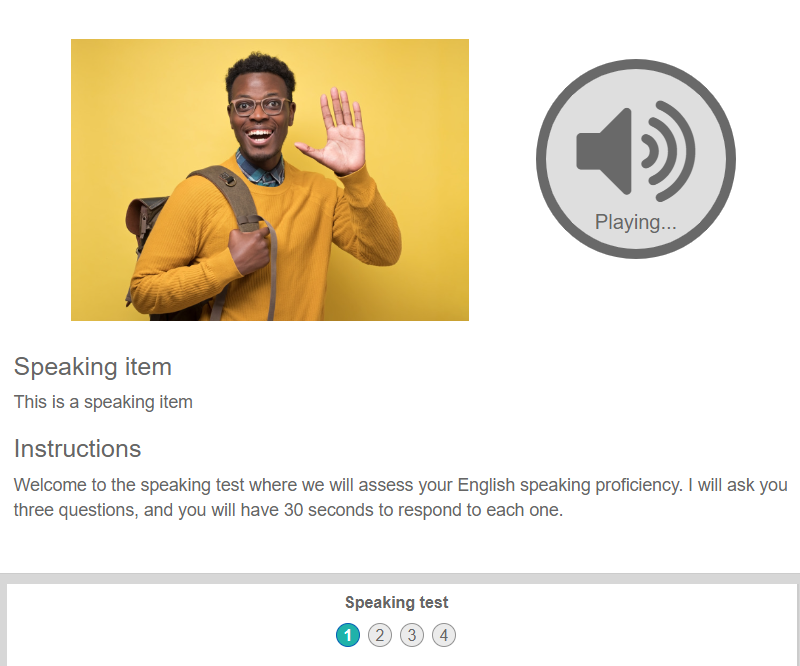
This is the introduction screen with a sound file attached.
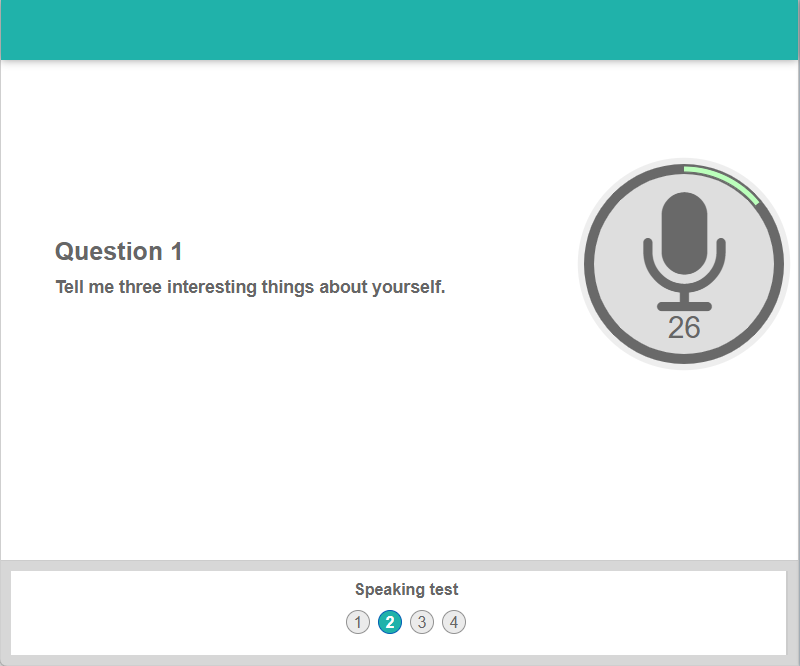
The speaker switches to a microphone and records the test-taker's responses.
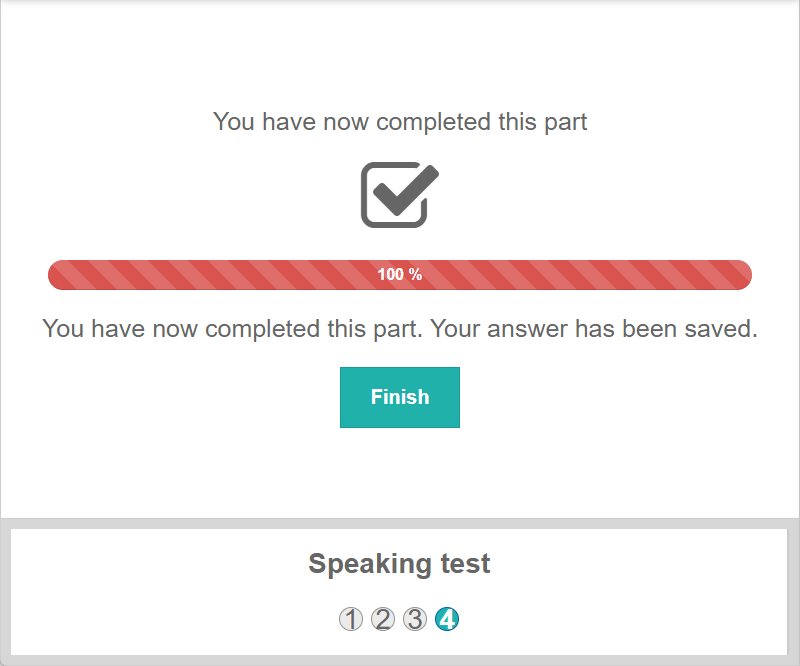
Once complete, the recording is uploaded for the marker to review.
Create a speaking item
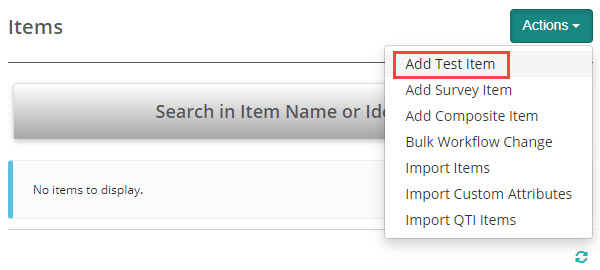
Navigate to Author > Items.
Select Add Test Item from the Actions drop-down.
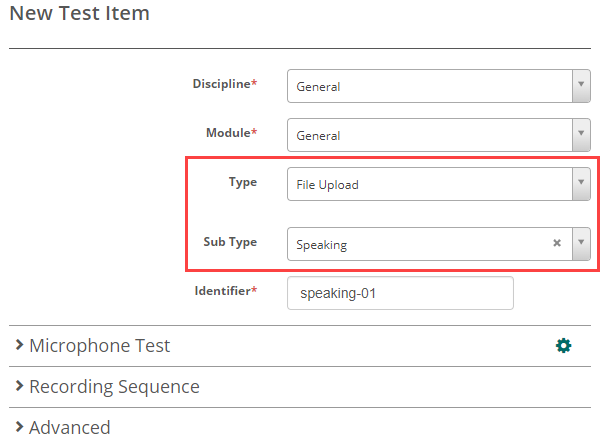
The New Test Item screen displays. Complete the form as required.
Select File Upload as the Type and Speaking as the Sub Type.
Microphone check
Expand the Microphone Test section.
If you check Include Microphone Test, test-takers will have the option to check their mics before they commence the test.
Scroll through the slideshow below to view the mic test screens. The test you see can be customised as detailed below.
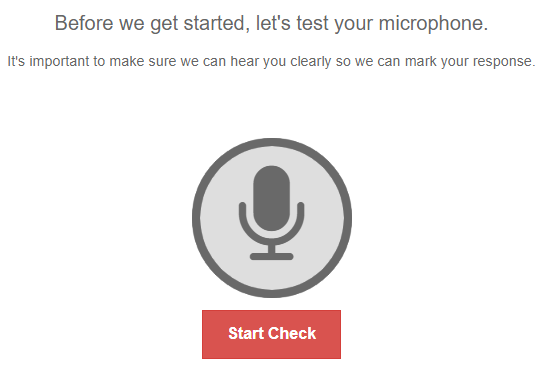
The Landing screen gives test-takers the option to start the check.
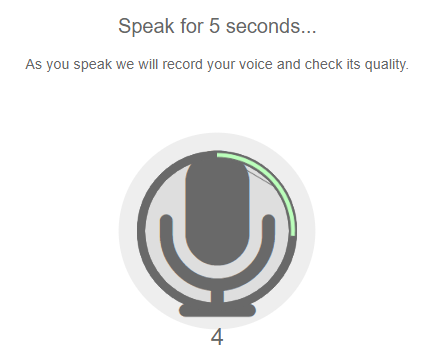
This is the Recording screen where the system captures the test-takers' voices.
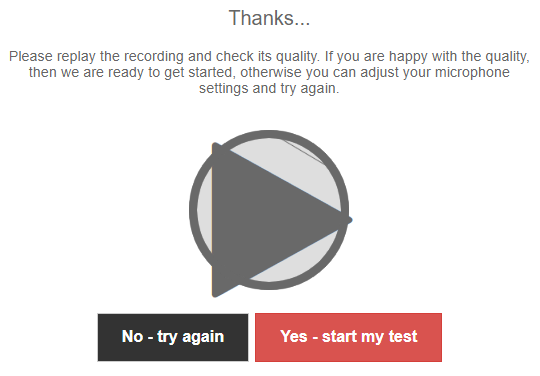
This is the Playback screen where test-takers review their recordings. They can either repeat the check or start the test.
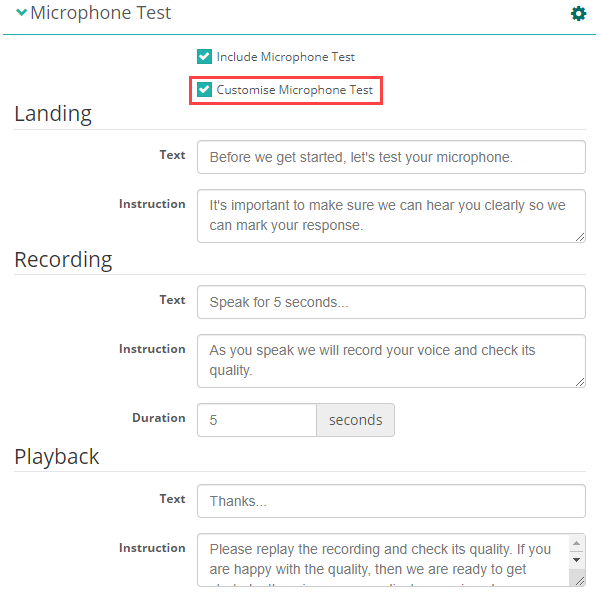
Customise microphone test
Select Customise Microphone Test to edit the text that displays to test-takers. View the text in the screen captures above to understand the difference between the Landing, Recording and Playback screens.
Note
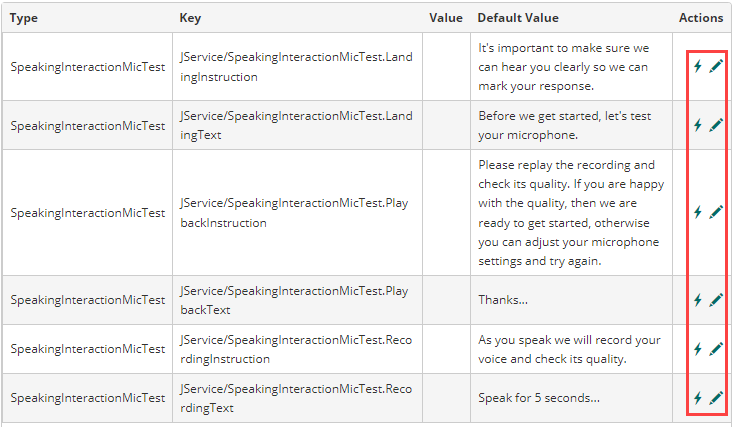
The changes you make here will only impact this item. To make the changes site wide, select the gear icon at the top of the section.


You'll be directed to the string resources screen where you can customise any of these options. Read more about string resources.
Add questions
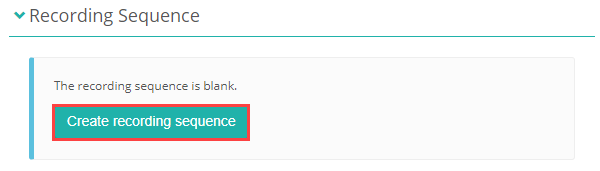
You add your questions in the Recording Sequence section.
Select Create recording sequence.
You now have the option to add 'parts' and 'steps'. A part is the heading for the questions, while the steps are the individual questions.
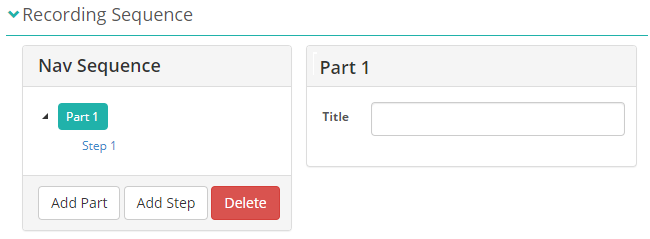
Add a part:
- Select Part 1.
-
Add the Title.
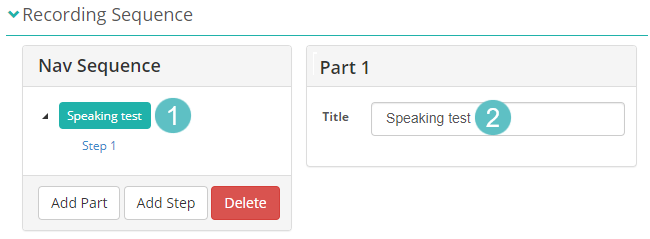
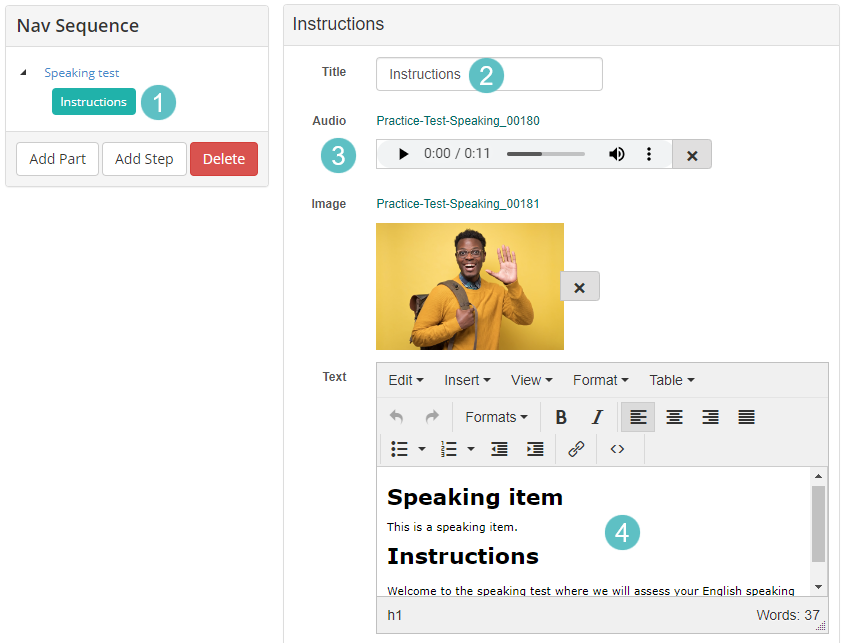
Add step content:
- Select Step 1.
- Enter a Title.
- Optionally upload Audio and an Image.
-
Enter your Text.
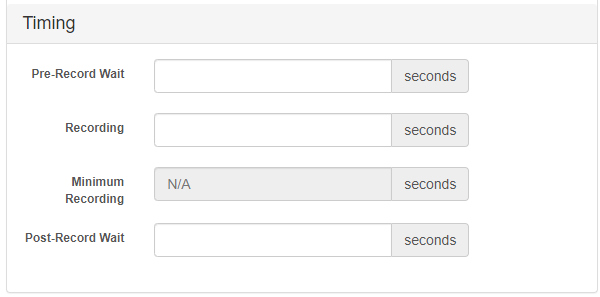
Optionally add timing restrictions to the step.
You can add multiple steps using the Add Step button. In the example below we have added four steps, one for instructions and three questions.
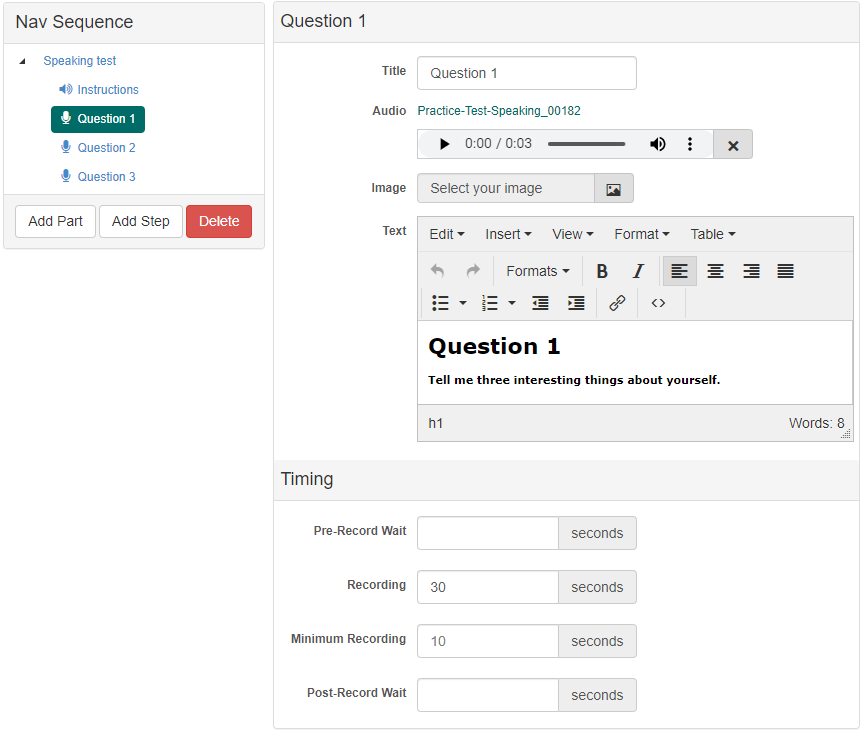
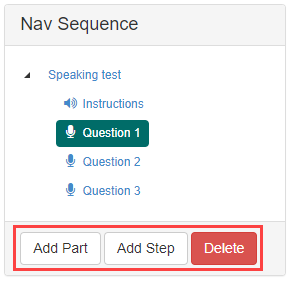
If required, add multiple parts and steps using the buttons at the bottom of the Nav Sequence.
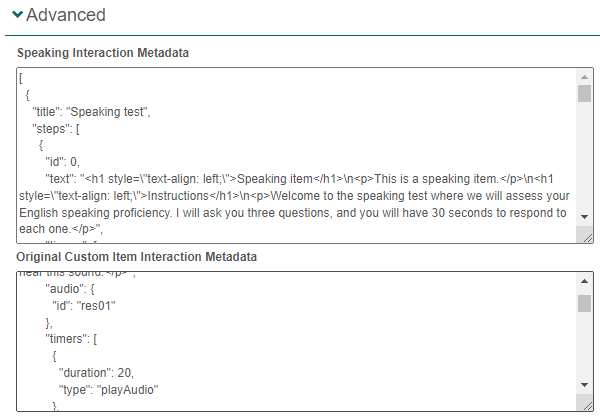
Advanced
The Advanced section of the item allows developers to create item content in a custom sequence. To use this feature, knowledge of JavaScript and JSON would be necessary.
Marking and setting scores
Speaking item types are human marked.
Once you save the item, a Marking section becomes available. This section gives you options to provide instructions and structured guidelines for markers.
Select the pencil icon.

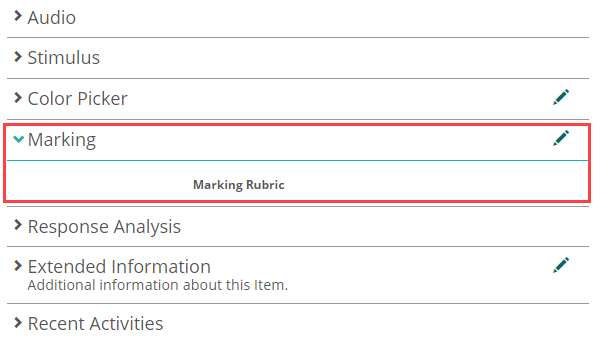
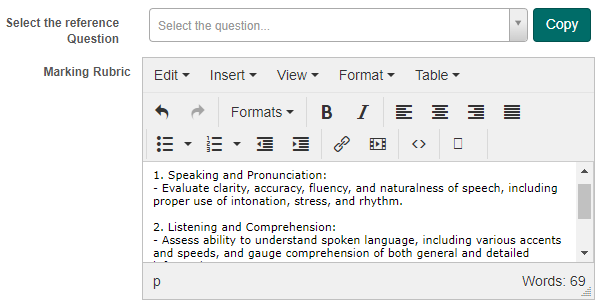
Enter instructions for the marker in the Marking Rubric field.
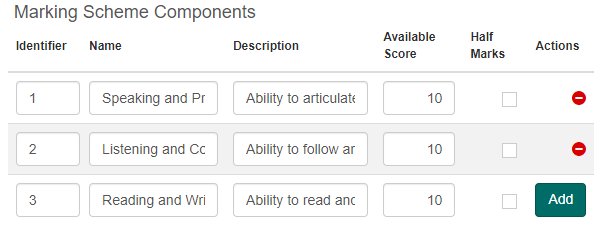
The Marking Scheme Components section provides the facility for markers to assign individual points to specific criteria of the response. You can set a name, add a description and an available score for each component.
In this example, we've added three components and we've set a score for each, making 30 possible points available.
If you have created marking scheme components for a different item but they are appropriate to the current item, you can select the related item from the Select the reference Question dropdown, and the marking scheme components will display. This saves you the step of creating new components.
To do this, navigate to the top of the marking section and select the item from the Select the reference Question dropdown, and then select Copy. The marking scheme components relating to that selected item will appear.

Marking screen
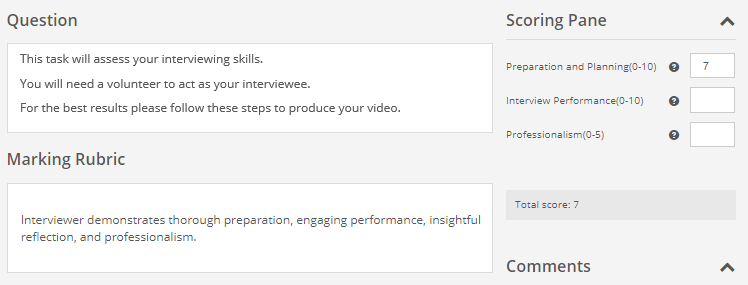
The marking scheme components you created appear in the Scoring Pane on the marking screen. Markers select a score for each component. The Description you entered displays when the marker hovers over the tooltip icon.

The Marking Rubric instructions display below.
Note
The marking screen below is a general example and does not reflect the rubric or marking scheme components set above.
Settings
Warning
File upload items and sub types must be active for this feature to work.
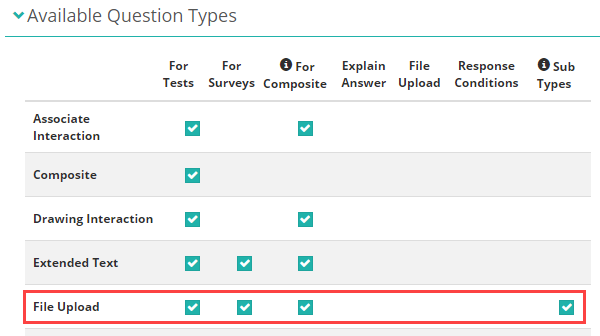
Navigate to Settings > Test Designer Settings and expand the Available Question Types section. Check File Upload For Tests and Sub Types.