Test blueprints
A test blueprint is a reusable template that streamlines the creation of tests. Tests built from blueprints – called blueprinted tests – automatically inherit the configuration settings defined in the blueprint. However, the items in each test can differ, ensuring variation between tests.
Blueprints also include a powerful autofill tool that matches blueprint specifications – such as item types, metadata and quantities – to auto-populate the test with relevant items.
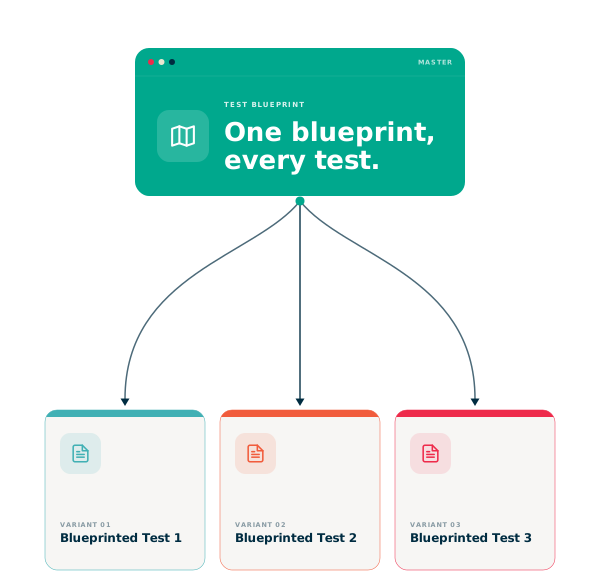
The following steps guide you through creating a test blueprint and generating one or more blueprinted tests ready for delivery.
Step 1: System configuration
Before you can create blueprints, certain system-level settings must be enabled by a user with the Administrator role.
Test designer settings
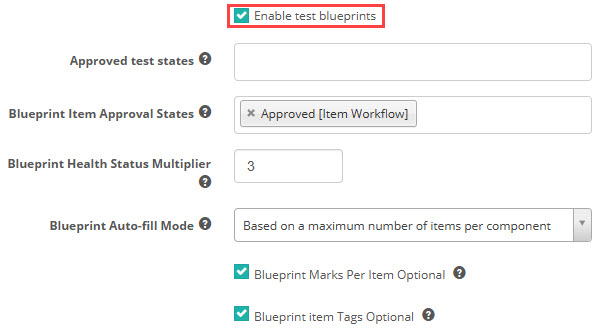
Go to Settings > Test Designer Settings and expand the Test Authoring Settings section.
You must select Enable test blueprints for the blueprint options to display in your menus.
Blueprint Item Approval States — select which workflow states (e.g. Approved) are eligible for blueprint autofill. Only items in the selected states are included when generating blueprinted tests. If you don't select any states, all items are eligible regardless of their workflow state.
Blueprint Health Status Multiplier — enter a number that determines how large your item pool should be for generating varied blueprinted tests. For example, if you want each test to have 5 items and set the multiplier to 3, the item pool should contain at least 15 items (5 × 3). A higher multiplier increases variety by reducing the chance of the same items appearing in multiple tests.
You can override this value at the module level.
Blueprint Auto-fill Mode — choose how autofill populates each component:
- Based on a maximum number of items per component — the system randomly selects and adds only the exact number of items specified in the blueprint component. For example, if the component specifies 5 items, only 5 items are added.
- Based on a minimum number of items per component — the system adds every matching item in the bank, not just the number specified. For example, if the component specifies 5 items but there are 20 items in the bank, all 20 items are added.
Role configurations
While administrators have access by default, you may need to grant permissions to other roles as required.
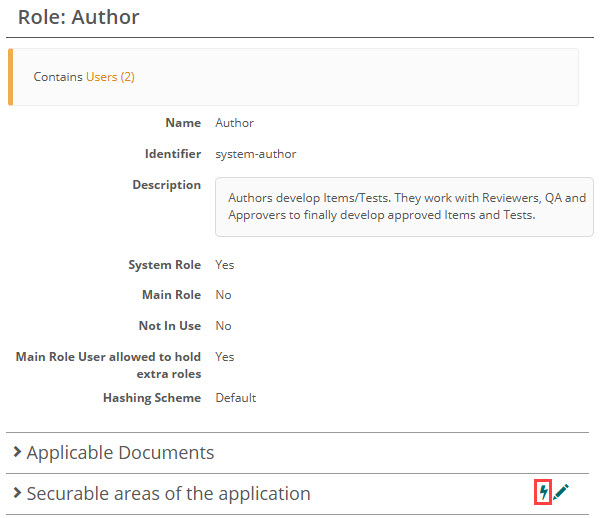
Navigate to Settings > Roles and select a role (for example, Author).
Select the Rapid Edit icon  next to Securable areas of the application.
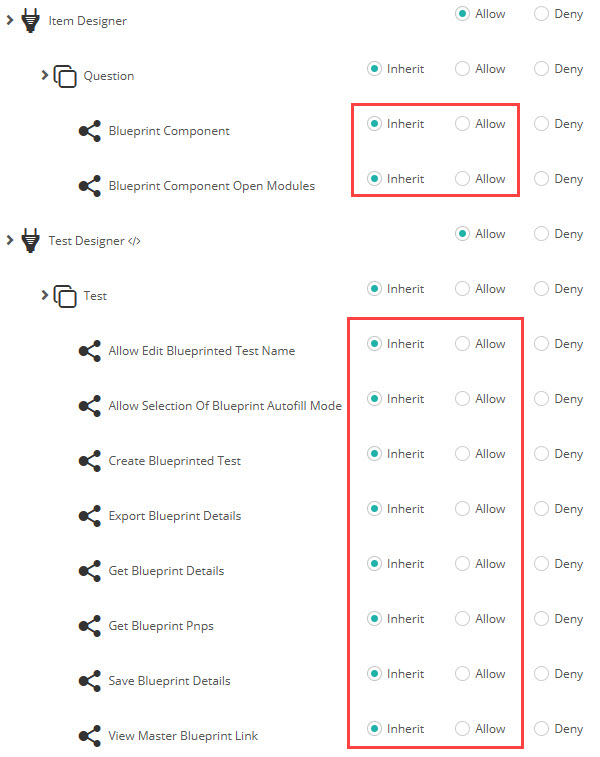
Search for blueprint and enable the following:
Under Item Designer > Question:
- Blueprint Component
- Blueprint Component Open Modules
Under Test Designer > Test, enable the blueprint permissions you need (for example, Create Blueprinted Test).
Step 2: Prerequisites before creating a blueprint
Define tag types
You need to create meaningful tag types and tags to categorise knowledge areas.
In this document, for the topic of Year 6 English, we've used the tag type Key strands, with 3 tags: Language, Literature and Literacy. You can create multiple tag types as needed.
Important
You need to tag all test items.
For more information, see our guide on tags and tag types.
Configure blueprint settings in a module
- Go to Author > Modules.
- Open a module and select the Edit icon next to Blueprint Settings.
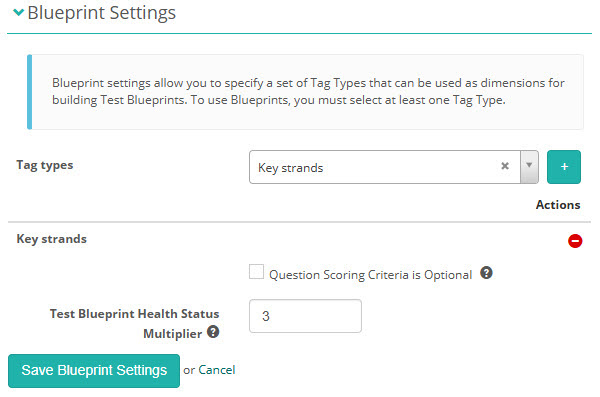
- Select relevant tag types from the drop-down and select + to add each.
-
Set the Test Blueprint Health Status Multiplier if needed. Refer back to the system configuration section above for a quick recap.
Step 3: Create a test blueprint
We're now ready to create the test blueprint.
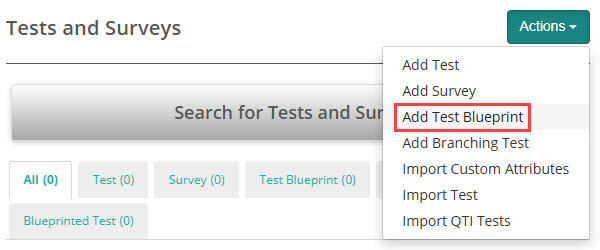
Go to Author > Tests and Surveys. From the Actions drop-down, select Add Test Blueprint.
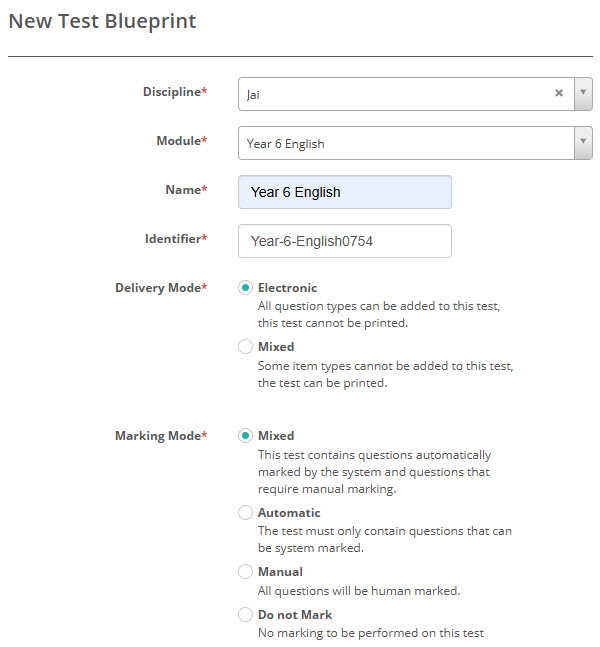
The New Test Blueprint screen opens. It's the same as the new test screen. For more information on completing it, see our guide on authoring tests.
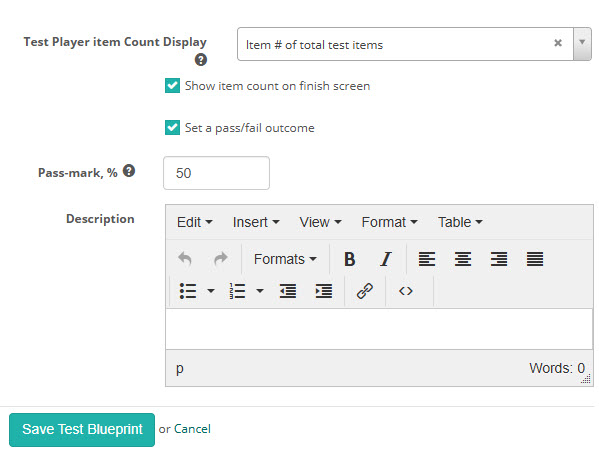
After saving, you'll see extended configuration options including Resit Settings, Timing Options, Sections, Comments, Test Styling, Scoring Options, Advanced Pass/Fail Settings and Results Summary Configuration. These settings are similar to regular tests. For more information, see our guide on authoring tests.
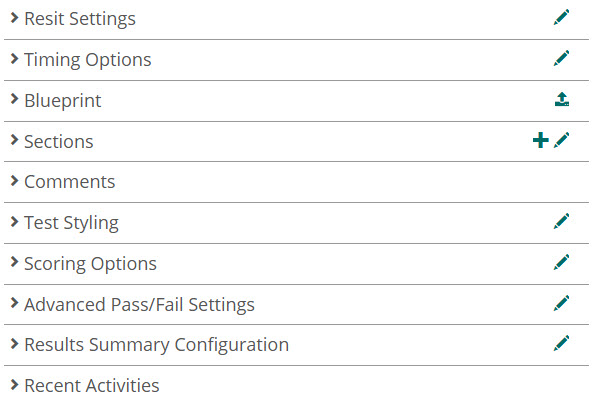
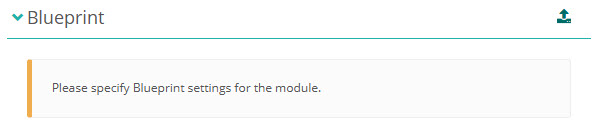
The Blueprint section is specific to the test blueprint and remains empty until components are added to one or more sections.
Step 4: Add sections to the blueprint
The next step is to create the test sections that will contain the items.
Warning
To ensure sections appear correctly in the blueprint, always add them directly from within the blueprint interface. If you add them from the left-hand menu, they won't be available for selection in the blueprint.
Select the + icon on the Sections expandable.

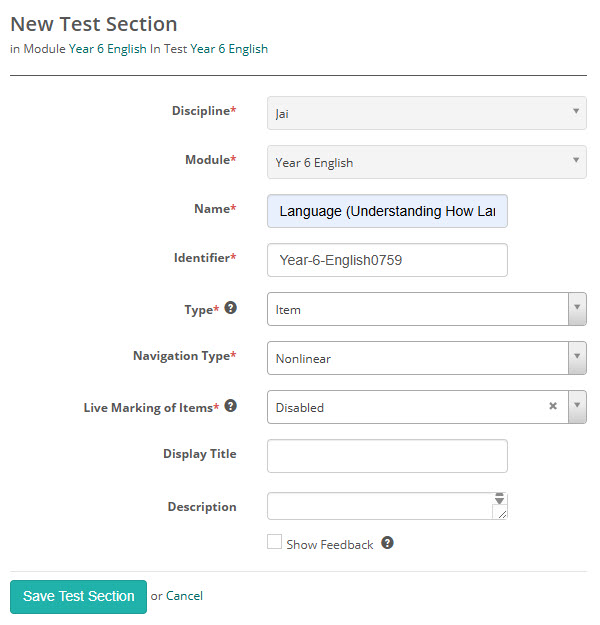
The New Test Section screen opens. It's the same as a regular test section form. For more information on completing it, see our guide on test sections.
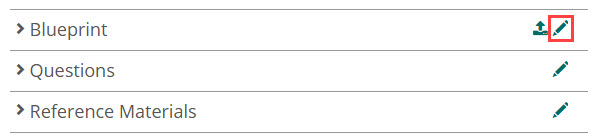
After saving, you'll see extended configuration options including Questions, Reference Materials, Stationery Tools and Comments. These settings are similar to regular test sections. For more information, see our guide on test sections.
Important
Only Item sections display in the test blueprint component section.
Configure blueprint components
The next step is to add blueprint components. These components define which items the system should include in each test section.
Select the edit pencil icon  on the Blueprint section.
Select Add component.
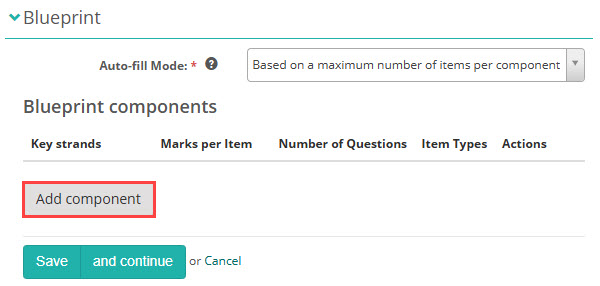
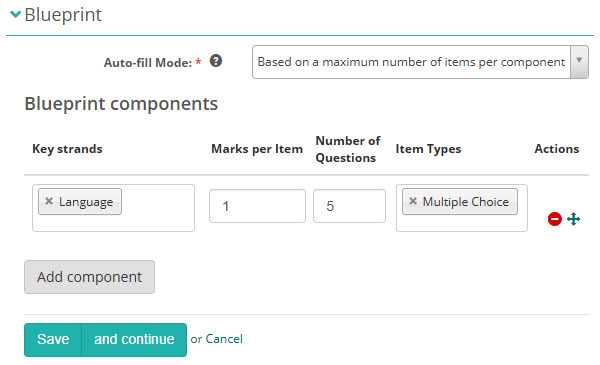
Select a tag and set Marks per Item, Number of Questions and Item Types to autofill. In the example below, we want the system to autofill 5 Multiple Choice items tagged with Language (a tag in the Key strands tag type). Each item is worth 1 mark.
Component status
After you save the component, the system displays its Status. This tells you whether enough matching items exist to generate varied tests, based on the Test Blueprint Health Status Multiplier (set to 3 at the module level in this example).
The multiplier scales the number of items you need with the number of questions you request. The system multiplies your Number of Questions by the multiplier to determine the minimum item pool required for a thumbs-up.
Suppose your item pool contains 20 matching items:
- If you set Number of Questions to 5, the system needs 15 items (5 × 3). With 20 items available, the pool is sufficient and the Status column shows a thumbs-up.
- If you set Number of Questions to 10, the system needs 30 items (10 × 3). With only 20 items available, the pool falls short and the Status column shows a warning, indicating an insufficient item pool.
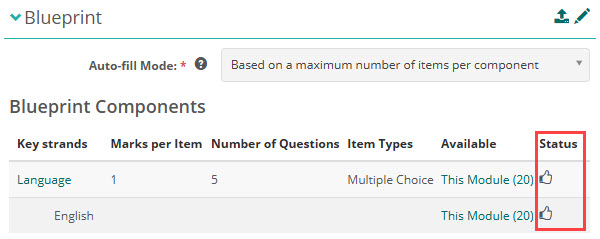
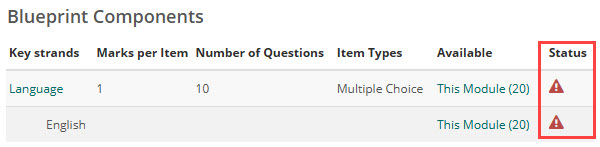
Once you have the thumbs-up in the Status column, you can add additional components and test sections as needed.
Step 5: Add items
The next step is to create items and add them to the test. You can create items either through the left-hand menu or directly from within the section.
Create items from the left-hand menu
Note
If you create items using the menu, you'll need to manually add them to the appropriate section afterwards.
Go to Author > Items and select Add Test Item from the Actions menu.
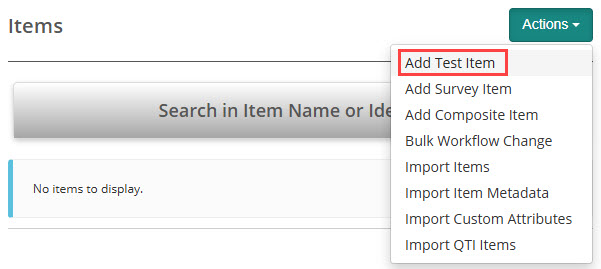
The New Test Item screen opens.
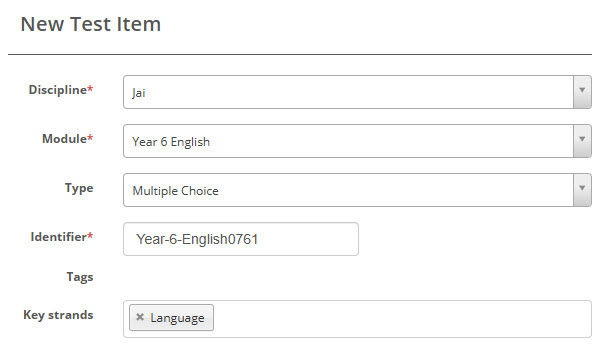
The next steps vary depending on the type of item you want to create. For detailed instructions, see our guide on item types.
Create items from within a section
If you create new items from within the section, they're automatically added to it.
Select the edit pencil icon on the Questions section.

Select Create a new Question.
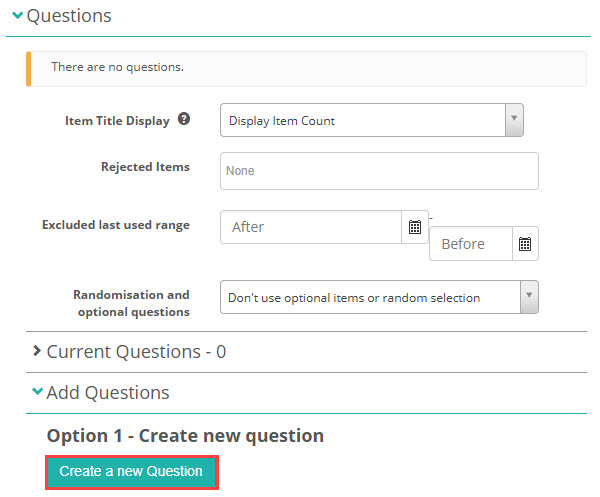
This opens the New Test Item screen, as described earlier. Follow the same steps to proceed.
Tag items
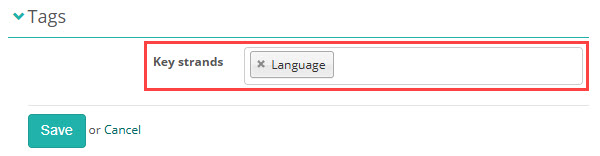
Add one or more tags to each item, either while creating it or after saving. To add tags to existing items, select the edit pencil icon on the Tags section.
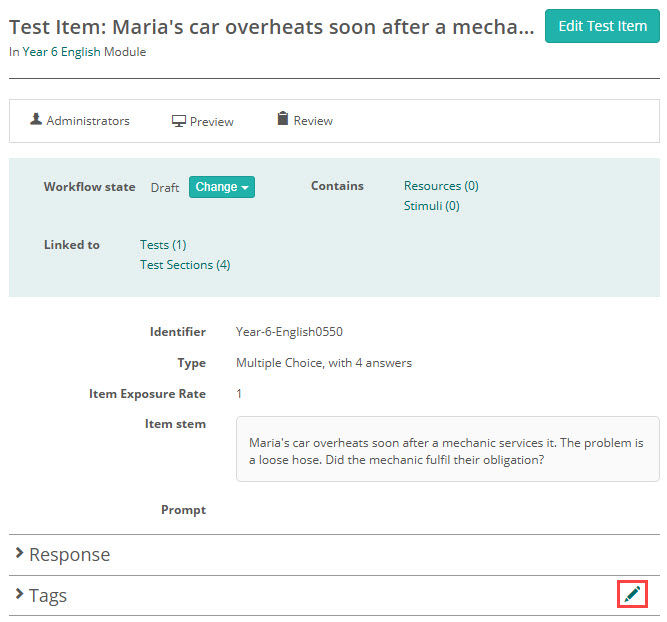
Select one or more tags.
Add items to the test section
If you created the items from the left-hand menu, you need to add them to the section.
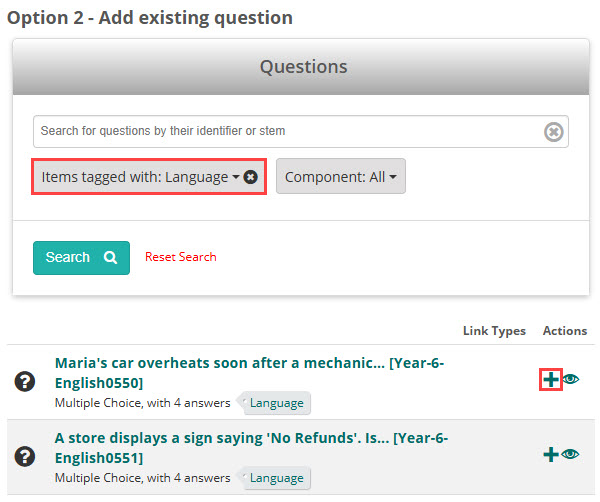
Select the edit pencil icon on the Questions section, then scroll to Option 2 – Add existing question.
Use the search and filters to find the items you need. In the screenshot example, we've filtered for all items tagged with Language. Select the + icon to add the required items.
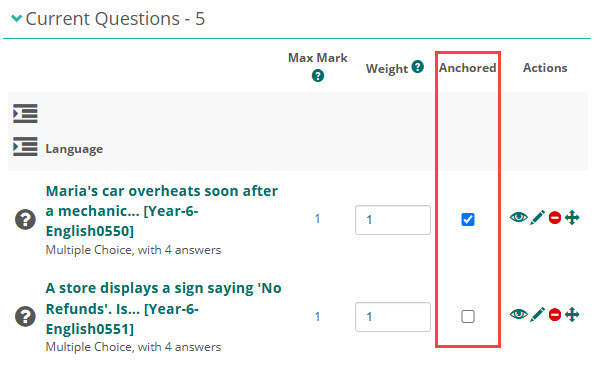
Adding items to a section doesn't define the final item pool – when you generate a test from the blueprint, those items are replaced with items that match the blueprint's criteria. However, you can Anchor specific items to keep them in place. Anchored items are included in every test generated from that blueprint, regardless of future autofills.
Important
You only need to add the number of items specified for the component. In this example, that means adding 5 items to the section.
These 5 items populate the section itself. They're separate from the wider matching pool the health status checks: for a healthy status and varied autofill, your item bank still needs Number of Questions × the multiplier matching items overall — 15 (5 × 3) in this example.
Step 6: Create blueprinted test
Once you've completed your test blueprint and created enough items to satisfy the component requirements, you're ready to generate one or more blueprinted tests.
Open the required test blueprint. From the Actions drop-down, select Create Blueprinted Test.
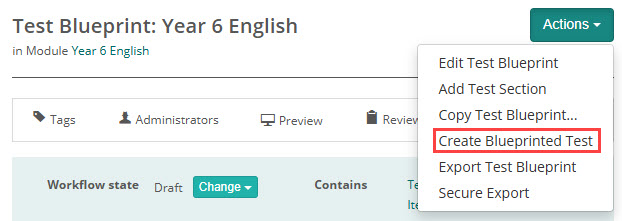
The system generates a blueprinted test with limited editing capabilities.
Tip
The system automatically appends the date and time to the name.
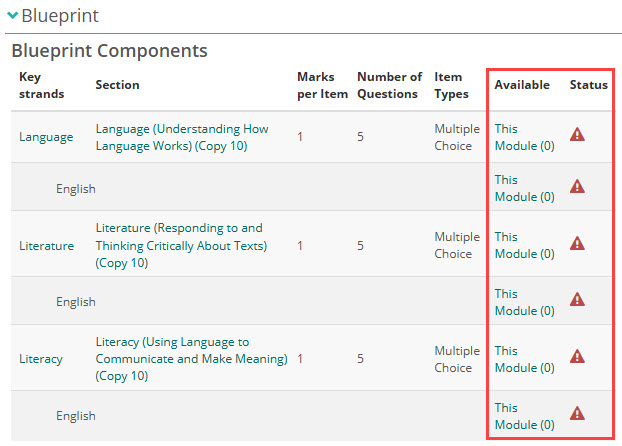
Most settings in a blueprinted test are the same as in a regular test, with the addition of the Blueprint configuration options. Initially, the Status column in the Blueprint section shows a red warning icon, indicating that more items are needed. Open each item section and use the autofill feature to populate items.
Step 7: Autofill items in the test sections
Autofill randomly selects items from the item bank to populate the test sections.
- Open the Sections expandable.
-
Open the relevant item test section and select the autofill wand icon
 on the Blueprint section.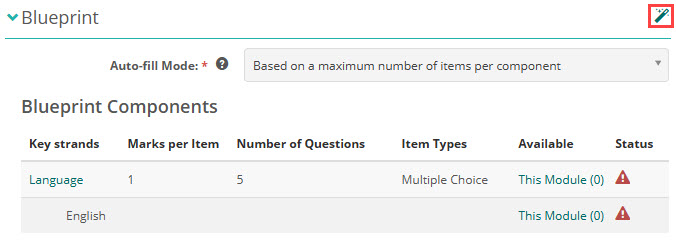
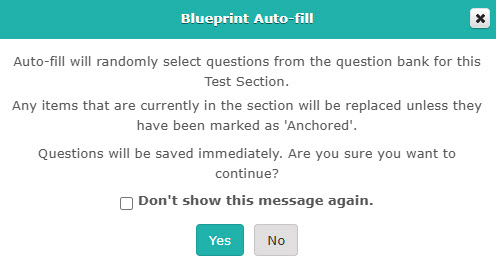
Select Yes to confirm.
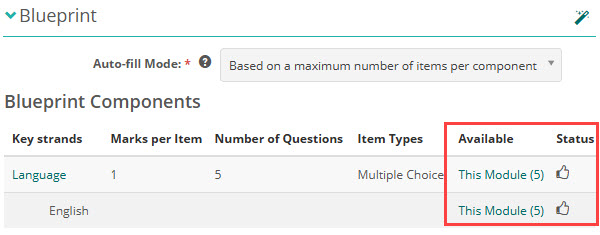
The system attaches items that match the component criteria. The Status updates to the thumbs-up icon  .
.
Important
Repeat the autofill steps for each section.
To view the attached items, expand the Items expandable below.
Edit the item bank after autofill
You can further customise the test by manually editing the items in each section.
Reject items
Remove items using the red Remove icon. Rejected items are excluded from future autofills for that section. They appear in the Rejected Items list above and can be restored from there.
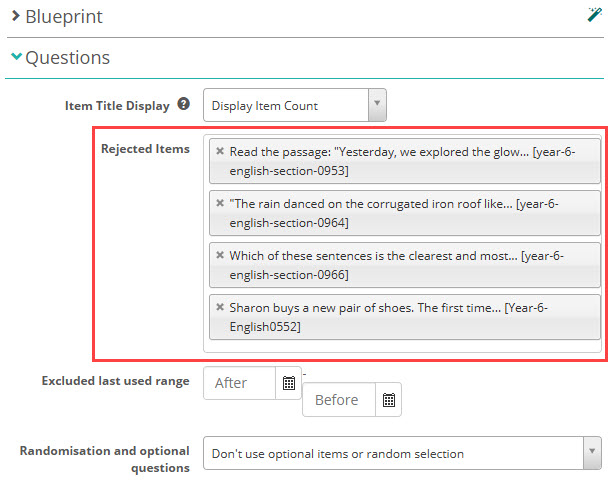
Exclude last used range
Set the Excluded last used range dates to exclude recently used items from being autofilled.
Once complete, you can add the blueprinted test to an assessment event for delivery to test-takers.
Settings
Blueprints are controlled by the settings below. Steps 1 and 2 walk through configuring them — this section is a quick reference to what affects blueprints and where each setting lives.
Administrators configure the tenant-level settings at Settings > Test Designer Settings, in the Test Authoring Settings section:
- Enable test blueprints, Blueprint Item Approval States, Blueprint Health Status Multiplier and Blueprint Auto-fill Mode — see Step 1 for what each does.
- Blueprint Marks Per Item Optional and Blueprint item Tags Optional — make the marks and tag fields optional on blueprint components.
- Enable Cross Module Item Selection in Blueprint Auto-fill — lets autofill draw items from more than one module.
Administrators grant access at Settings > Roles: under Item Designer > Question, enable Blueprint Component and Blueprint Component Open Modules; under Test Designer > Test, enable the blueprint permissions you need (such as Create Blueprinted Test). See Step 1.
At the module level, an author configures Blueprint Settings on the module's details page (Author > Modules) — the Tag types used as blueprint dimensions and the Test Blueprint Health Status Multiplier. See Step 2.