Test centre/Invigilator dashboard
The Test Centre Dashboard, sometimes called the Invigilator Dashboard, provides a summary of information relating to your test delivery and gives you access to create sessions.
Important
The sections, dropdowns, links, and icons visible on the dashboard vary depending on your user role. This guide is written from the perspective of an Administrator, which means all available features are shown. If you're logged in with a different role, your view may be limited accordingly.
There are several key sections within the Dashboard that support test session administration. We'll explore each of these next.


View and create test sessions
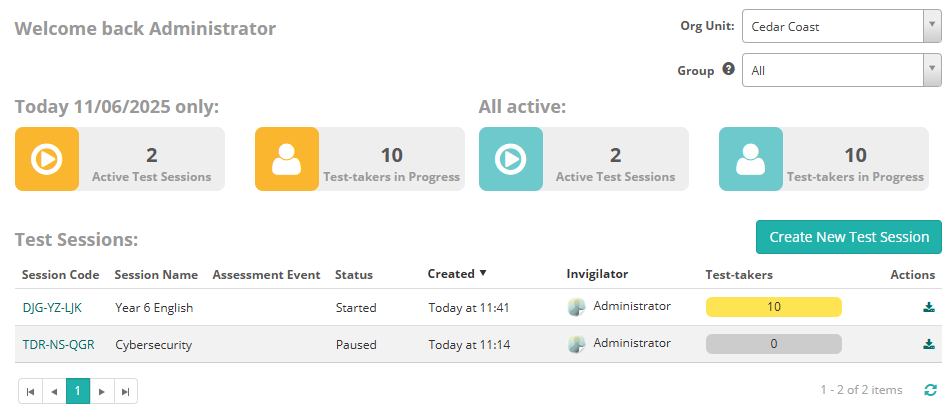
This is the top section of the dashboard.
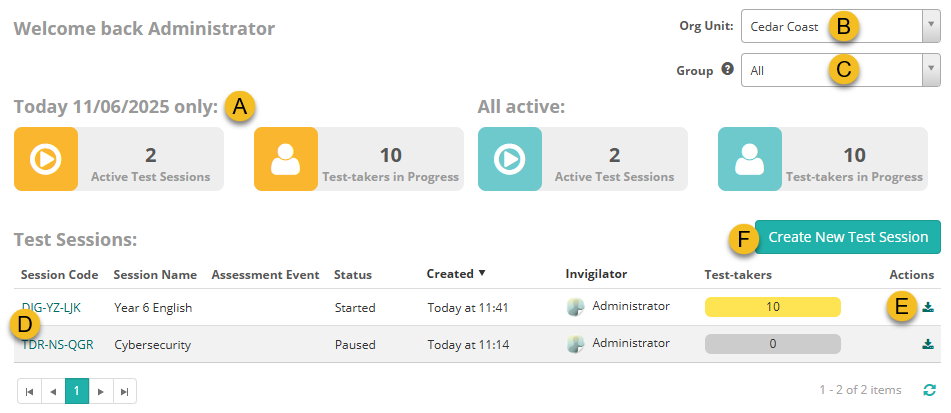
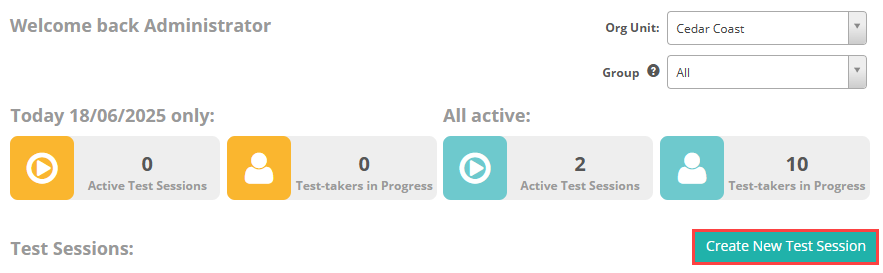
A The tiles at the top of the dashboard provide a summary of the Active Sessions and Test-takers in Progress for the selected Org Unit and Group.
B If you are an Invigilator for more than one test centre, you can select a different one using the Org Unit drop-down.
C Selecting a Group here will filter the grids below.
The Test Sessions section displays information on the sessions currently running, including their status, when they were created, the Invigilator and the progress of test-takers. You can sort the information by Created, Invigilator or Room (where applicable), by selecting the column header.
D Select the Session Code to open the test session.
E Select the icon to download a report containing details of the test session. This includes assessment event information, disability adjustment codes, and test-taker data such as start and end times, among other information.
F Select the button to create a test session, then follow the on-screen instructions. See the topic below for steps to create a test session.
Assessment events
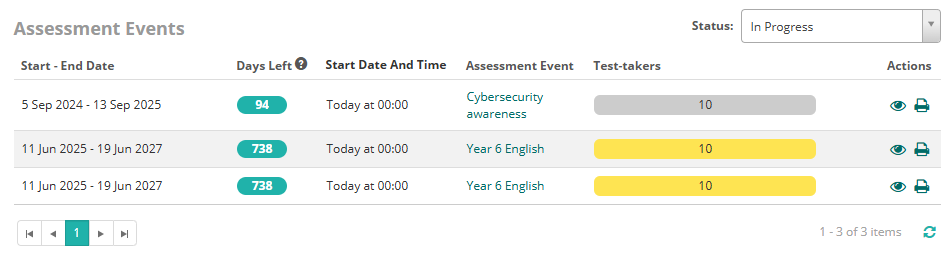
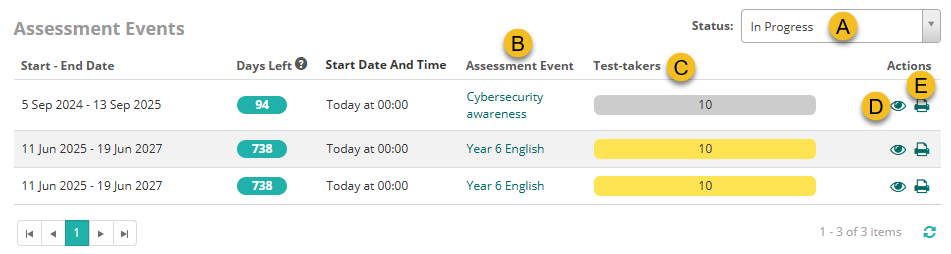
The Assessment Events section displays information about each of the assessment events and the progress of the candidates undertaking the event. You can sort the information by Start Date & Time by selecting the column header.
There are a number of things you can do from here:
A Status: Allows you to filter events based on their status. Available options include:
- In Progress
- Starting in Next Hour
- All for Today
- Completed
- Upcoming
B Assessment Event: Provides a link to the Assessment Event details page, where you can manage the event.
C Test-takers: When you hover over the progress bars, a tooltip displays the number of candidates and their current status.
D Preview: This icon in the Actions column lets you preview the unrandomised version of the test.
E Print One-Time Code Slips: This icon in the Actions column lets you print one-time code slips for candidates.
Test-takers
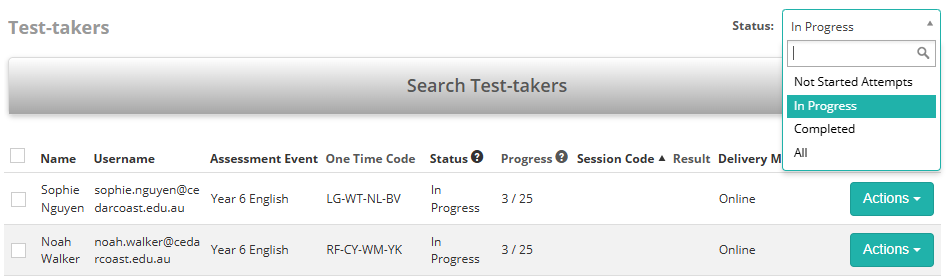
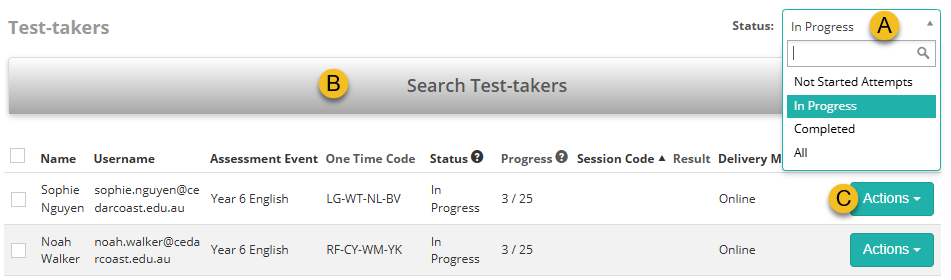
The Test-takers section displays information about candidates, their test sessions, and their progress. You can sort the data by Name, Assessment Event, Status, Delivery Mode, or Reconciled by selecting the relevant column header.
You can perform several actions from this section:
A Status: Allows you to filter test-takers based on their current status. Available options include:
- Not Started Attempts
- In Progress
- Completed
- All
B Search: Enables you to search for a specific test-taker.
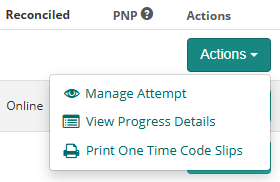
C Actions: There are three actions available:
- Manage Attempt
- View Progress Details
- Print One Time code Slips
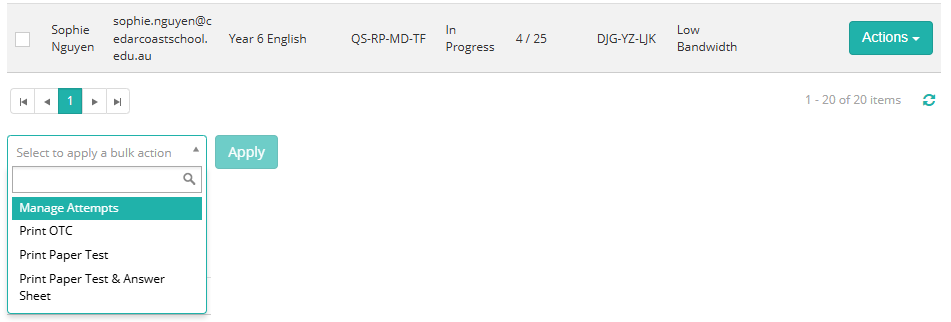
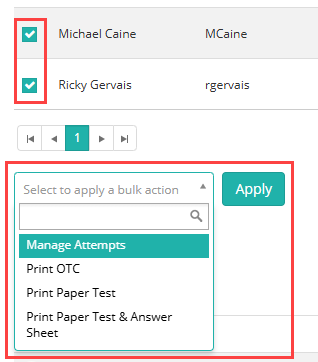
At the bottom of the Test-takers section, a bulk actions filter allows you to apply actions to multiple test-takers by selecting their checkboxes on the left, choosing an action, and then clicking Apply.
Invigilators
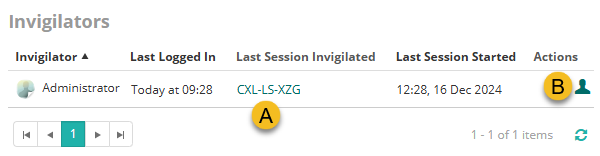
The Invigilators section provides details about the invigilators. From here, you can:
A Select the link under Last Session Invigilated to open the Test Session Dashboard.
B Open the details page for the invigilator.
Janison Replay
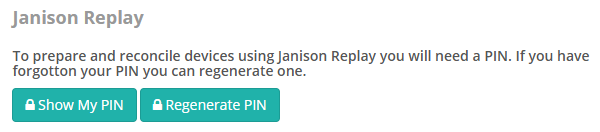
The Janison Replay section provides access to your PIN which will be needed to prepare or reconcile Replay. If you already have a PIN you can view it here or regenerate another PIN.
Create New Test Session
The Create New Test Session button is located near the top of the screen. Select Create New Test Session.
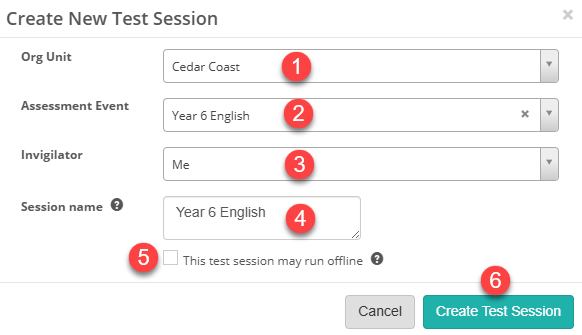
The Create New Test Session modal will appear (see below).
- The Org Unit selected on the dashboard is pre-filled. You can change this if needed.
- Select the Assessment Event. If the session is intended for more than one Assessment Event, leave this field unselected.
- Select the Invigilator who will administer the test.
- Optionally, enter a Session Name. This will display at the top of the Session Administration dashboard.
- Optionally, select This test session may run offline. This indicates to the invigilator that the session may include Test-takers using Replay in offline mode. In this case, they may not immediately see Test-takers enter the session, but should wait for all Replay devices to be reconciled before finalising the session.
-
Select Create Test Session.
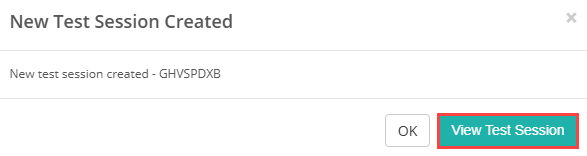
The New Test Session Created modal displays.
Select View Test Session to open the Test Sessions Administration dashboard.