Create custom attributes
Every custom attribute starts with the same main settings — name, identifier, description and hint text — described in Add a custom attribute. Once you select a Type, the remaining fields depend on the type you chose. This page covers the type-specific steps, then the linking and saving steps that every type shares.
For what each type looks like to end users, see custom attribute types.
Boolean
A Boolean attribute has no type-specific fields.
- Select Boolean from the Type dropdown.
- Link the attribute and save. For a Boolean, the Caption you enter becomes the label shown next to the checkbox.
Note
If you check Mandatory on a linked object, end users cannot leave the checkbox blank — they must check it to save the form.
Custom View
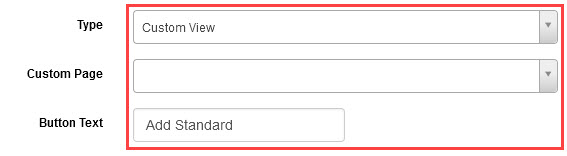
- Select Custom View from the Type dropdown.
- Select a previously built custom page from the Custom Page dropdown.
-
Enter the text to show on the custom view's button in the Button Text field.
-
Link the attribute and save. The Caption becomes the label next to the custom view button.
Tip
A custom page must be built before it can be used in a custom view attribute — generally a Janison developer builds it. Contact the Janison customer services team for more information.
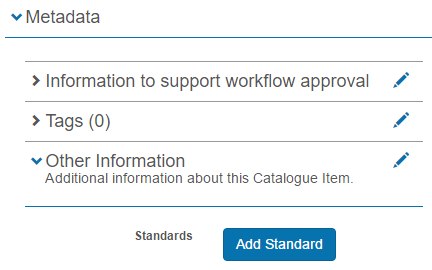
For a custom attribute to be used in a catalogue item, it must first be added to a custom attribute set. In this example, a Standards Selector custom view was added to a set and now appears in the Metadata expandable section when creating a catalogue item:
Date
A Date attribute has no type-specific fields.
- Select Date from the Type dropdown.
- Link the attribute and save. End users see a date field with a date picker.
Date Time
A Date Time attribute has no type-specific fields.
- Select Date Time from the Type dropdown.
- Link the attribute and save. End users see a date and time field with date and time pickers.
Float
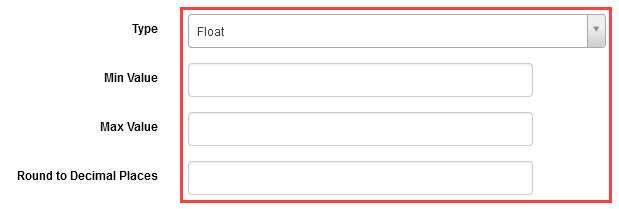
- Select Float from the Type dropdown.
- Enter a minimum allowed value in the Min Value field (optional).
- Enter a maximum allowed value in the Max Value field (optional).
-
Enter the number of decimal places to round to in the Round to Decimal Places field (optional). Janison Insights rounds the value entered by the end user to this number of decimal places.
Image
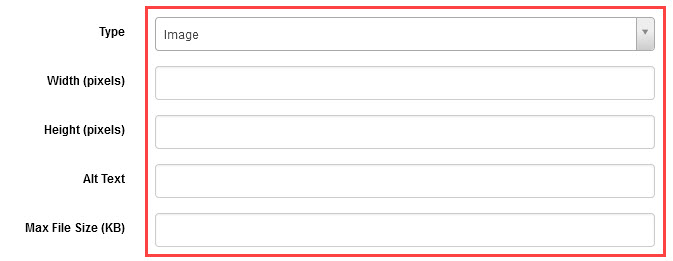
- Select Image from the Type dropdown.
- Enter a width in the Width (pixels) field (optional). The system scales the uploaded image to this width.
-
Enter a height in the Height (pixels) field (optional). The system scales the uploaded image to this height.
Tip
Entering both a width and a height will distort the uploaded image, unless the image is already that size or ratio.
-
Enter alternative text in the Alt text field (optional). This displays if images are turned off in the browser, and is read by screen readers.
-
Enter a maximum upload size in the Max File Size (KB) field (optional). End users cannot upload an image larger than this.
Integer
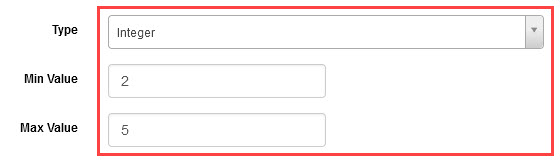
- Select Integer from the Type dropdown.
- Enter a minimum allowed value in the Min Value field (optional).
-
Enter a maximum allowed value in the Max Value field (optional).
List
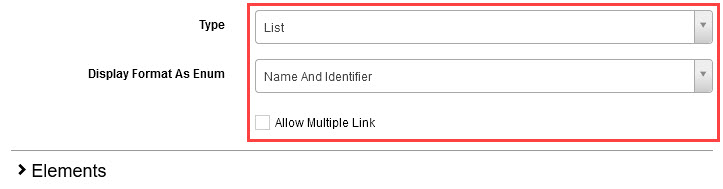
- Select List from the Type dropdown.
-
Select an option from the Display Format as Enum dropdown. This determines the format of what displays in the list for the end user — for example, Name and Identifier shows both fields in the list. The list elements themselves are set in step 4.
-
Check Allow Multiple Link (optional).
If checked, the elements appear as checkboxes and end users can select more than one:
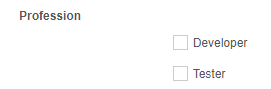
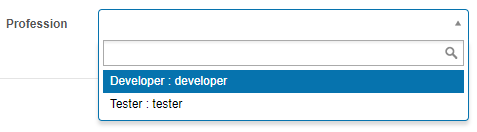
If unchecked, the elements display in a dropdown and end users can select only one.
-
Select the Elements expandable section, then for each element to display in the list, add a Name, Identifier and Value as required.
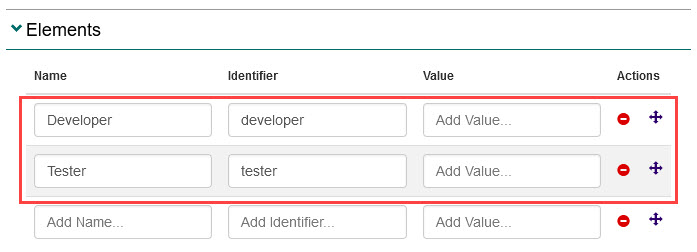
Drag the Move icon to reorder elements — this sets the order end users see. Select the Remove icon next to an element to remove it.
Memo
- Select Memo from the Type dropdown.
-
Check Use Rich Text Editor (optional).

Checking this sets the free-text field to rich text, letting end users format what they enter. It also enables two further options:
-
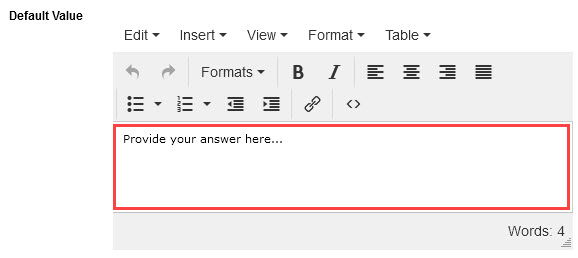
Default Value — text that displays in the field to the end user, useful as a prompt or example answer. Enter it in the Default Value field and format it with the options above the field.
-
Word Limit — the maximum number of words the end user can enter. Type a number or use the up and down arrows.

-
Selection
- Select Selection from the Type dropdown.
-
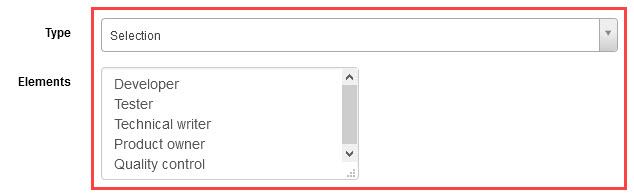
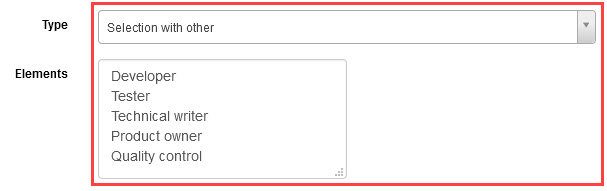
Enter the required elements (the items shown in the selection list) in the Elements field — type an element, press Enter to start a new line, and enter the next.
Selection with other
- Select Selection with other from the Type dropdown.
-
Enter the required elements in the Elements field — type an element, press Enter to start a new line, and enter the next. End users get an additional 'Other' option with a free-text field.
Selection from system entity
- Select Selection from system entity from the Type dropdown.
-
Select the entity type to show in the list from the Entity Type dropdown:
-
Group — shows the end user a list of groups. Selecting this displays the Associated Group Types field; to filter the list to groups of a specified type, enter the group type and select it from the results.

-
Organisation — shows a list of organisations.
- Org Unit — shows a list of organisation units.

-
String
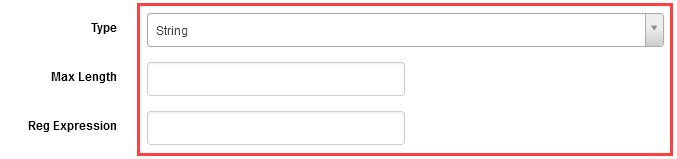
- Select String from the Type dropdown.
- Enter a maximum number of characters in the Max Length field (optional).
-
Enter a regular expression in the Reg Expression field (optional). This ensures the text the end user enters matches a required pattern.
Link the attribute and save
Every custom attribute type finishes with the same two steps.
-
Select the Linked Objects expandable section, then complete the following for each place the custom attribute needs to display:
- Select the system object from the Object dropdown. This is where the field displays for end users.
- Enter text in the Caption field. This is the label shown with the field.
- Enter text in the Hint Text field (optional). End users see it when hovering over the question-mark Hint icon next to the attribute.
- Check Mandatory to make the field one that must be completed (optional).
- Check Inactive to hide the field from end users in that location (optional).
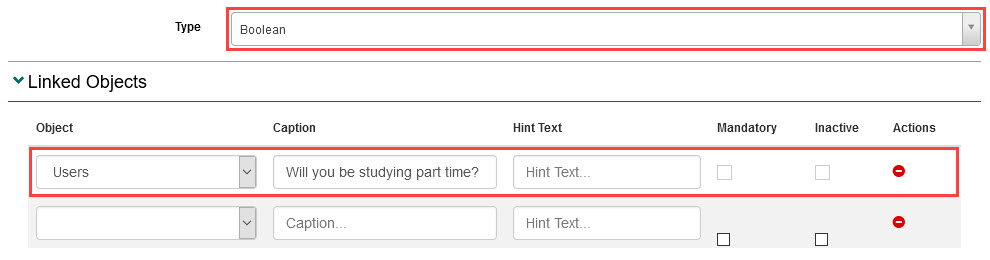
To remove a link between a system object and the custom attribute, select the Remove icon next to it.
-
Select Save Custom Attribute.