Assessment events
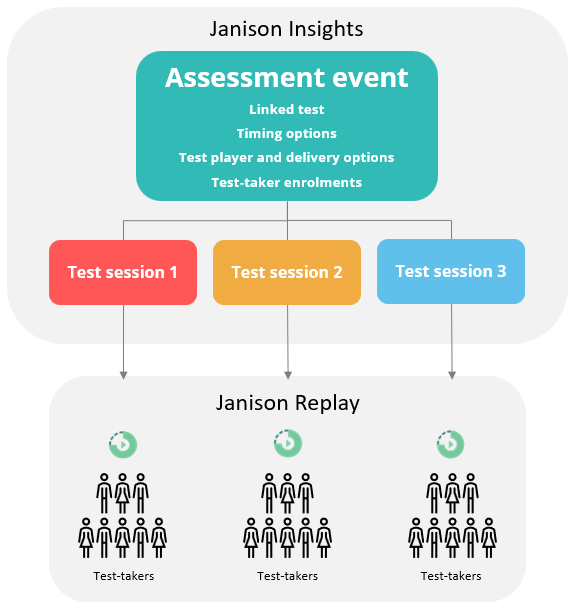
In the Janison Insights platform, an Assessment Event is a feature used to manage and deliver tests to test-takers. This feature allows administrators to create an event, link it to a test, configure settings, and enrol test-takers.
Tests are then delivered through Test Sessions, with test-takers completing their tests in Janison Replay, the test delivery app. Invigilators manage and monitor test-takers via the Test Sessions Administration screen. From this interface, they can start test sessions, track test-taker progress, manage test-takers and ensure the smooth operation of the testing process.
Create an assessment event
-
Go to Deliver > Assessment Events
-
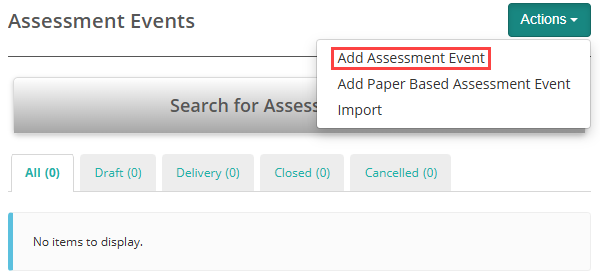
Select Actions > Add Assessment Event
-
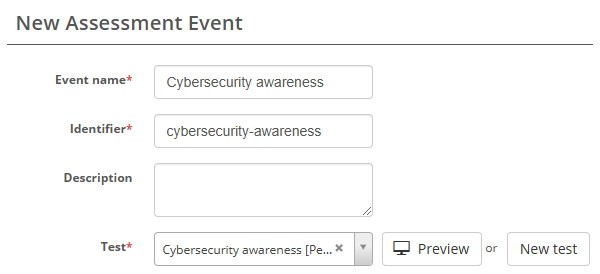
The New Assessment Event screen displays
-
Complete the form as required
There are several options available for scheduling your event:
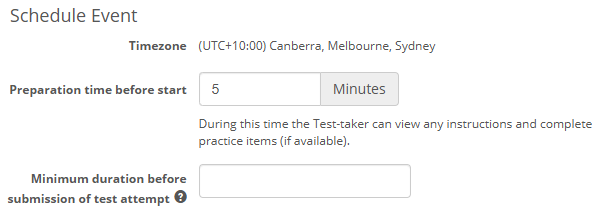
Preparation Time Before Start: This period allows test-takers to view instructions and complete practice items. The duration is set in minutes.
Minimum Duration Before Submission: Specify the minimum time (in minutes) that a test-taker must spend on the test before they can submit their attempt. Invigilators can submit the test at any time, regardless of this setting.
Three scheduling modes are available: Specific Date, Booking Window, and Anytime. Let's explore these options in more detail.
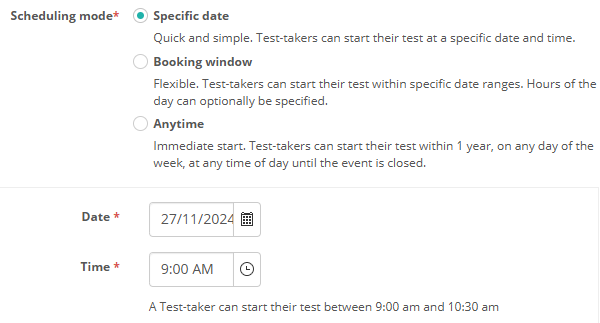
Specific Date: Test-takers are limited to taking the test on the date and time specified.
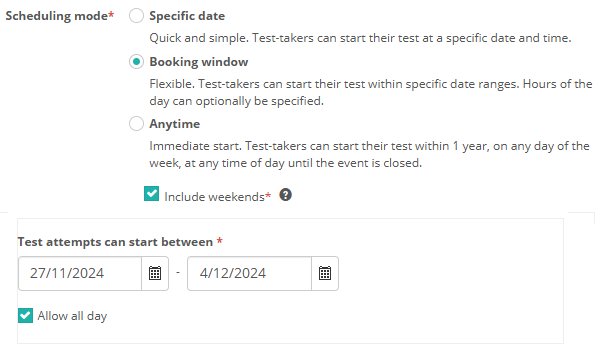
Booking Window: Test-takers can start their test within a defined date range. Optionally, you can specify hours of the day or select Allow all day to enable testing at any time of day.
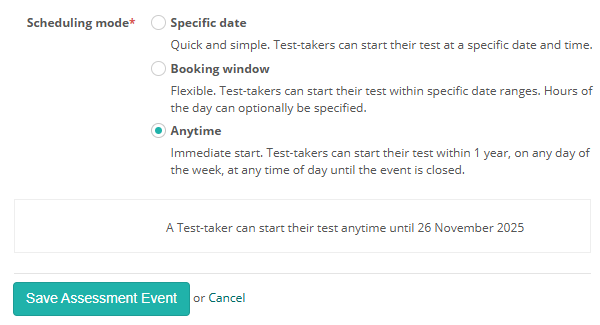
Anytime: Test-takers can start their test at any time, within one year from the event start, on any day of the week and any time of day, until the event is closed.
After saving the assessment event, the details page displays. This page includes several sections where you can configure settings and manage enrolments.
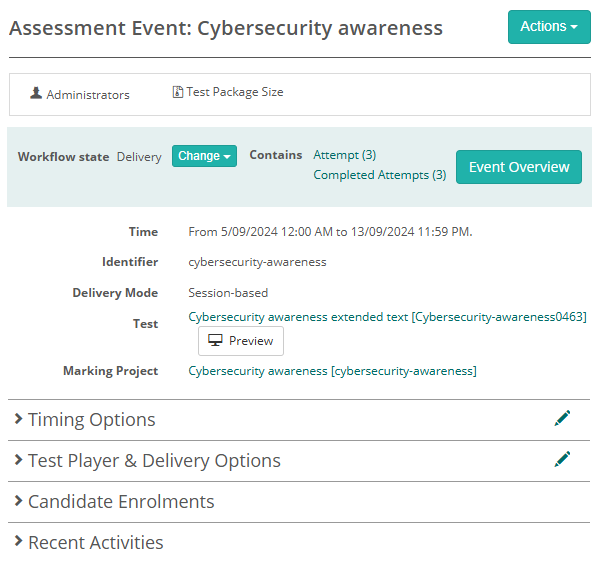
Timing Options
You can modify the Timing Options configured during the creation of the assessment event. Refer to the section above for detailed instructions.
Test Player & Delivery Options
This expandable section contains three subsections:
- Test Player Display Settings
- Sessionless Delivery Settings
- Test Delivery/Replay Settings
Let's explore each of these in detail.
Test Player Display Settings
These settings allow you to customise the information displayed in the test player's title, such as item counts, progress indicators, and section titles.
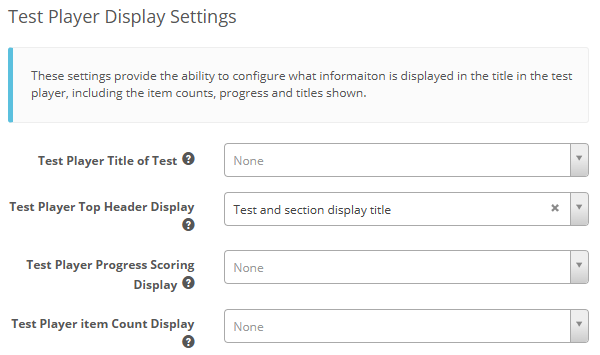
Test Player Title of Test
This allows you to select what information you want shown to the Test-taker in Test player 2.
Options are:
- Default (Assessment event name)
- Test name
- Assessment event name
- Other. Selecting Other displays a text entry box to give you the option to enter a name or leave it blank to have no information about the test or assessment event name displayed.
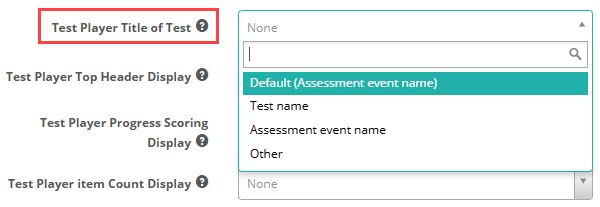
Test Player Top Header Display
This allows you to select the name or title of the test and or sections you want displayed to the Test-taker in the title bar of the test player.
Options are:
- Test name
- Assessment event name
- Section display title
- Test and section display title
- Test display title
- Other
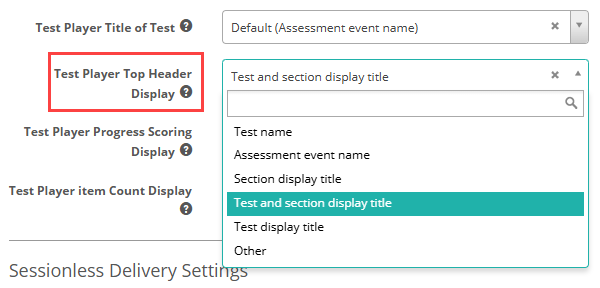
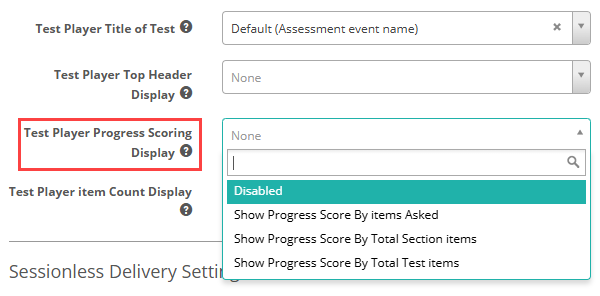
Test Player Progress Scoring Display
This allows you to select the format of the running score you want displayed to the Test-taker in the title bar of the test player.
Options are:
- Disabled
- Show Progress Score By items Asked
- Show Progress Score By Total Section items
- Show Progress Score By Total Test items
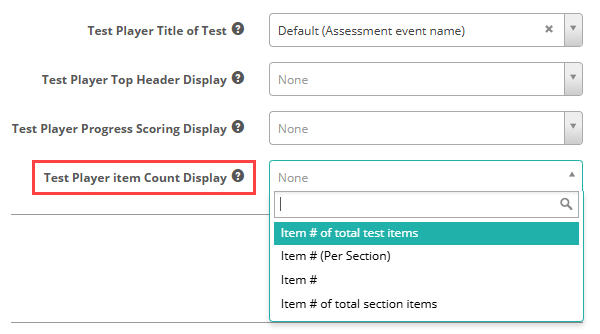
Test Player item Count Display
This allows you to select the format of the question number you want displayed to the test-taker in the title bar of the test player.
Options are:
- Item # of total test items
- Item # (Per Section)
- Item #
- Item # of total section items
Sessionless Delivery Settings
When enabled, Test-takers will only be required to supply a One Time Code (OTC) to validate entry to their test, a session code will not be required. For this feature to work, you will need to set the Test-taker login redirect to auth/opensession.
To read more, view our guide on Sessionless delivery.

Test Delivery/Replay Settings
These settings allow you to define any additional requirements for the test player used by the test-taker.
The options available in this section depend on your site's configuration. If you're interested in a specific setting that isn't visible, please contact your Janison account manager.
Short answer audit trail: Enabling this setting stores a snapshot of each response every time an answer is saved. The audit trail can be viewed from the Test Session screen or the Test Attempt Details modal. This feature is only applicable when the assessment event includes short answer (extended text) items and uses NoSQL for delivery. For more information, refer to our Short Answer Audit Trail guide.
Allow Reliable Offline Delivery: If enabled, Replay can be used to run assessment events partially or fully offline. This option is enabled by default.
Allow Starting of Test Offline:
- When enabled, students can start their test even if their device is offline.
- When disabled, students must reconnect to the internet before they can start their test. This applies once they have navigated past any instruction pages and confirmed they are ready to begin.
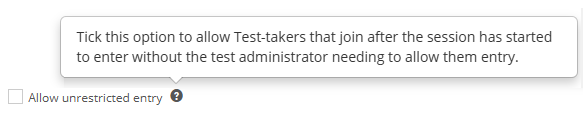
The above two points apply to test session that have Allow unrestricted entry disabled.
Enable Shortcut Keys: When enabled, test-takers can use any available shortcut keys within the Test Player during their test. Please note that keyboard shortcuts are typically disabled in Janison replay. For more information, refer to our keyboard shortcut guide.
Reset Replay on Test Submission: When enabled, test-taker responses and test data will be removed from Replay after the automatic reconciliation of a test. Test attempts that require manual reconciliation will remain on the device.
Require Replay to Pre-cache all Media: When an Assessment Event transitions to Delivery, all devices with Replay installed must download and pre-cache a media update. This ensures optimal performance for tests with rich media requirements when delivered via Replay.
Use Enrolment Based Marking: Enrolment based marking projects distinguish themselves from standard marking projects by releasing results while testing is ongoing. This is suitable in scenarios where a test is in progress, allowing both test-takers and teachers to access their results concurrently, with others still undergoing testing. For more information, refer to our Enrolment based marking guide.
Enrol Test-takers
In this section, you can add test-taker enrolments to assessment events using two methods or a combination of both.
- Add individual test-takers
- Add test-takers via groups
Let's explore these options in more detail.
Add test-takers via groups
This method is ideal if you have a large number of test-takers to add to the assessment event.
You will need to create a group first and add the test-takers to the group. To read more, view our guide on groups and group types.
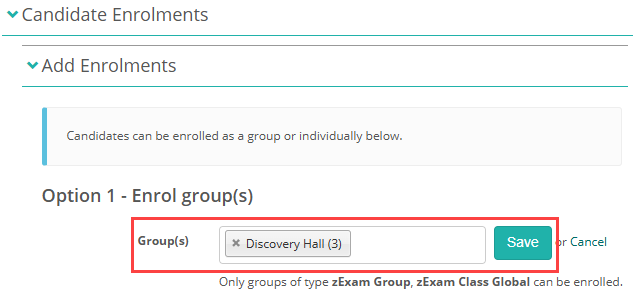
Once you have created your group, open the Test-taker Enrolments section and select Edit.
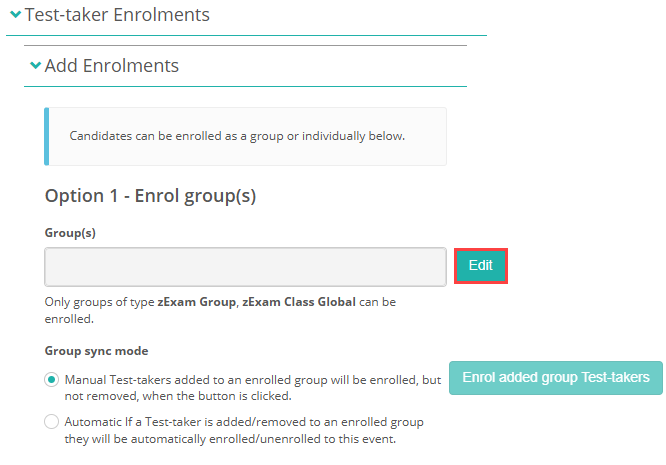
Select one or more groups and Save.
Important
Only specific types of groups can be used to enrol test-takers. This is determined by the configuration in Settings > Assessment Event Settings > Group Types to Enrol Test-takers By. The eligible groups will display directly below the selector.

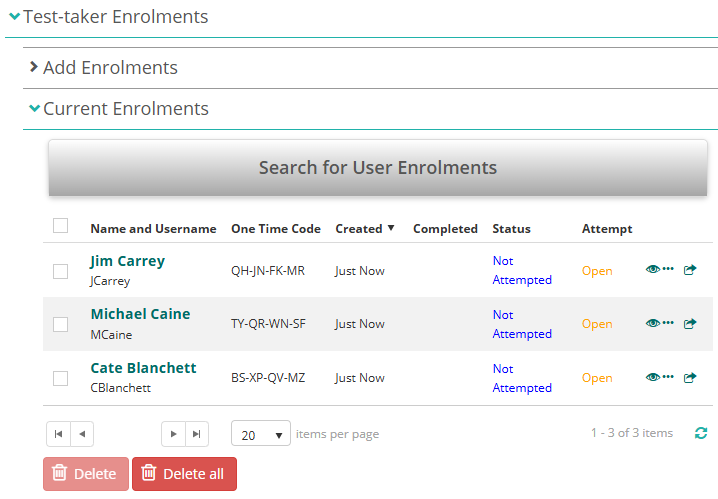
The system will run the enrolments and they will appear in the Current Enrolments section below.
Group Sync Mode
You can now define how the system handles test-takers added to a group:
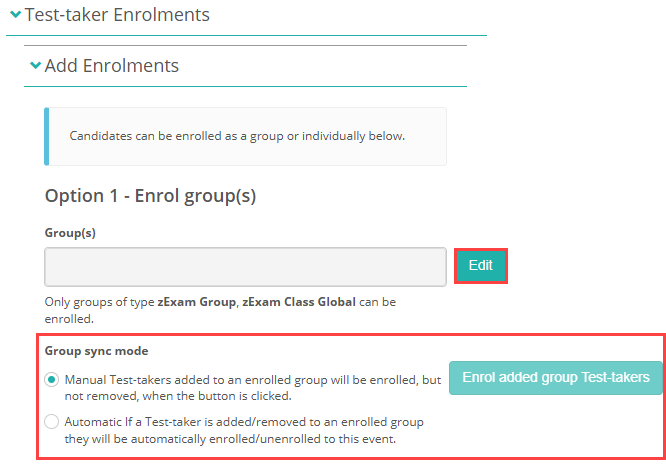
Manual Sync: Test-takers added to the selected group will be enrolled, but those removed will keep their enrolment. If you select this option, you must manually click Enrol Added Group Test-takers to update the enrolment.
Automatic Sync: Test-takers added or removed from an selected group will be automatically enrolled or unenrolled in the event, with no need for manual intervention.
Add individual test-takers
This method is ideal for adding a small number of test-takers to an assessment event without having to create a group.
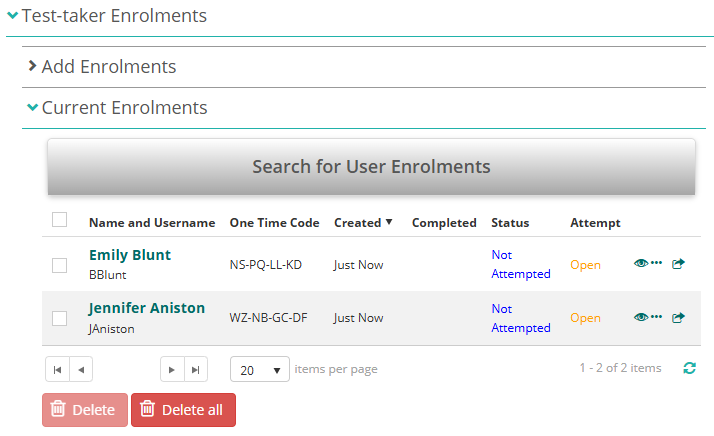
In the section Option 2 – Enrol individuals, select one or more test-takers and then Add.
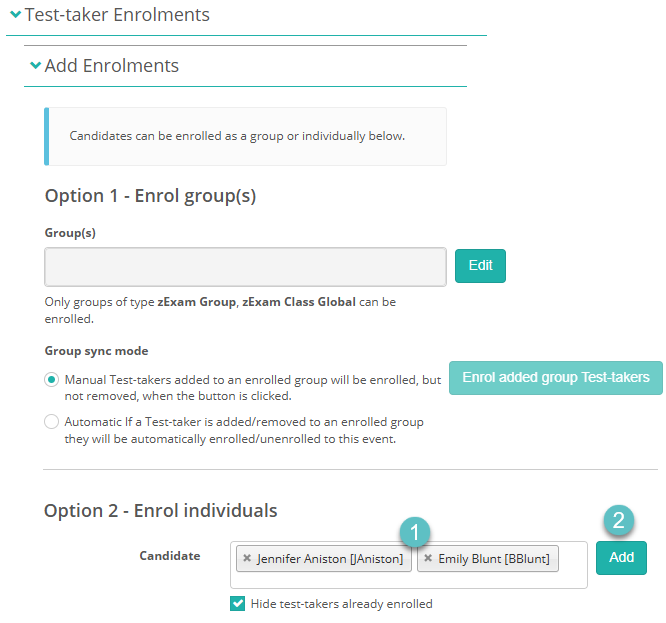
The added test-takers display in the Current Enrolments section below.
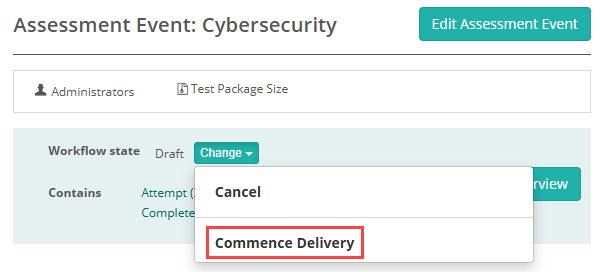
Set the assessment event state to Delivery
When you create an assessment event, the workflow state will be set to Draft. You will need to set it to Delivery before you can run test sessions.
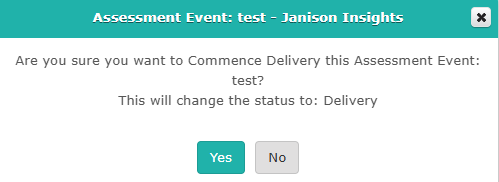
Select the Change drop-down for the Workflow state and select Commence Delivery, and Confirm by selecting Yes.
Create test session
A test session is like a virtual classroom where invigilators manage test-takers as they complete an assessment. It is set up by an administrator or invigilator once the assessment event has been switched to Delivery mode.
Sessions can be organised by room, group, or cohort, allowing invigilators to monitor specific sets of test-takers.
Use the Delivery Dashboard to create one or more test sessions. Read more.
Manage test-taker attempts
You can view and manage test-takers using the icons in the Current Enrolments section.
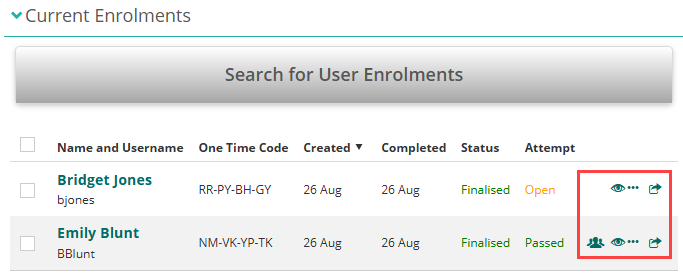
The people icon links you to the Test Session Administration dashboard. This icon only displays if the session is in an open state.

View and manage test attempts
The remaining three icons provide different navigation paths to manage test attempts, offering access to the same or similar tools, such as the option to change the attempt status for a test-taker. Before diving into the details of each icon, let's first take a closer look at how to change the test attempt status.
Change attempt status
Changing the test attempt status can be done for several purposes, including:
- Reporting: To differentiate reasons for not completing the test. For instance, test-takers may be marked as Absent or Withdrawn to reflect specific circumstances.
- Functional Adjustments: To implement changes like cancelling or postponing an attempt.
To change the attempt status, select any of the three icons.
Select the Status > Change dropdown and select the relevant option.
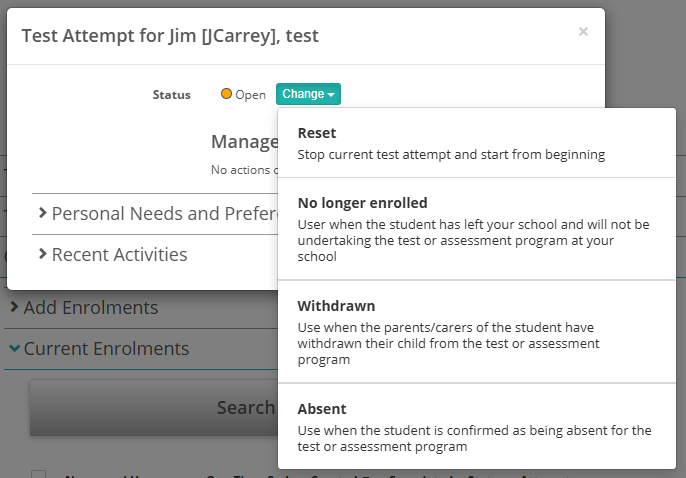
The status options that are available depend on the current attempt status as well as the configuration of your site. Your Janison account manager can help you to make the statuses you require available.
Below is a list of available options that your Janison account manager can enable or disable for specific roles as needed.
Open
| From | To | Description |
|---|---|---|
| Open | Abandoned | |
| Open | Absent | Use when the student is confirmed as being absent for the test or assessment program |
| Open | Cancelled | Cancel test attempt |
| Open | Completed | |
| Open | Exempt | Use when you have received approval from your local TAA that this student can be exempted from the test or assessment program |
| Open | NoLongerEnrolled | Use when the student has left your school and will not be undertaking the test or assessment program at your school |
| Open | Refused | Use when the student is confirmed as refusing to undertake the test either by not logging into the test or by logging in and not responding to the questions. |
| Open | Resitting | Stop current test attempt and start from beginning |
| Open | Suspended | |
| Open | Withdrawn | Use when the parents/carers of the student have withdrawn their child from the test or assessment program |
Abandoned
| From | To | Description |
|---|---|---|
| Abandoned | Open | |
| Abandoned | Postponed Absent |
Absent
| From | To | Description |
|---|---|---|
| Absent | Open | |
| Absent | Postponed |
Completed
| From | To | Description |
|---|---|---|
| Completed | Abandoned | |
| Completed | Postponed | |
| Completed | Open |
Marking Exempt
| From | To | Description |
|---|---|---|
| Completed | Marking Exempt |
Failed
| From | To | Description |
|---|---|---|
| Failed | Failed |
Marking
| From | To | Description |
|---|---|---|
| Marking | Marked | Evaluate answered questions. |
| Marking | Refused | |
| Marking | Open | Undo submission |
| Marking | Completed | Use when a candidate's answer submission needs to be reviewed, managed and/or updated. |
No Longer Enrolled
| From | To | Description |
|---|---|---|
| NoLongerEnrolled | Open | |
| NoLongerEnrolled | Postponed |
Paused
| From | To | Description |
|---|---|---|
| Paused | Passed | |
| Paused | Abandoned | |
| Paused | Open | Resume paused current attempt. |
Postponed
| From | To | Description |
|---|---|---|
| Postponed | Abandoned | |
| Postponed | Absent | |
| Postponed | Cancelled | Cancel test attempt |
| Postponed | Completed | |
| Postponed | Exempt | |
| Postponed | NoLongerEnrolled | |
| Postponed | Refused | |
| Postponed | Open | |
| Postponed | Resitting | Stop current test attempt and start from beginning |
| Postponed | Suspended |
Refused
| From | To | Description |
|---|---|---|
| Refused | Absent | |
| Refused | Postponed | |
| Refused | Open |
Resitting
| From | To | Description |
|---|---|---|
| Resitting | Abandoned | |
| Resitting | Cancelled | Cancel test attempt |
| Resitting | Completed |
Suspended
| From | To | Description |
|---|---|---|
| Suspended | Abandoned | |
| Suspended | Open |
Withdrawn
| From | To | Description |
|---|---|---|
| Withdrawn | Open |
The eye icon

The eye icon opens a Test Attempt modal. Options exist to change the attempt status as covered above and manage Personal Needs and Preferences.
Personal Needs and Preference Codes
Personal Needs and Preferences (PNP) codes offer a versatile system for tailoring tests to the specific needs of individual test-takers. These codes allow customisation based on unique requirements, such as providing a high-contrast screen for individuals with visual impairments, or offering test items translated into the test-taker's native language.
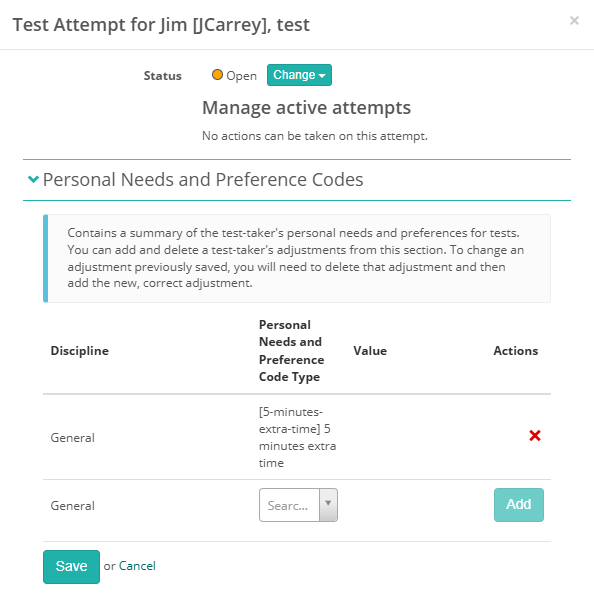
To read more, view our guide on Personal Needs and Preferences.
The View More icons
The View More icons lead to the same screen. The first icon (the three dots) overwrites the current page and navigates to the Enrolments page for the test-taker, while the second icon opens the page in a new tab.


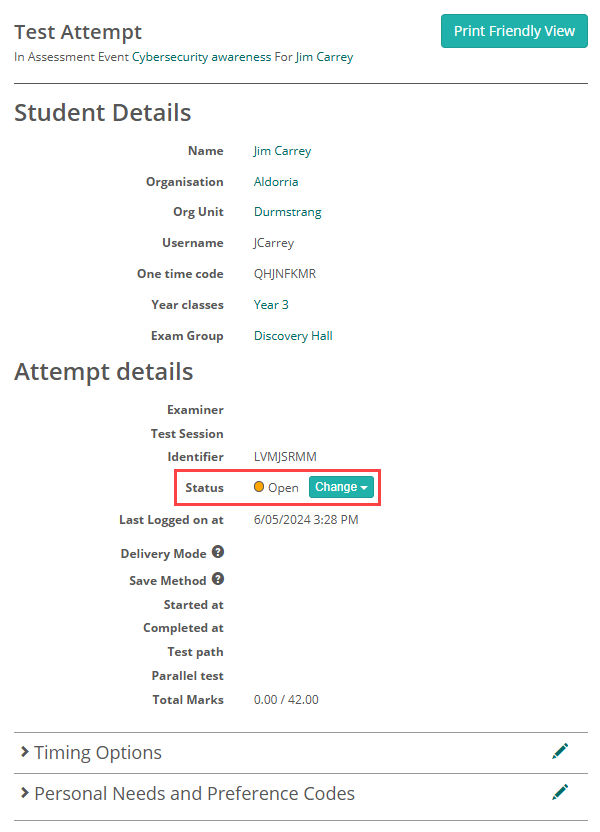
If there is only one test attempt, you can change its status by selecting Current Test Attempt > Change at the top. For multiple attempts, expand the Attempts section and select the required attempt.
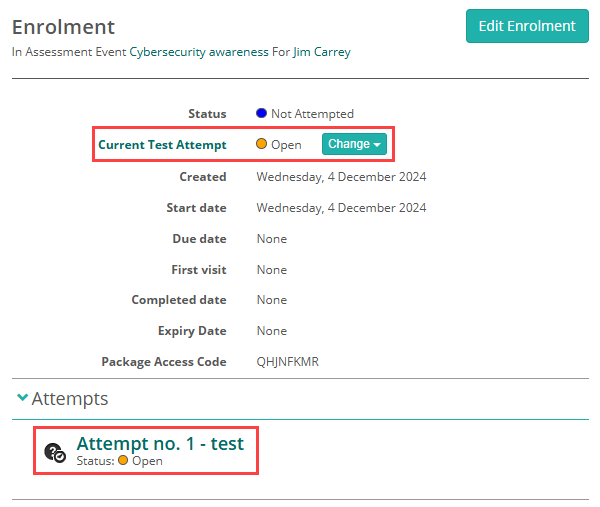
When you open the attempt, the Test Attempt page will open where you can change the status as highlighted below.
Delete test attempts
If the Assessment Event is in a Draft status, you can delete enrolments.
Select the test-taker and Delete.
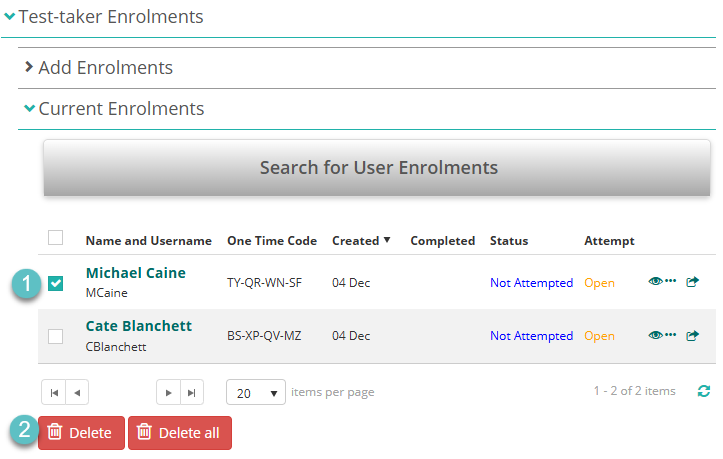
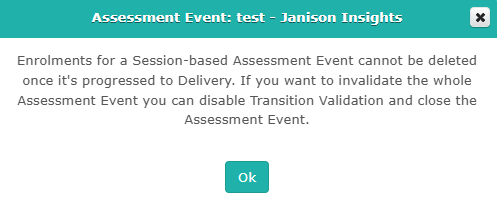
If the Assessment Event has transitioned to Delivery, you cannot delete the attempt. A modal will appear to explain the reason.