Create a test
Tests are the core structure for delivering assessments in Janison Insights. Each test contains one or more test sections, which in turn hold the items test-takers respond to.
Core components
A test consists of three main elements:
- The test itself
- Test sections
- Items (may be renamed to "questions" depending on your site configuration)
Each test belongs to a module, and each module belongs to a discipline. The diagram below shows how these levels fit together.
Add a test
Navigate to Author > Tests and Surveys.
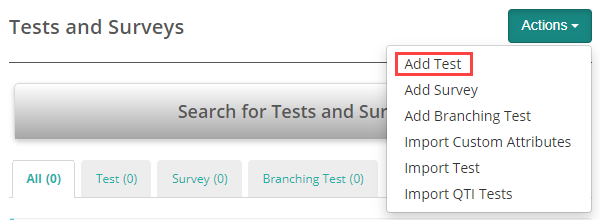
Select Add Test from the Actions dropdown.
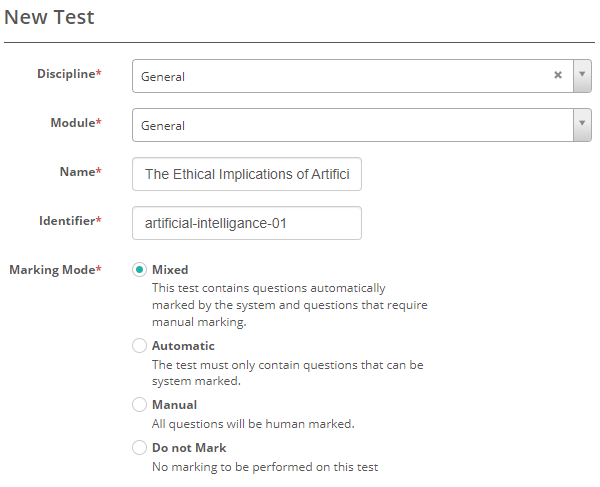
Complete the required fields — Discipline, Module, Name, and Identifier. Choosing a Discipline filters the Module list to that discipline.
You choose a discipline here because you started from Tests and Surveys, outside any module. If you instead add a test from within a module, its discipline and module are already set, so you won't be asked for them (see Modules).
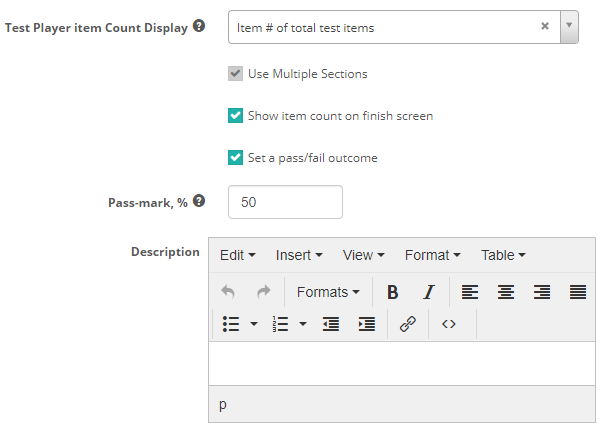
Select Save to access the test details screen, where additional configuration sections are available as expandable panels.
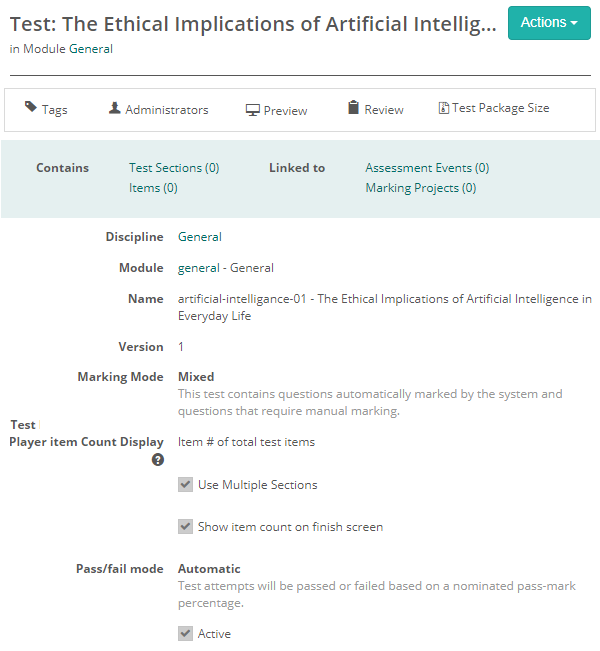
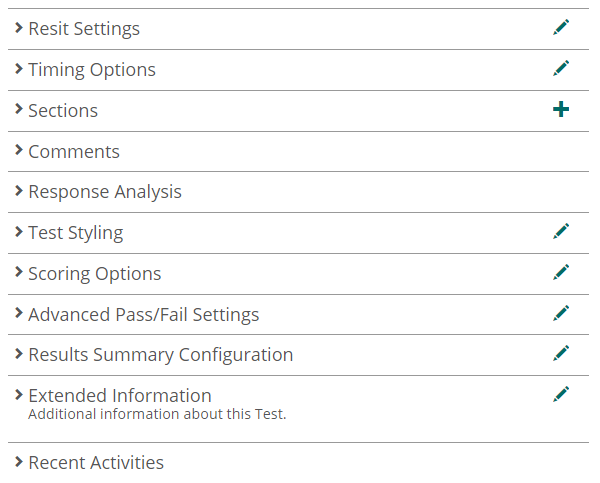
Key configuration sections
Resit settings
Select the pencil icon next to Resit Settings to edit.
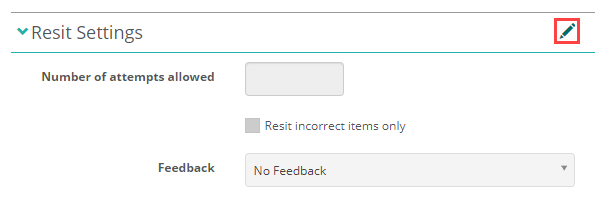
Specify the Number of attempts allowed, then enable Resit incorrect items only to present only the items answered incorrectly on later attempts.
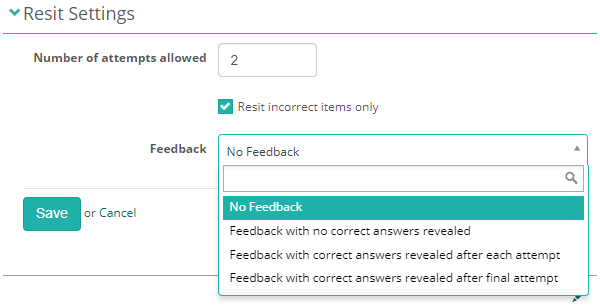
Use the Feedback dropdown to control what test-takers see after each attempt:
- No Feedback — no feedback is shown between attempts.
- Feedback with no correct answers revealed — shows feedback, but not the correct answers.
- Feedback with correct answers revealed after each attempt — reveals the correct answers after every attempt.
- Feedback with correct answers revealed after final attempt — reveals the correct answers only once the final attempt is used.
Attempts vs. retrying an item
Number of attempts allowed controls how many times a test-taker can sit the whole test. For example, setting it to 3 lets them complete the full test up to three times.
This is separate from the section-level Retry Marked Item setting, which lets a test-taker re-answer an individual item during a single sitting (see Test sections). Retrying an item does not use up one of the test attempts — a test-taker can retry items as allowed within a sitting and still have their full number of attempts available.
Timing options
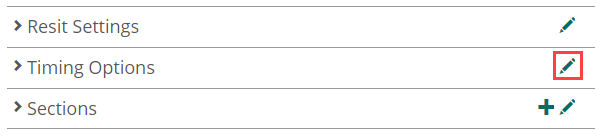
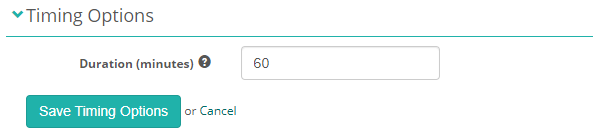
Select the pencil icon next to Timing Options to edit.
Set Duration (minutes) to a value between 1 and 1440 (24 hours). Leave it blank for an untimed test.
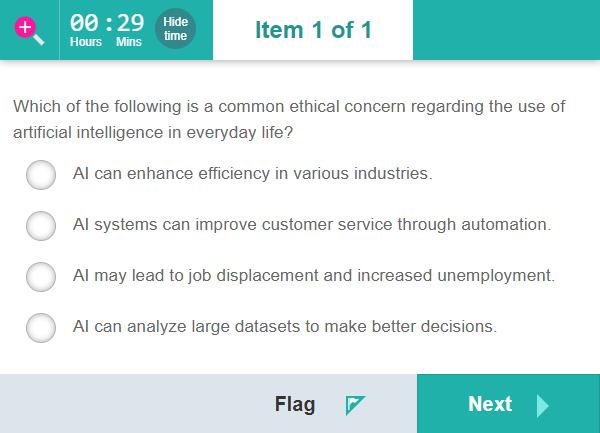
Test-takers see a countdown timer in the top-left corner of the test player.
Only an administrator can configure the timer display, at Settings > Test Designer Settings > Test Player 2 Settings.
Enable Hideable test timer to let test-takers show or hide the timer. The dropdown sets when hiding is allowed: Always, Not within last (the timer stays visible for the final number of minutes you set), or Never.
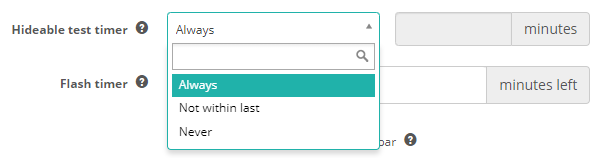
Use Flash timer to make the timer flash at set time thresholds. Enter one or more values — for example, 10 and 5 to flash at 10 and 5 minutes remaining. It only works while the timer is visible.

Sections
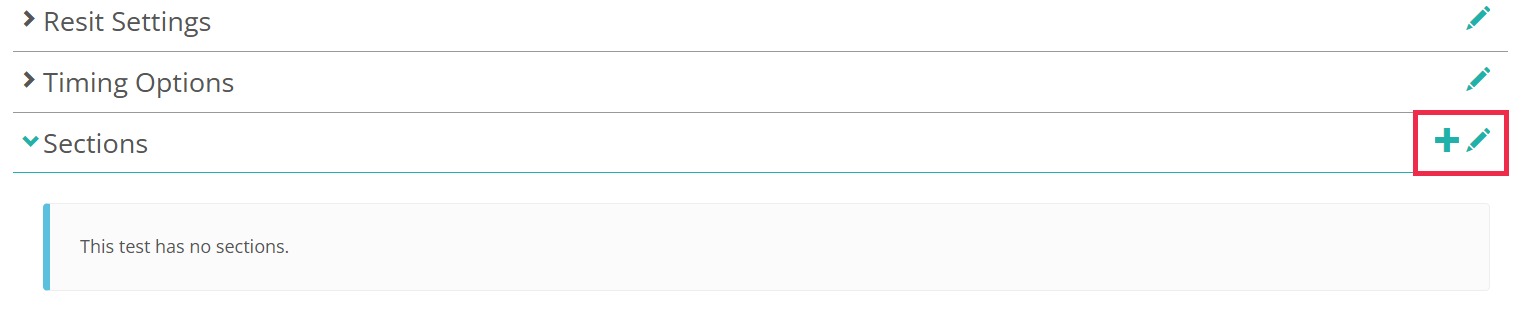
Create new test sections or add existing ones from the Sections expandable. See Test sections for details.
Comments
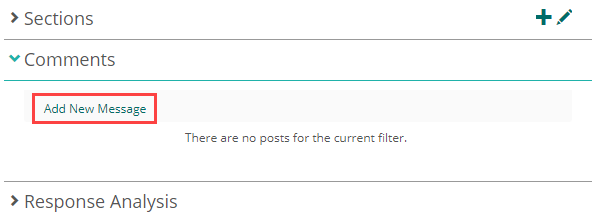
Authors can engage in test-level discussions using the Comments section. No email notifications are sent.
Select Add New Message to post a comment.
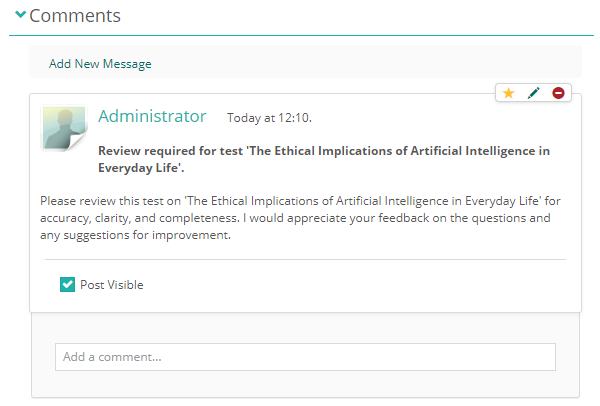
Your comment appears in the thread. Use the edit icon  to change a comment, or the delete icon
  to remove it. You can only edit or delete your own comments.
Response analysis
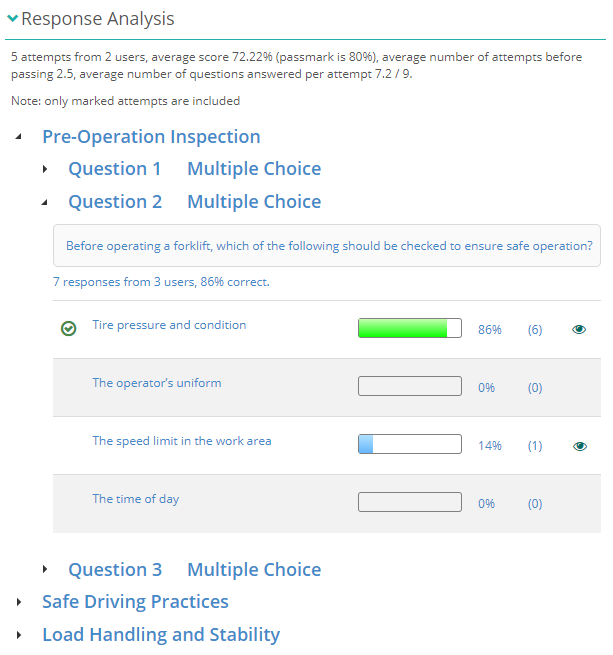
The Response Analysis section provides:
- Number of attempts and test-takers
- Average score and pass mark
- Average number of attempts before passing
- Average number of items answered per attempt
- Per-item response percentages and distractor analysis
Test styling
The Test Styling section lets you customise the test player appearance and available tools.
Apply a custom Test Player Theme to change the test player's appearance (see Player themes).
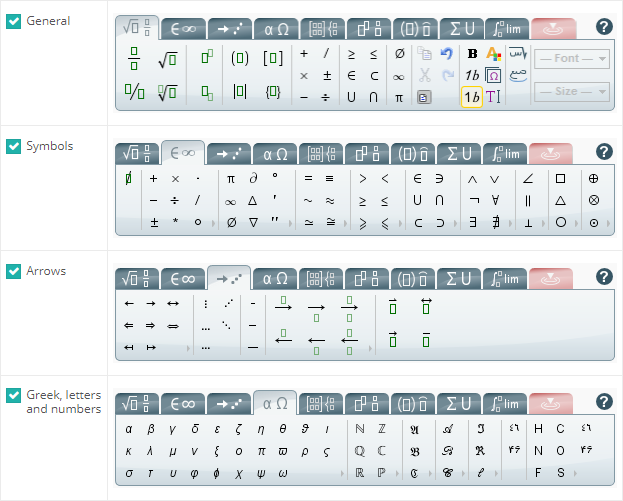
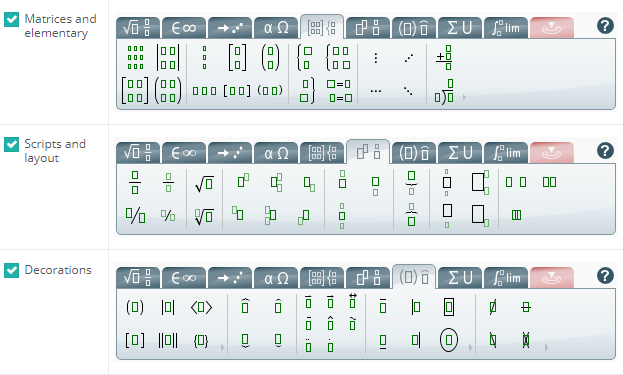
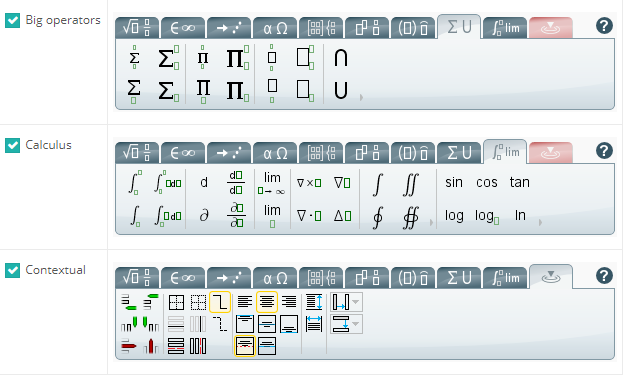
If the maths equation editor is enabled for your site, use Math Equation Editor Tabs to control which tabs test-takers can use.
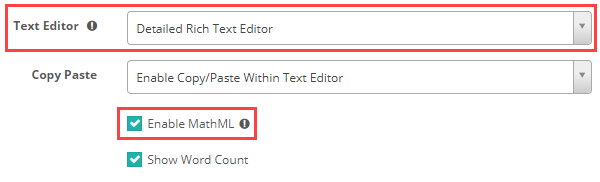
MathML input is enabled per item — in the item editor, select Enable MathML.
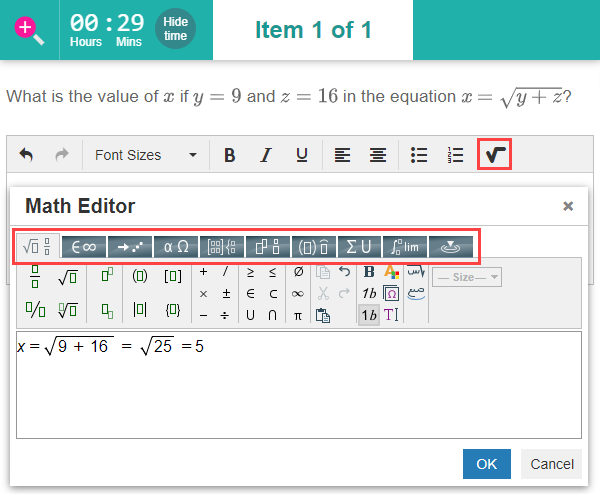
With equation editor tabs configured, test-takers select the maths symbol  to open the equation toolbar in the response area.
Scoring options — test score band tables
Assign names to score ranges (for example, Fail, Pass, Credit, Distinction). These bands display on test-taker dashboards instead of numerical scores.
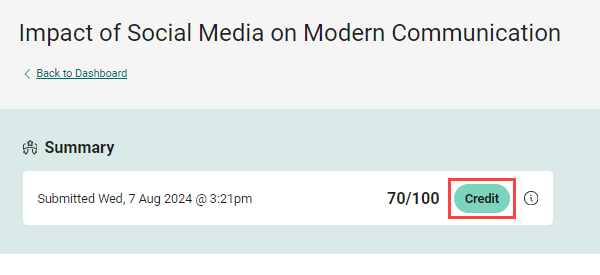
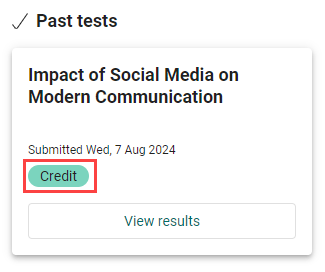
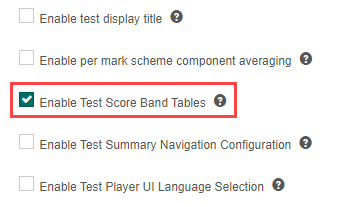
Before you can use score band tables, an administrator must enable them at Settings > Test Designer Settings by turning on Enable Test Score Band Tables.
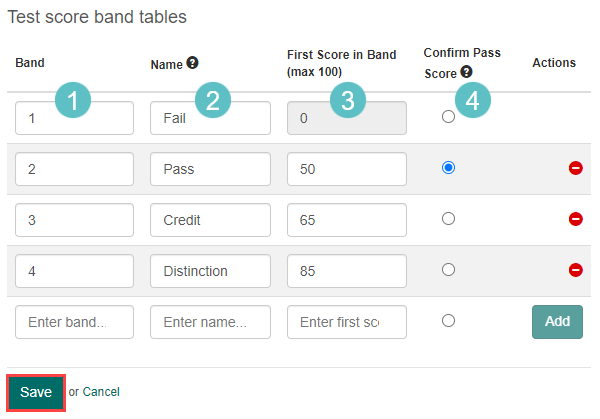
Once enabled, select the pencil icon next to Scoring Options to configure score bands on the test.

Enter a name and score range for each band.
Preview a test
Preview the test to experience it as test-takers will, verifying functionality, navigation, and multimedia elements before delivery.
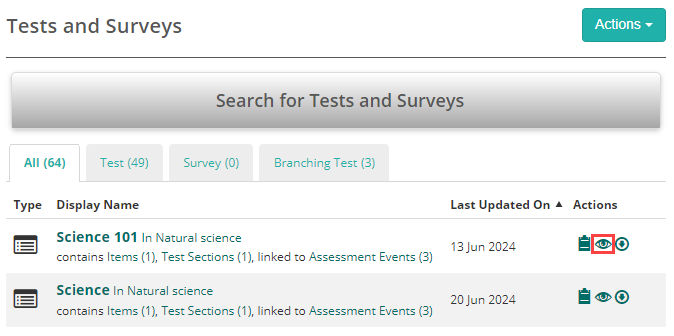
Select the Preview icon  in the Actions column of the tests list.
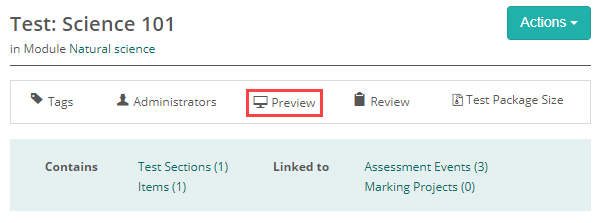
Alternatively, select the Preview link on the test details screen.
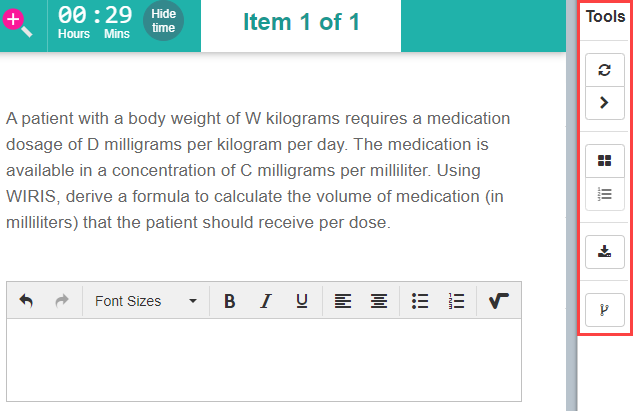
The test opens in the test player, with a Tools bar down the right-hand side. Its preview tools let you check navigation, item and distractor order, scoring, and more — see Preview tools for what each one does.
Other configuration sections
The test details screen includes further expandable panels:
Advanced Pass/Fail Settings — controls result display on feedback screens.
Results Summary Configuration — required for displaying end-of-test results to test-takers.
Settings
Most settings that affect a test are configured per test on the test details screen — Resit Settings, Timing Options, Scoring Options, and so on. A few site-wide settings, which only an administrator can change, also influence how tests behave. These live on two pages under Settings: Test Designer Settings (which includes a Test Player 2 Settings section) and Test Feedback Settings.
At Settings > Test Designer Settings:
Enable Test Score Band Tables — makes test score band tables available in a test's Scoring Options.
Enable Results Summary Configuration — shows the Results Summary Configuration panel on the test details screen.
Hideable test timer and Flash timer — control how the countdown timer is shown in the test player. Both sit in the Test Player 2 Settings section, at Settings > Test Designer Settings > Test Player 2 Settings.
At Settings > Test Feedback Settings:
Show Detailed Feedback — controls whether detailed result feedback is shown to test-takers.
The maths equation editor is enabled site-wide via the Enable WIRIS as a MathML editor setting; once enabled, configure its available tabs per test under Test Styling.