Custom reports
This reporting functionality provides the ability to create and run detailed reports on key entities in the system, including item or answer, and using filters such as status. This allows you to customise and generate professional reports with minimal input.
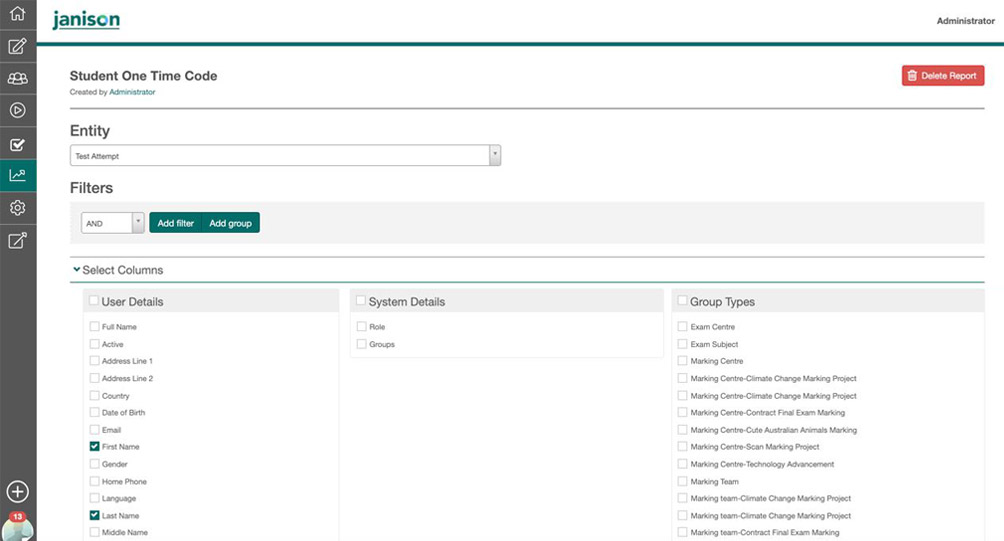
Custom report settings can be saved so reports can be run at a later date with all the filters and columns already selected.
Reports can also be set to run automatically on a defined schedule and you can choose who can view and edit the report.
Custom report settings
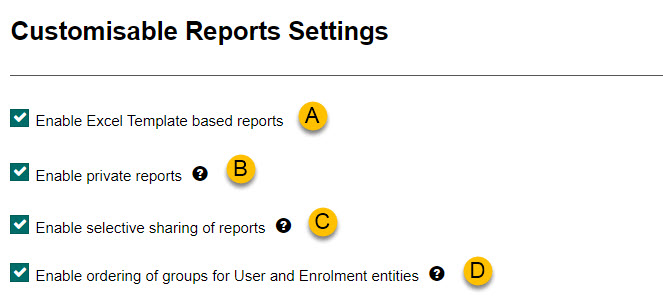
There are various settings available which enable or disable custom report options and fields. To access these settings, select the Settings button.
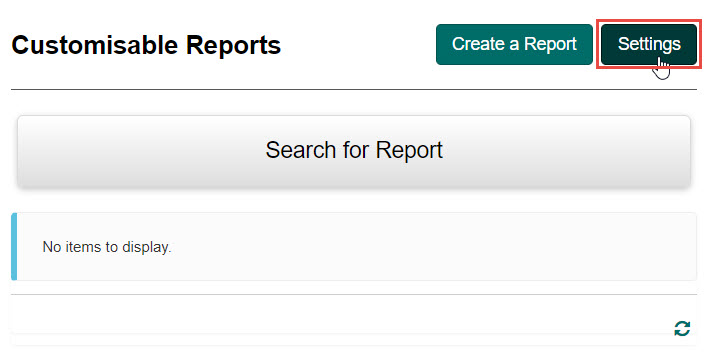
The following settings are available:
| # | Item | Description |
|---|---|---|
| A | Enable Excel Template based reports | This setting enables you to apply templates to reports which gives you additional features such as adding pivot tables to create charts and do data counts. To learn more about this, see the Custom report templates section. |
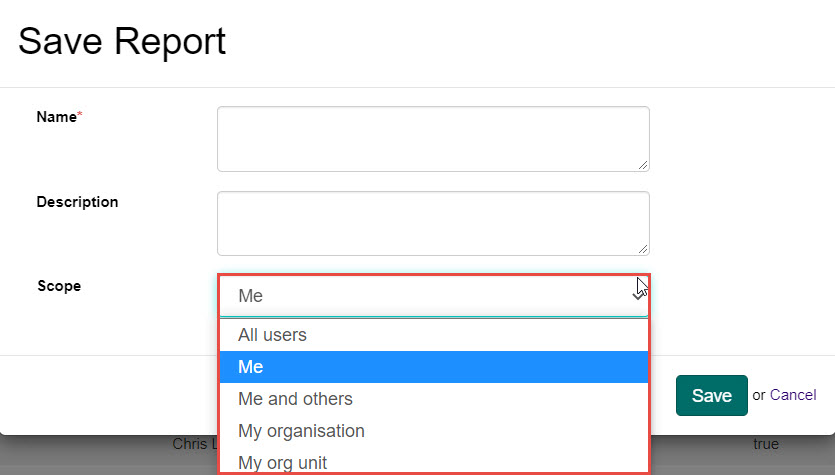
| B | Enable private reports | This setting impacts the options available in the popup when saving a report. Select this setting to enable a Scope field which allows you to select who is permitted to access the report. |
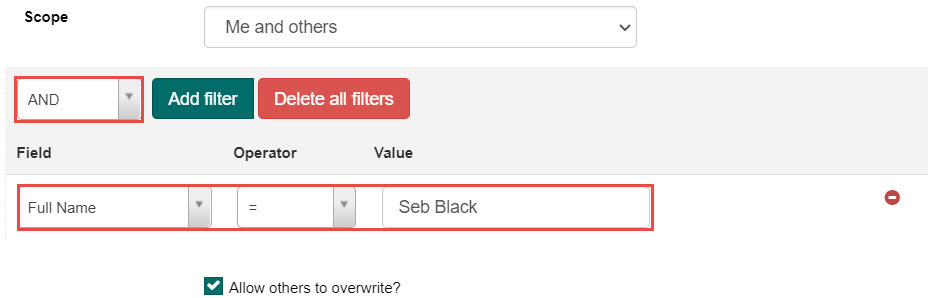
| C | Enable selective sharing of reports | This setting impacts the options available in the popup when saving a report. Select this setting to enable a filter when Me and others is selected from the Scope drop-down. This enables you to specify Users who are permitted to access the report. |
| D | Enable ordering of groups for User and Enrolment entities | This setting forces the Group column to display in alphabetical order based on the Group ID. |
Tip
This may introduce a performance issue to the report.
Enabled entity types
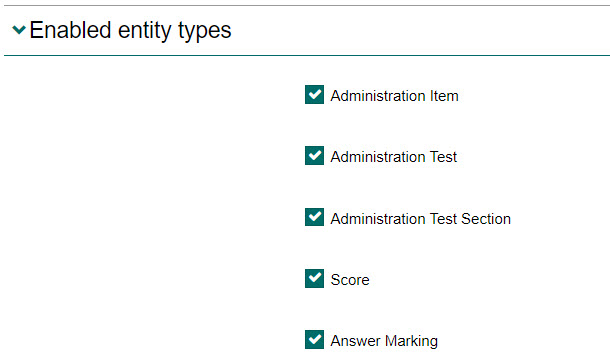
The settings in the Enabled entity types expandable section allow you to control whether entity types are available for selection when creating a report.
Create custom reports
Customisable reports can be accessed by selecting Reports from the Menu, then selecting Customisable Reports.
Save a custom report
Once you have created a custom report, you have the option to save the report.
Tip
This is only necessary if you intend to run the report again in the future.
To save a report:
-
Select the Save Report button.
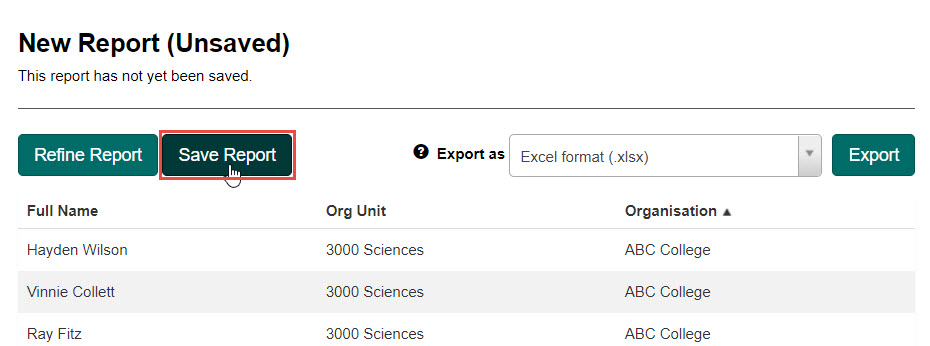
A popup will display.
Tip
This popup may differ depending on the settings enabled. See the Custom report settings section for more information.
-
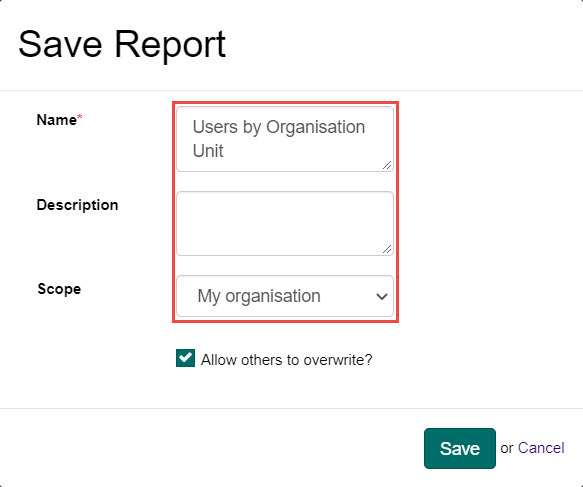
Complete the following:
- Enter a name for the report in the Name field.
- Enter a description for the report in the Description field (optional).
-
Select who you would like to be able to access and edit the report from the Scope drop-down field.
Tip
Selecting Me and others will display an additional filter option where you can select the Users you want to provide access to the report.
-
Select the Save button to save your changes.
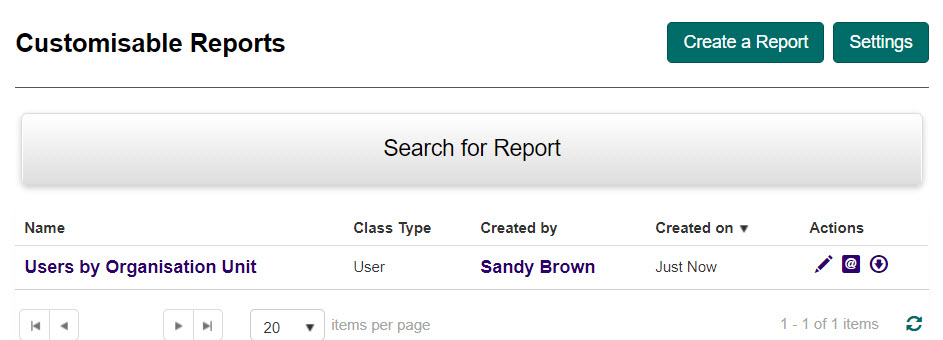
The report will now be listed on the Customisable Reports page.
Export a custom report
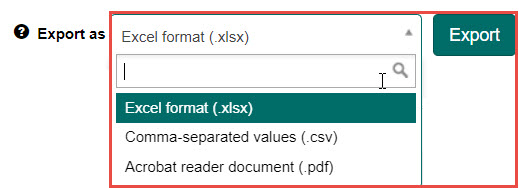
Once you have created a custom report, you have the option to export it to Excel, CSV or PDF format.
To do this select the format you would like to export in from the Export as drop-down field, then select the Export button.
The report will download to your computer/device.
Schedule a custom report
You can schedule reports to email or file to run at specific times or regular intervals.
Schedule to email
-
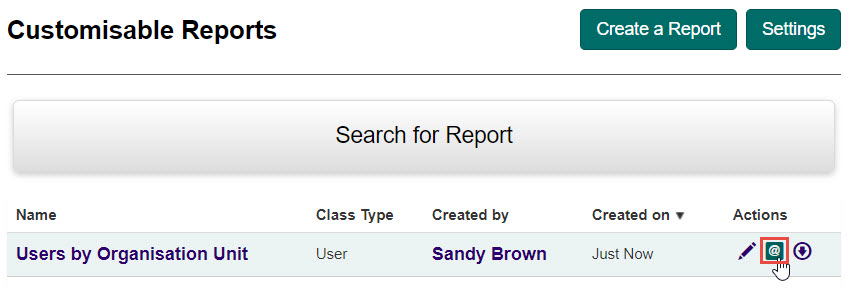
Select the Schedule to Email button next to the saved custom report you would like to schedule.
-
Complete the following:
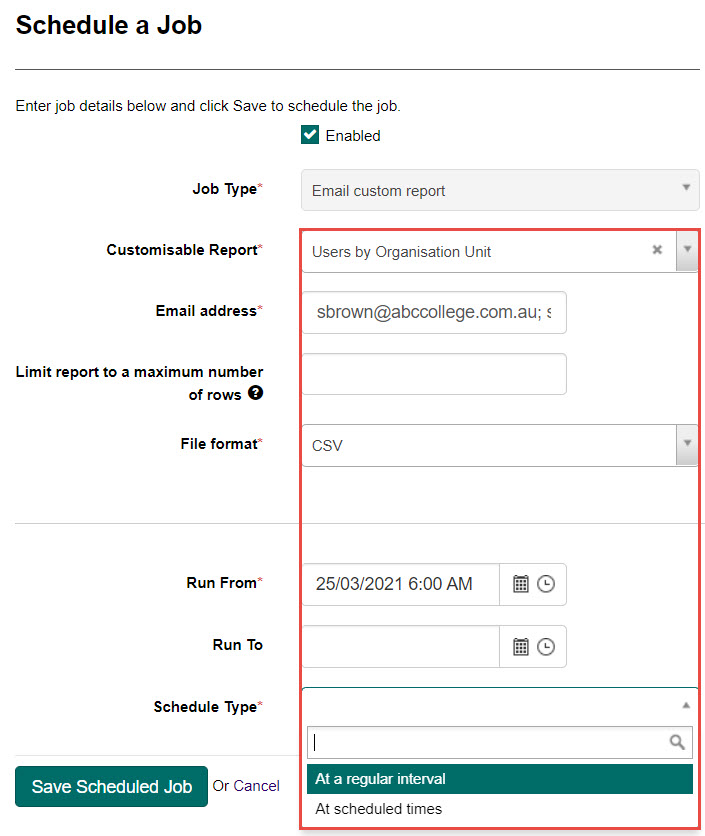
- Select a report name from the Customisable Report drop-down. This will default to the report you selected the Schedule to Email button next to, however you can change this to any saved custom report if you wish.
-
Enter the email you want the report sent to in the Email address field.
Tip
Use a semicolon (;) between email addresses to send the report to more than one person.
-
Select the format for the report in the File format drop-down field, the options are CSV, PDF or Excel.
- Select a date and time in the Run From field.
-
Select a date and time in the Run To field (optional).
Tip
If the Schedule Type you select is At a regular interval, you would not typically set an end date as the options set there would determine the end date.
-
Select an option from the Schedule Type drop-down field as follows:
Schedule type Description At a regular interval This report will run at regular intervals. If this option is selected, additional options will display. Complete the following: 1. Select the Run Indefinitely checkbox if you want the report to run indefinitely (optional). If selected, you don't need to change any other settings. 2. If Run Indefinitely is disabled, enter a number in the Run Count field. This will determine how many instances the report runs for. 3. Select an option from the Unit drop down field. You can choose minute, hour, day or week. 4. Enter a number in the Frequency field. This will determine how often the task will run. At scheduled times This report is set to run at scheduled times. If this option is selected, additional options will display. Complete the following: 1. Select a time zone from the TimeZone drop-down field. 2. Select a time in the Time of Day drop-down field. 3. Select a frequency in the Frequency drop-down field. At a regular interval — additional options:
- Select the Run Indefinitely checkbox if you want the report to run indefinitely (optional). If selected, you don't need to change any other settings.
- If Run Indefinitely is disabled, enter a number in the Run Count field. This will determine how many instances the report runs for.
- Select an option from the Unit drop down field. You can choose minute, hour, day or week.
- Enter a number in the Frequency field. This will determine how often the task will run.
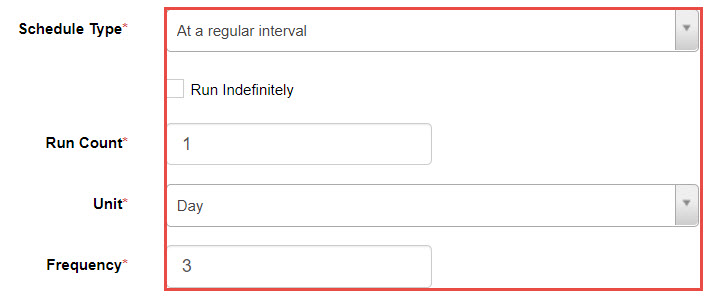
At scheduled times — additional options:
- Select a time zone from the TimeZone drop-down field.
- Select a time in the Time of Day drop-down field.
- Select a frequency in the Frequency drop-down field.
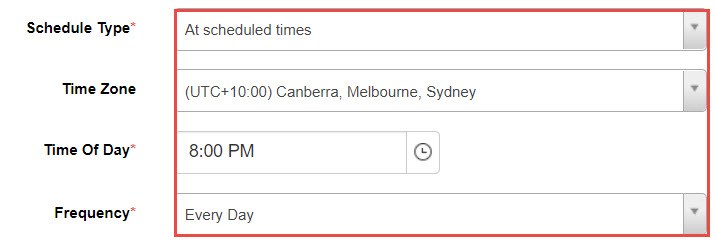
-
Select the Save Scheduled Job button to save the job.
Schedule to a file
Reports can also be scheduled to be placed in a location on the network. This may be used for third party systems such as a HR system to access User data.
To do this:
-
Select the Schedule to File button next to the saved custom report you would like to schedule.
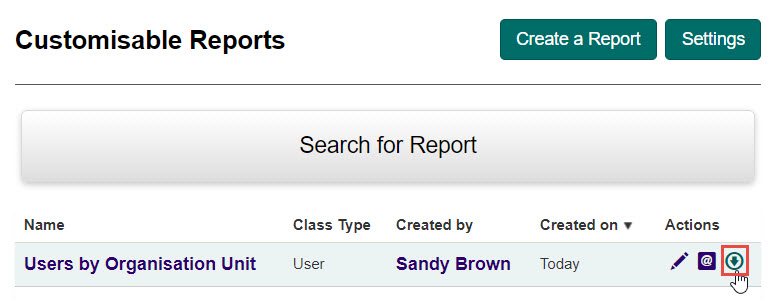
-
Complete the following:
- Select a report name from the Customisable Report drop-down. This will default to the report you selected the Schedule to Email button next to, however you can change this to any saved custom report if you wish.
-
Enter the email you want the report sent to in the Email address field.
Tip
Use a semicolon (;) between email addresses to send the report to more than one person.
-
Enter a password in the Zip Password field.
- Select the format for the report in the File format drop-down field, the options are CSV, PDF or Excel.
- Select a date and time in the Run From field.
-
Select a date and time in the Run To field (optional).
Tip
If the Schedule Type you select is At a regular interval, you would not typically set an end date as the options set there would determine the end date.
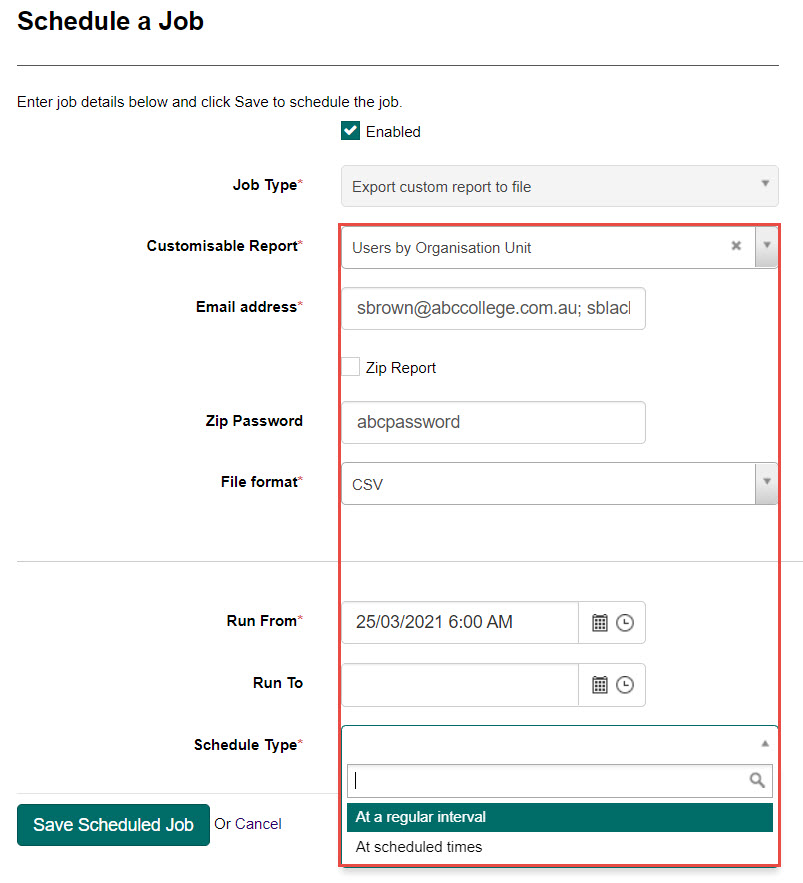
-
Select an option from the Schedule Type drop-down field as follows:
At a regular interval — additional options:
- Select the Run Indefinitely checkbox if you want the report to run indefinitely (optional). If selected, you don't need to change any other settings.
- If Run Indefinitely is disabled, enter a number in the Run Count field. This will determine how many instances the report runs for.
- Select an option from the Unit drop down field. You can choose minute, hour, day or week.
- Enter a number in the Frequency field. This will determine how often the task will run.
At scheduled times — additional options:
- Select a time zone from the TimeZone drop-down field.
- Select a time in the Time of Day drop-down field.
- Select a frequency in the Frequency drop-down field.
-
Select the Save Scheduled Job button to save the job.
Custom report templates
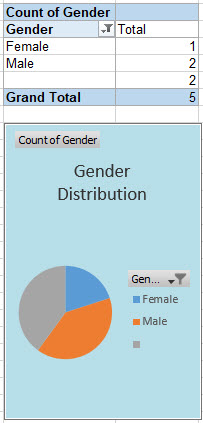
You can use an Excel template to sort, count, total or average data and add charts to your report.
Tip
To use a template, you must have the Enable Excel Template based reports setting enabled in the customisable report settings. To see how to do this, see the Custom report settings section.
Create a custom report with a template
-
Select the Create a Report button.
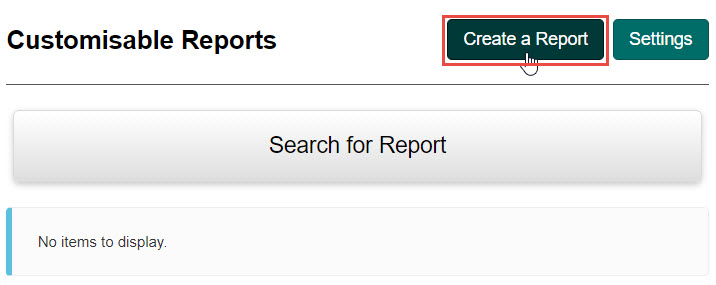
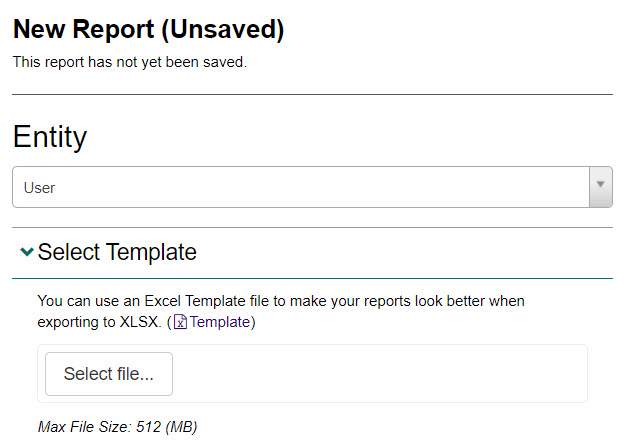
The New Report screen will be displayed.
-
Select an entity from the Entity drop-down field. Entities are divided into several categories – assessment event, comment, test, User and other.
-
Select the Template link to download the template, then populate it with the relevant data. There are three tabs that require input as follows:
Tab Description Data template This is the tab where you input the data you intend to have on your report including: Category – This is the column header with the options User Details, System Details or Other; PropertyName – These are the fields of the columns (spaces must be removed eg. FirstName); OutputHeaderName – This is how the field will appear in the output (optional) Raw data This is the tab which will be populated with the data when the report is run. The columns are the PropertyName from the data template tab. Chart This is the tab where you can add a pivot table and charts based on the raw data. Data template tab inputs:
- Category – This is the column header with the options User Details, System Details or Other
- PropertyName – These are the fields of the columns (spaces must be removed eg. FirstName)
- OutputHeaderName – This is how the field will appear in the output (optional)
Raw data tab:
This is the tab which will be populated with the data when the report is run. The columns are the PropertyName from the data template tab.

Chart tab:
This is the tab where you can add a pivot table and charts based on the raw data.
-
Save the file to your local computer, then select the Select file button to locate the file and upload it.
-
Select your filters and columns as per the standard custom report creation steps. See Create a custom report for more information.