Custom attributes
Administrators use custom attributes to define additional data fields within Janison Insights. These fields can be linked to objects in the system to control where they are displayed, and can then be used to filter, sort, search and report on those objects. Custom attributes can also be grouped into sets.
The table below summarises the available types. For detailed descriptions and examples of each, see custom attribute types.
| Type | Used for |
|---|---|
| Boolean | A checkbox giving a true or false value. |
| Custom View | Access to a custom page from a specified location, or a data store for responses to custom-page forms. |
| Date | A date field with a date picker. |
| Date Time | A date and time field with date and time pickers. |
| Float | A numeric text field accepting whole and decimal numbers, with optional lower and upper limits and rounding. |
| Image | An image upload field (.jpg, .png or .gif). |
| Integer | A numeric text field accepting whole numbers, with optional lower and upper limits. |
| List | A drop-down list where each element can have a name, an identifier and a value. |
| Memo | A larger free-text field, plain or rich text, with an optional word limit and default text. |
| Selection | A drop-down list without identifiers or values per element. |
| Selection with other | A drop-down list with an additional 'Other' free-text option. |
| Selection from system entity | A drop-down listing system entities, built by the system from the settings you choose. |
| String | A free-text field, optionally restricted by length or a regular expression. Used for most metadata fields. |
Add a custom attribute
Creating a custom attribute involves three main steps:
- Create the custom attribute and set its main settings. This step is the same for every type.
- Select the type of custom attribute and complete the further setup steps for that type. See custom attribute types for how each type is used.
- Link the custom attribute to the required system object(s) to set where it will display.
Tip
Custom attributes cannot be directly linked to catalogue items, tests, test sections or questions. Instead, create a custom attribute set and link it to a discipline — see Add a custom attribute set.
Custom attributes can be linked to other objects such as new user creation, schools or assessment events.
To create a custom attribute:
- Go to Settings > Custom Attributes.
-
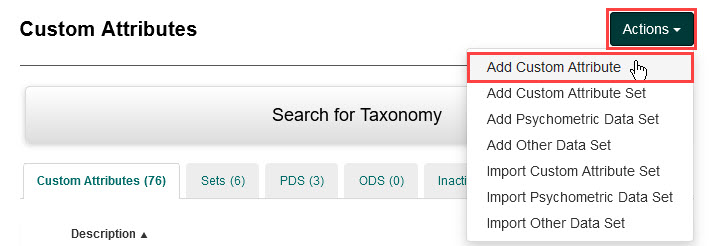
The Custom Attributes screen displays. Select the Actions dropdown, then select Add Custom Attribute.
-
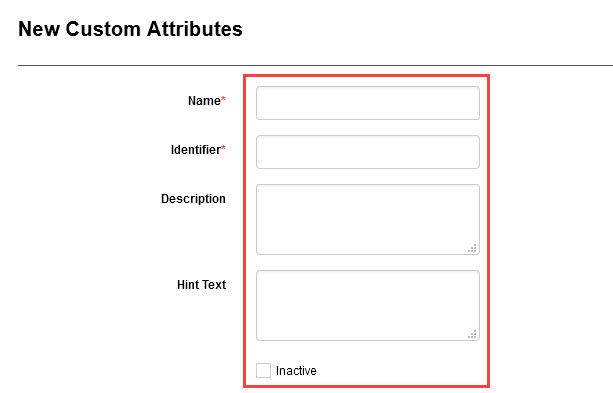
The New Custom Attributes screen displays. Complete the following:
- Enter a name for the custom attribute in the Name field.
- The Identifier field populates automatically, based on the name you entered.
- Enter a description of the custom attribute in the Description field (optional).
- Enter text to serve as a hint in the Hint Text field (optional). This is not displayed to end users.
- Check Inactive to deactivate the custom attribute (optional). This is useful if you do not want the attribute active in the system straight away. It is also how you stop an attribute from displaying — set custom attributes to inactive rather than deleting them.
-
Select a type for the new custom attribute, then complete the remaining steps for that type. See create custom attributes for the steps for each type.
Add a custom attribute set
Custom attributes can be grouped into sets, which can be linked to disciplines. Creating disciplines is currently completed by the Janison implementation team.
Custom attributes must exist before they can be added to a set — see Add a custom attribute.
To create a custom attribute set:
- Go to Settings > Custom Attributes.
-
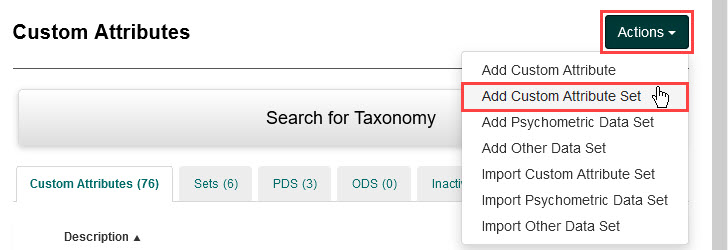
The Custom Attributes screen displays. Select the Actions dropdown, then select Add Custom Attribute Set.
-
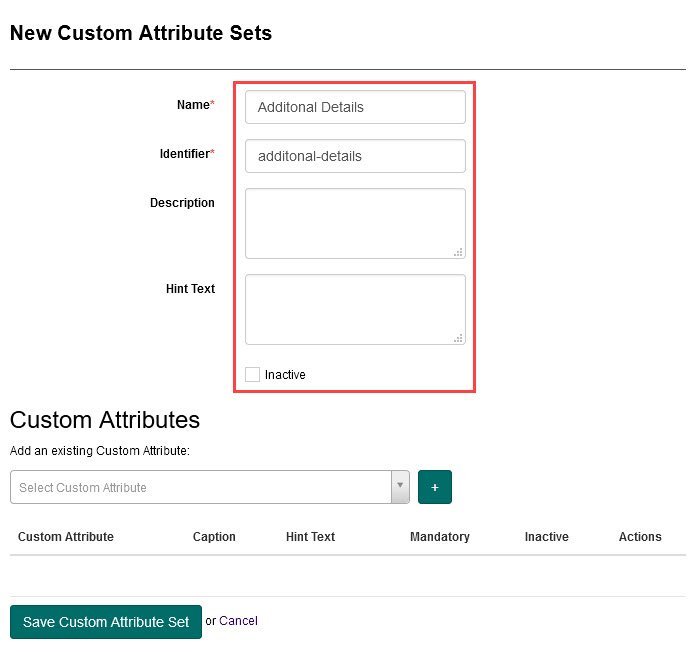
The New Custom Attribute Sets screen displays. Complete the following:
- Enter a name for the set in the Name field.
- The Identifier field populates automatically, based on the name you entered.
- Enter a description of the set in the Description field (optional).
- Enter text to serve as a hint in the Hint Text field (optional). This is not displayed to end users.
- Check Inactive to deactivate the set (optional). As with custom attributes, set to inactive rather than deleting.
-
Add the required custom attributes to the set in the Custom Attributes section. For each one:
-
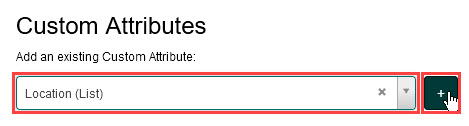
Select the custom attribute from the Select Custom Attribute dropdown, then select the + button.
-
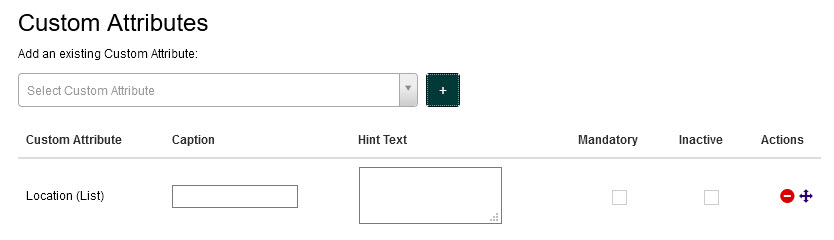
The custom attribute displays in the list.
-
Enter a caption to show next to the custom attribute field in the Caption field (optional).
- Enter an explanation of the field in the Hint Text field (optional). Any text entered here shows when the end user hovers over the question-mark Hint icon next to the custom attribute. If no hint text is provided, the icon does not display.
- Check Mandatory to make the field one that must be completed (optional).
-
Check Inactive to stop the attribute from displaying to end users within this set (optional).

-
-
When all the required custom attributes have been added, put them in the order you would like end users to see. Select and drag the Move icon to move an element up or down the list.
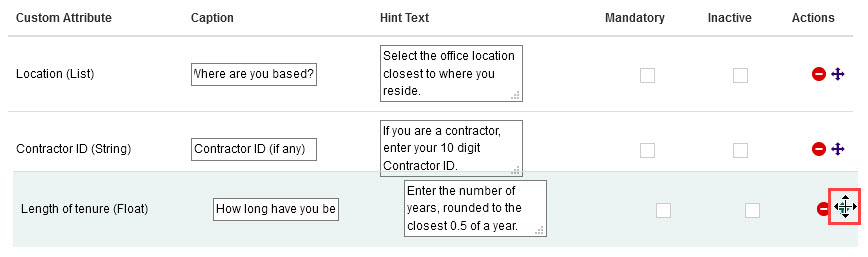
To remove a custom attribute from the set, select the Remove icon next to it.

-
Select Save Custom Attribute Set.
Batch edit custom attribute values
Custom attributes assigned to the Users system object can be set to allow batch edits. This lets you make the same change in a custom attribute field across one or more users at the same time. The following example uses batch edit to add first aid certification to a group of users.
-
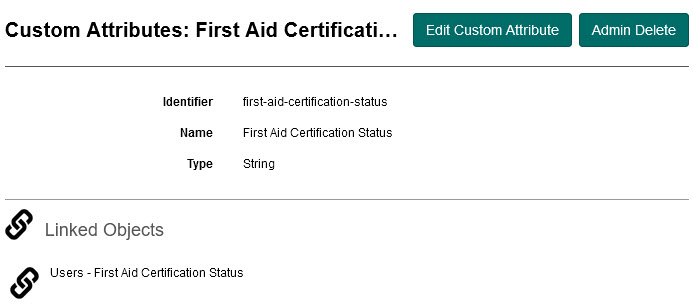
Create a string custom attribute and link it to the Users system object — see Add a custom attribute.
-
Activate the batch edit option for the custom attribute:
- Go to Settings > User Settings.
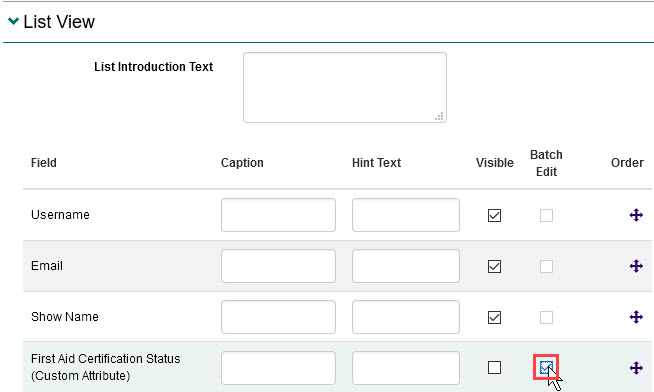
- On the User Settings screen, expand the List View section.
-
Check Batch Edit next to the required custom attribute.
-
Select Save Settings.
-
Action the batch edit from the list of users:
- Go to People > Users.
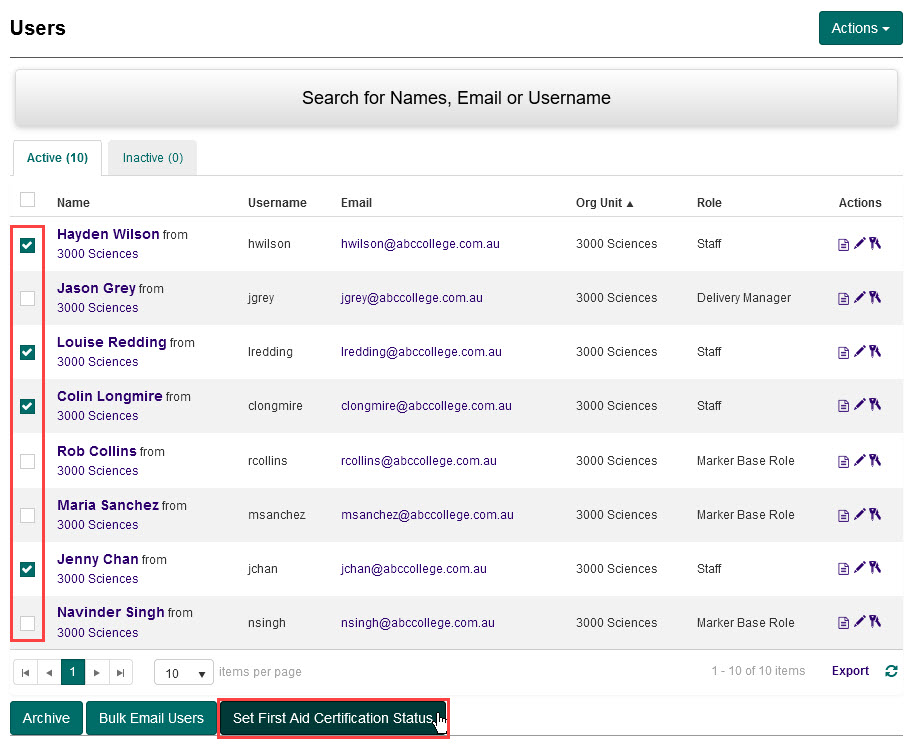
- On the Users screen, check the box next to each required user.
-
Select the button matching the custom attribute you created — for example Set First Aid Certification Status.
-
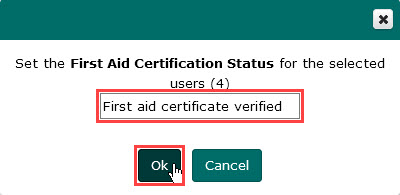
A popup displays. Enter the required value and select Ok.
-
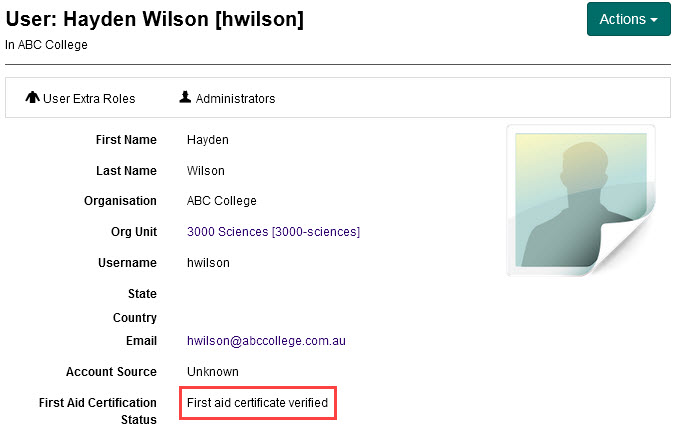
Open one of the users you just updated — the new value shows on the User screen.
Tip
You can also set custom attribute fields to display on forms and views. See user settings for how to configure these.