Add audio to an item
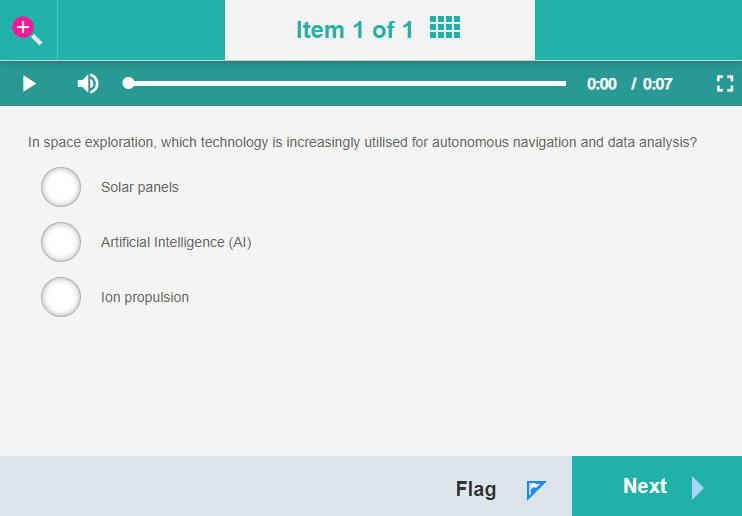
The audio feature lets you attach audio files to an item's stem, prompt, response options, and feedback. You can also generate audio from text using text-to-speech. When test-takers open the item, a single player at the top of the screen controls all attached audio.
There are two ways to add audio to an item:
- Via the Audio section — attaches audio to the item as a whole and displays a single top-bar player in the test player. Use this when you want to read the item aloud or use autoplay.
- Inline in the stem or distractors — embeds individual players directly in the content area.
Add audio to the stem or distractors
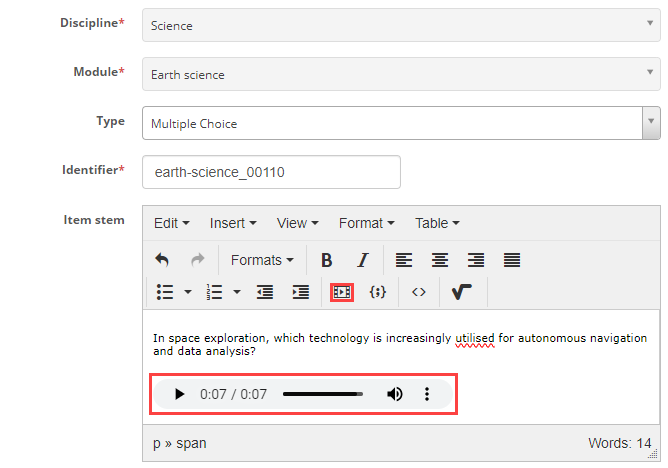
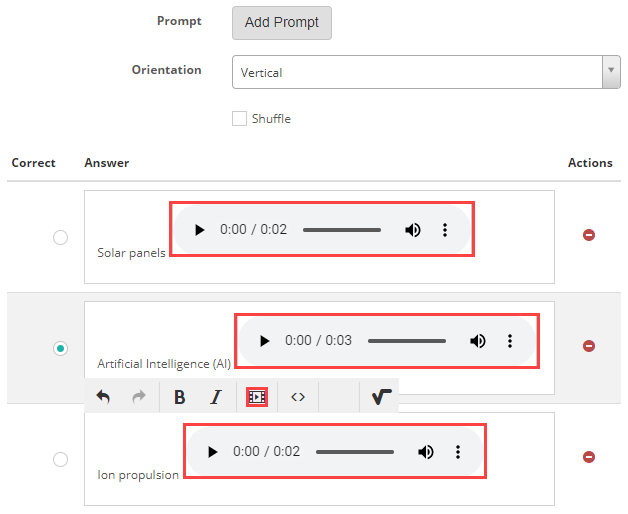
You can embed audio directly in the item stem or in individual response options using the Insert/edit resources  icon in the editor toolbar.
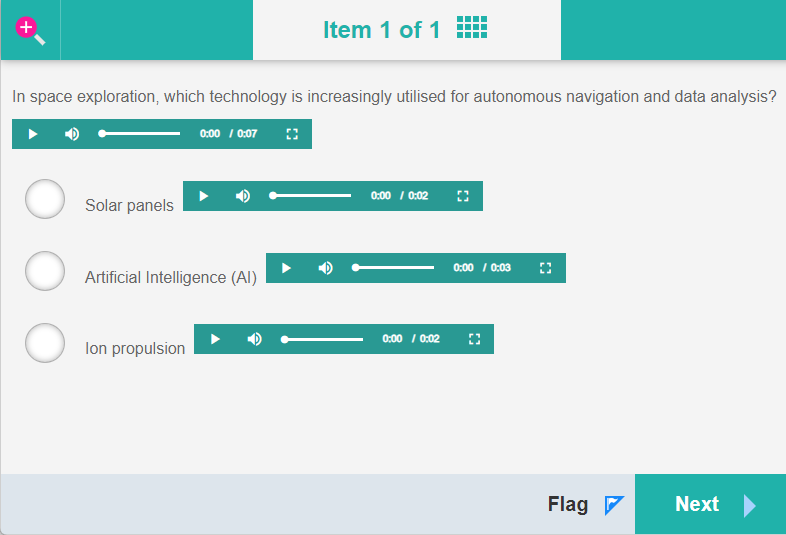
This places a player within the content area itself. In the test player, the player colour scheme varies depending on the test player theme.
To add audio this way, open the item in edit mode, place your cursor in the stem or a distractor, then select the Insert/edit resources icon in the toolbar.
Add audio via the Audio section
Adding audio via the item's Audio section displays a single player at the top of the screen in the test player. This player controls all attached audio and relates to the whole item. Use this method to read the item aloud or to use autoplay.
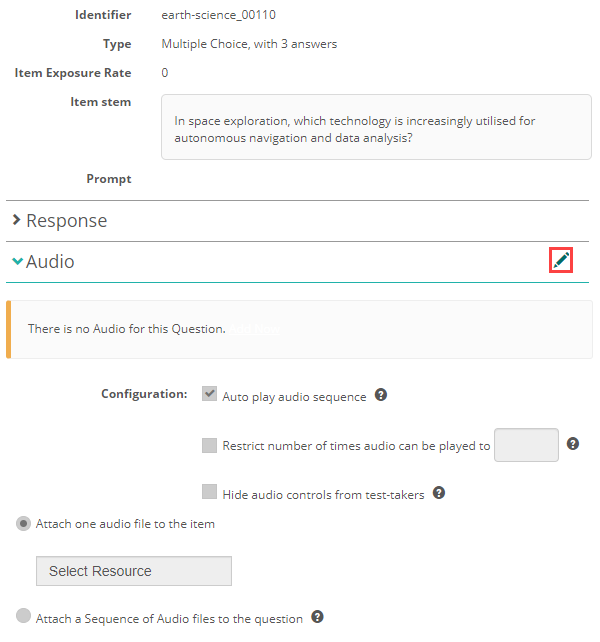
To open the Audio section for editing, expand the Audio section in the item designer then select the edit (pencil) icon.
Configuration
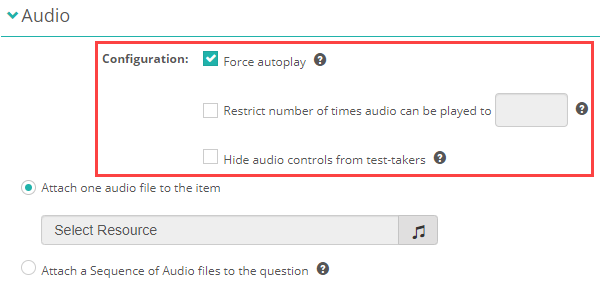
The configuration options control how audio behaves for test-takers:
| Option | Description |
|---|---|
| Force autoplay | Automatically plays all attached audio when the test-taker opens the item. Overrides the autoplay setting on individual audio files. |
| Restrict number of times audio can be played to | Limits how many times a test-taker can play the audio. Enter the maximum number in the adjacent field. Once the limit is reached, the test-taker cannot pause, resume, or seek — they can only restart if plays remain. |
| Hide audio controls from test-takers | Hides playback controls from test-takers, leaving only the volume control and a play button. If autoplay is on and the play count is restricted to one, the play button is also hidden. |
Attach a single audio file
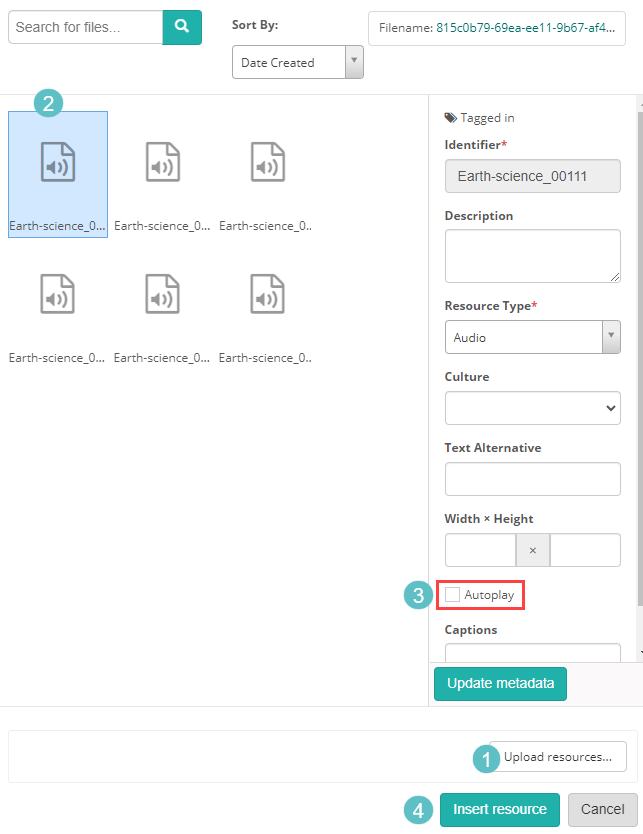
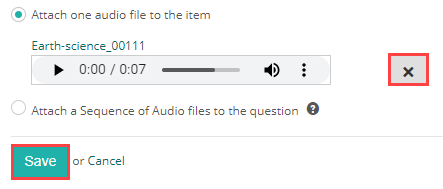
Select Attach one audio file to the item, then select Select Resource.
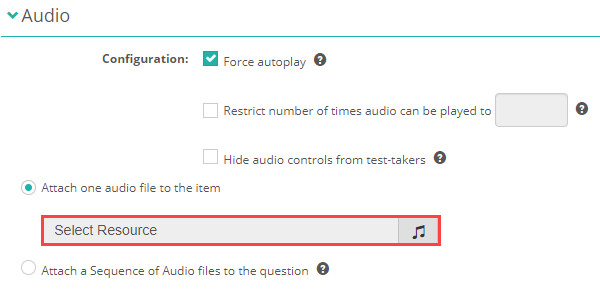
- Select Upload resources to upload a new file, or select an existing file from the list.
- Select the file.
- Configure any playback options, such as autoplay.
-
Select Insert resource.
Select Save.
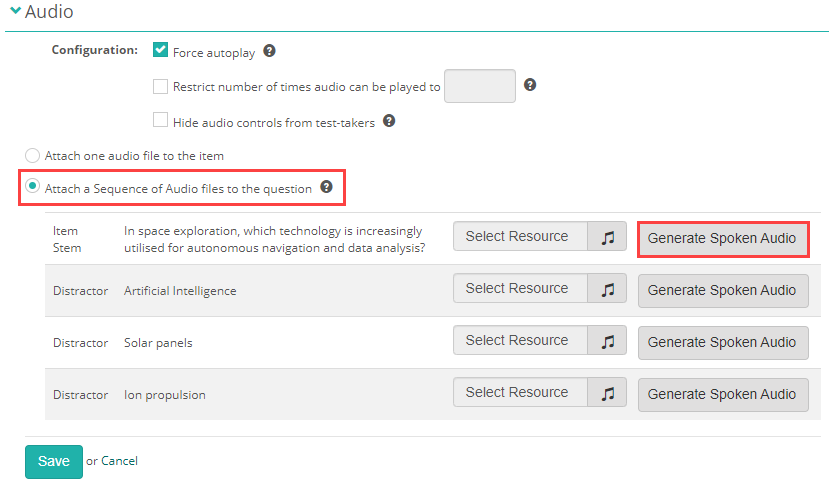
Attach a sequence of audio files
Sequence mode lets you attach separate audio files for the item stem, item prompt (if the item has one), each response option, and any feedback sections. In the test player, the files play in order with a 0.5-second gap between them.
Tip
If you do not want the files played sequentially, embed audio directly in the stem or distractors instead (see Add audio to the stem or distractors above).
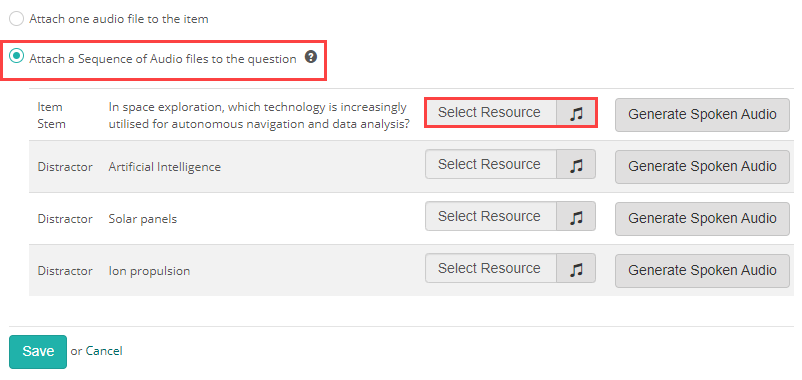
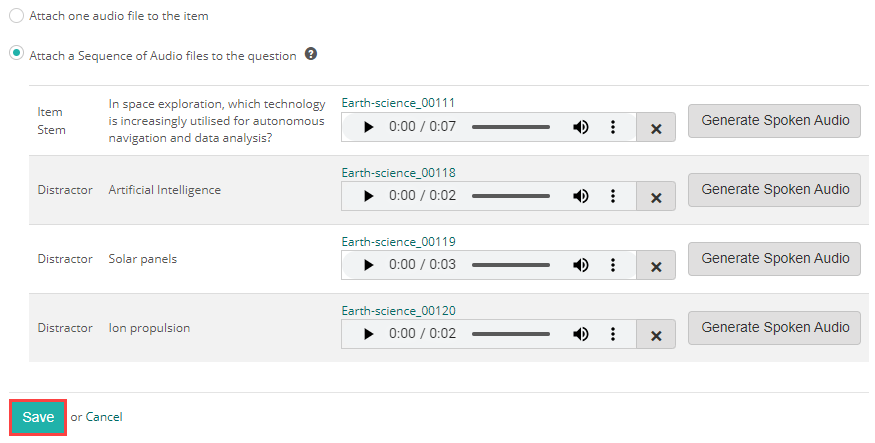
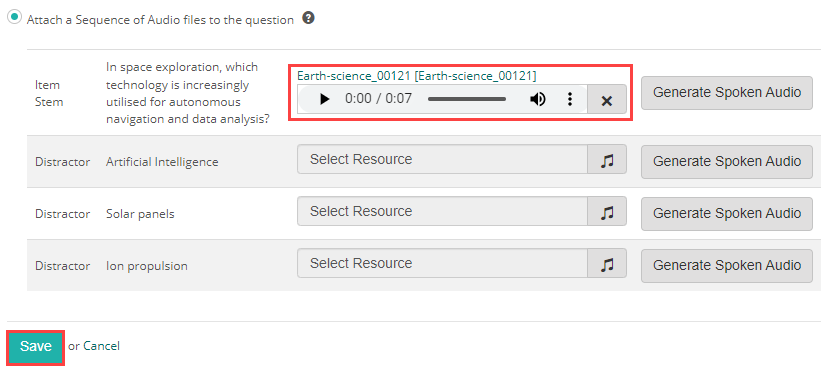
Select Attach a Sequence of Audio files to the question. For each row — Item Stem, Item Prompt (if present), each Distractor, and any feedback rows — select Select Resource, choose a file, then select Insert resource. Select Save when all rows are filled.
After you select Insert resource in the resource picker for each row, the table updates to show the attached audio files with playback controls.
Tip
After saving, preview the item to confirm the audio plays correctly. See Preview items.
Text-to-speech
Important
Text-to-speech must be enabled for your organisation before you can use this feature. Contact your Janison account manager to discuss activation.
Text-to-speech generates an audio file from the text in an item component. Use it instead of uploading a manually-recorded file.
In the Audio section, select Attach a Sequence of Audio files to the question, then select Generate Spoken Audio beside the component you want to generate audio for.
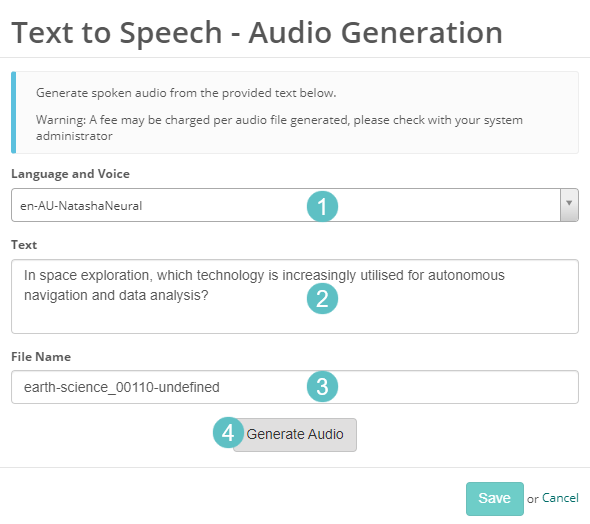
On the Text to Speech screen:
- Select the Language and Voice.
- Edit the text in the Text field if needed.
- Enter a filename in the File Name field.
-
Select Generate Audio.
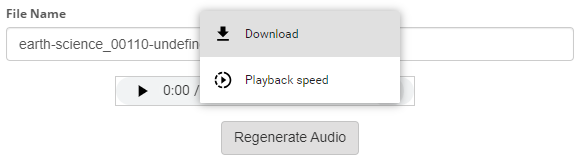
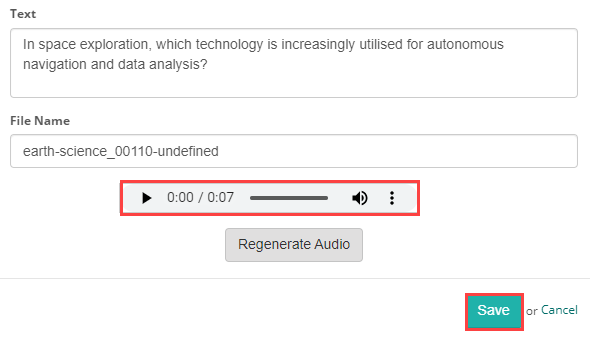
Listen to the preview and confirm the audio is correct. Select the three-dot menu  icon to access additional options.

The available options are:
- Download — download the generated audio file to your device.
- Playback speed — adjust the speed of the preview.
Select Save.
Repeat for any other components in the sequence.
Tip
If the item text changes after you generate audio, a warning icon appears in the Audio section header. Open the section and regenerate audio for any affected components.
Settings
Resource Designer settings
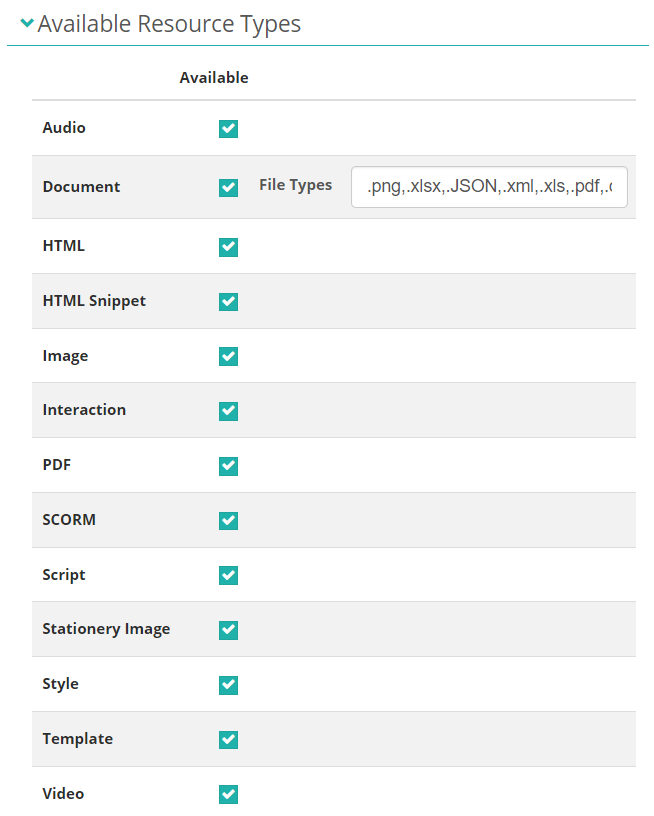
Administrators can configure which audio file extensions are available in the resource picker. Common audio formats are enabled by default.
Navigate to Settings > Resource Designer Settings > Available Resource Types and add the required extension to the Document field.
Test Delivery settings
Administrators can show or hide the audio progress bar in the test player.
Navigate to Settings > Test Delivery Settings.
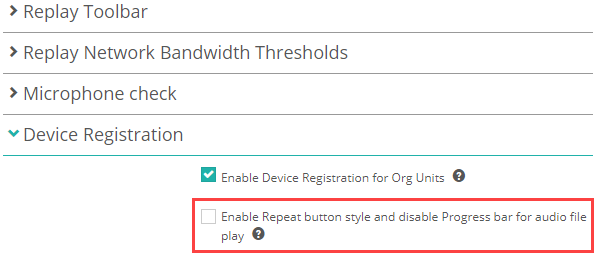
When the option is enabled, the audio progress bar is hidden and a repeat button is shown instead.


Text to Speech settings
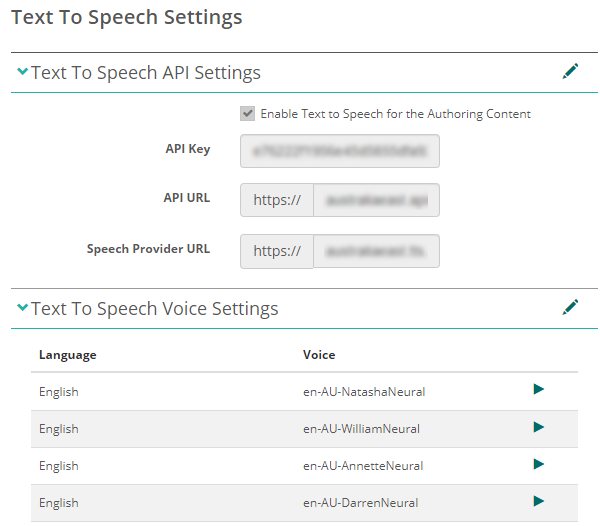
Administrators enable text-to-speech and manage the languages and voices available to authors.
Navigate to Settings > Text To Speech Settings. Enable the feature in the Text To Speech API Settings section, then add languages and voices in the Text To Speech Voice Settings section.