End-of-test feedback
When a test-taker submits an automatically marked test, Janison Insights can show them a results screen. It gives their pass or fail outcome, their score, a breakdown by test section and knowledge area, and the items they answered incorrectly.
This guide covers that screen and how you configure it. In the test's settings it's called the Results Summary Screen. You set it up the same way on a regular test and on a test blueprint, so this guide says "test" for both.
Note
Insights offers several kinds of feedback. For feedback on individual items during a test, or results on the test-taker's dashboard, see other types of feedback at the end of this guide.
What test-takers see
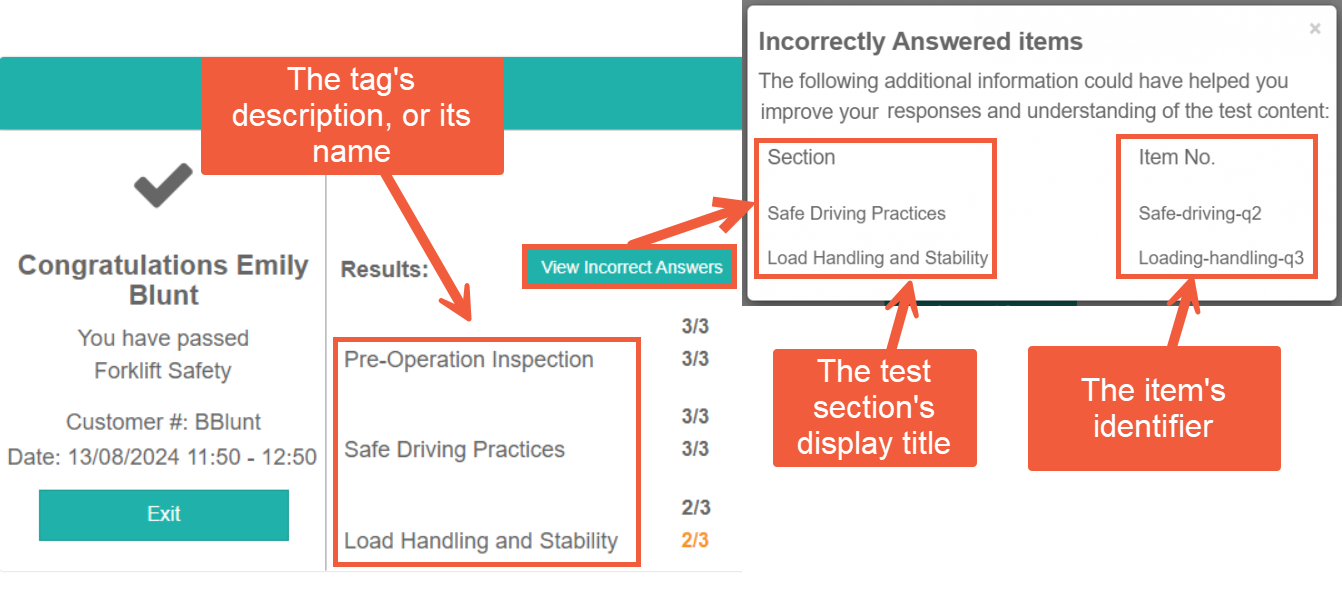
The results screen shows the outcome on the left. Depending on the format you choose, a results panel headed Results: appears on the right.
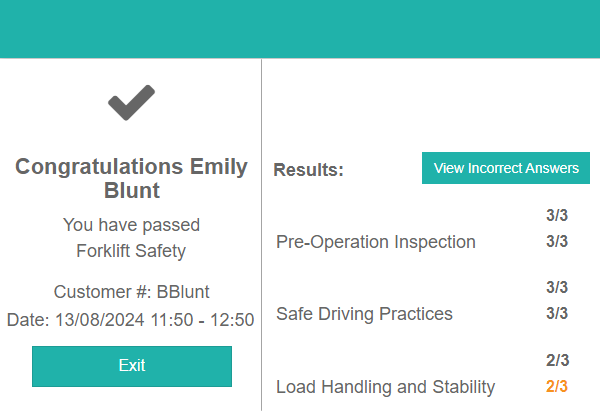
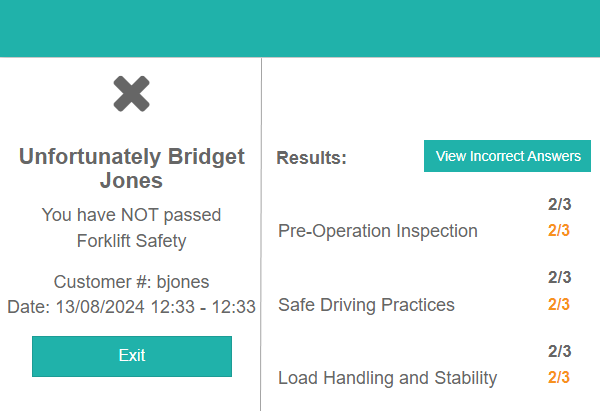
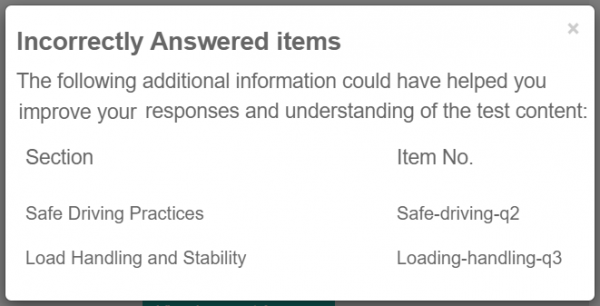
Select View Incorrect Answers to open the Incorrectly Answered items modal. It lists each item the test-taker got wrong, with the test section it came from and the item's identifier. The button only appears if at least one item in the sections you nominate has Enable Live Marking and Feedback for this item ticked — see feedback and live marking. It's ticked by default.
Before you start
These 5 things must be in place before the results screen can work. They're the same for a regular test and a test blueprint. Set the test-level ones on the blueprint when you're using one — they carry to every test it generates.
Blueprint must be an available test type. An administrator selects this at Settings > Test Designer Settings > Available Test Types, by ticking Available on the Blueprint row. This is what makes tag types available on items and modules — for regular tests as well as blueprints.
Tag types must be attached to the module. Open the module at Author > Modules, edit Blueprint Settings and add the tag types you want to use. Only these tag types appear on the module's items and in the test's feedback configuration. See tags and tag types.
The test must be automatically marked. Set Live Marking of Items on each item section to This section is to support live marking of responses in the test player. The results summary can't calculate anything from manually marked items.
The test must have a pass/fail outcome. On the test's details, tick Set a pass/fail outcome and enter a Pass Mark. Until you do, the Advanced Pass/Fail Settings expandable doesn't appear on the test at all.
Items must keep feedback enabled. Enable Live Marking and Feedback for this item is ticked by default on each item. Untick it and that item drops out of the Incorrectly Answered items modal — if no item in your nominated sections has it, the View Incorrect Answers button never appears. See feedback and live marking.
How to set it up
- Create your tag types and tags, and enter a Description for each tag.
- Tag your items.
- Create the test and tick Set a pass/fail outcome.
- Add item sections and add your tagged items to them.
- Configure Advanced Pass/Fail Settings on the test.
- Configure Results Summary Configuration on the test.
The examples throughout this guide use a test on Forklift Safety with 3 sections: Pre-Operation Inspection, Safe Driving Practices and Load Handling and Stability.
Tags
Tags are what turn a score into a knowledge-area breakdown. The tag's Description is the label a test-taker sees in the results panel.
For the steps to create tags and activate them on your items, see tags and tag types.
Add a description to a tag
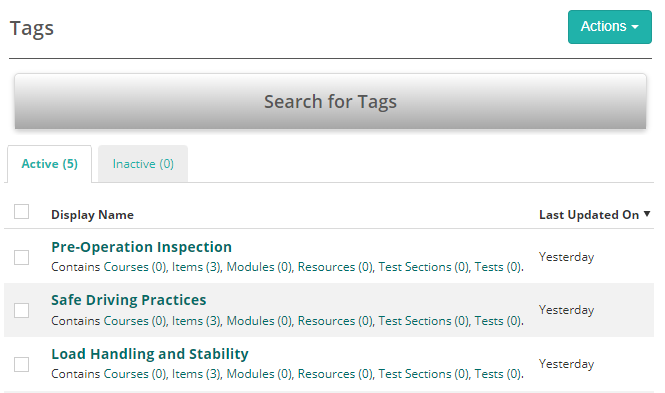
Go to Author > Manage Tags. In this example there's a tag type of Forklift Safety with 3 tags: Pre-Operation Inspection, Safe Driving Practices and Load Handling and Stability.
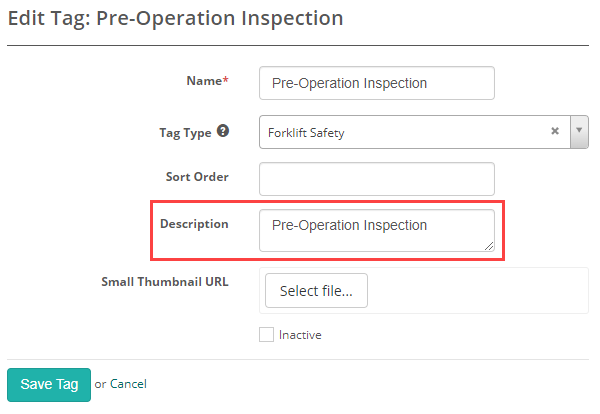
Open a tag in edit mode and enter a Description. Leave it blank and the results panel falls back to the tag's Name.
Tag your items
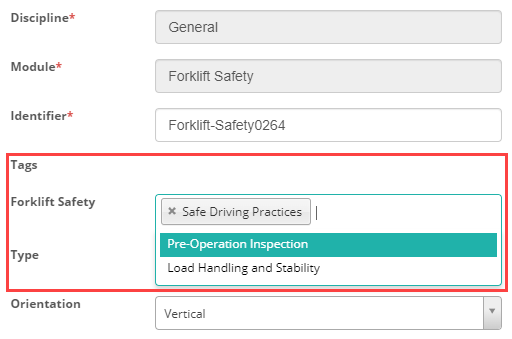
On each item, the module's tag types appear as fields under Tags, labelled with the tag type's name. Select every tag that applies — the field takes more than one, and it's usually mandatory.
Note
No Tags expandable on the item means one of the prerequisites above is missing: either Blueprint isn't an available test type, or the module has no tag types.
Where the labels come from
Three authoring fields supply the labels a test-taker sees — one in the results panel, and two in the Incorrectly Answered items modal it opens.
| Where it appears | Comes from |
|---|---|
| Row labels in the results panel | The tag's Description, or its Name if the description is blank |
| The Section column in the modal | The test section's Display Title |
| The Item No. column in the modal | The item's Identifier |
The results panel lists a row for each test section you nominate, scored across every item in that section, then a row for each tag found on those items, scored across only the items carrying that tag.
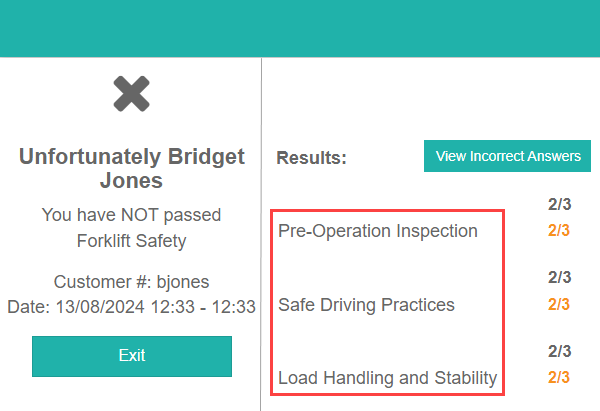
The two match when a section's items all share one tag, which is the case in the example above — so each score appears twice. They separate as soon as a section spans more than one tag:
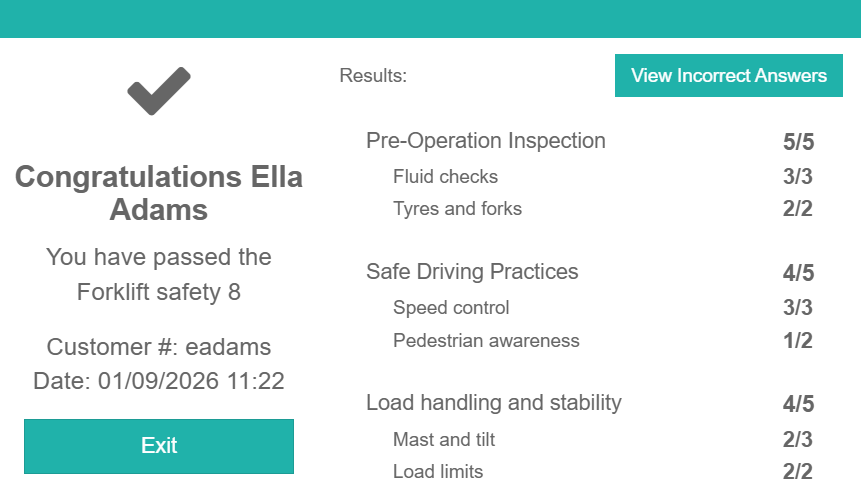
Display Title only controls the label on the section row — the row appears whether or not you set one. The screenshots at the top of this guide come from a test with no Display Title set, which is why each labelled score there sits under a bare, unlabelled one.
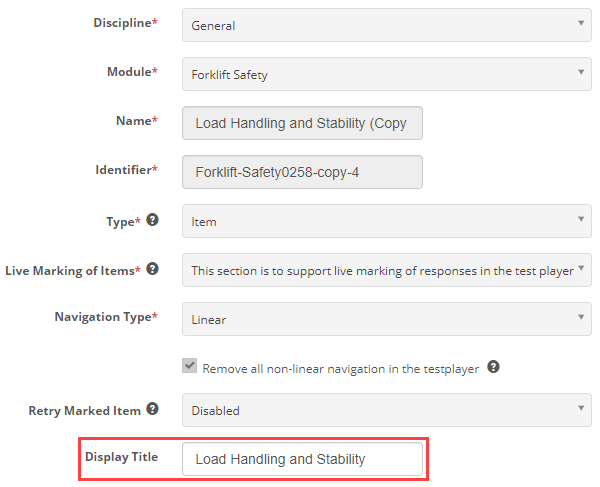
A section's Name and Display Title are for different audiences. Name is what you see in section lists and in the Included Test Sections dropdown; Display Title is what a test-taker sees here. Copying a section shows why both exist: the copy is named Load Handling and Stability (Copy) while its Display Title stays Load Handling and Stability.
Set Display Title on the test section.
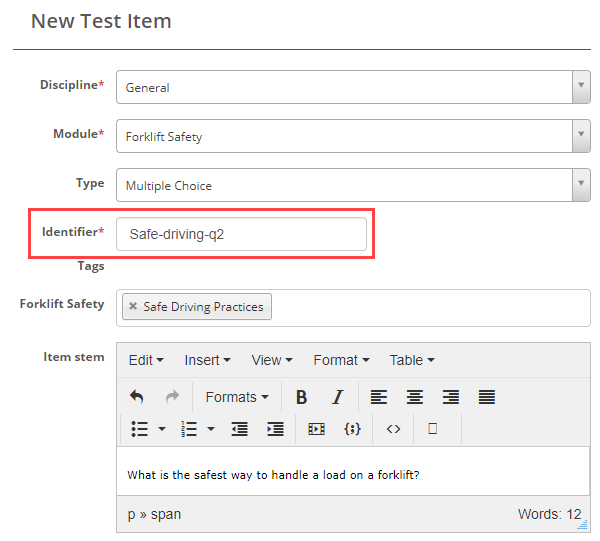
Set Identifier on the item. In this example the identifier Safe-driving-q2 is what appears under Item No. in the modal.
The left of the screen
Most of the left is derived rather than authored. The tick or cross, Congratulations or Unfortunately, and You have passed the or You have NOT passed the all follow from the pass or fail outcome, and you can't change them per test.
Three things you do control:
The test name — the test's Display Name.
The test-taker's name, Customer # and Date — these come from the user and the attempt. On an example test, Exclude example customer information hides all three. See practice tests.
A prompt and a content block below the date — written per outcome in the module's Testplayer Custom Content Settings, under Test Results Summary Screens. Pick a Test Result Outcome — Passed Test 100%, Passed Test with Errors or Failed Test — and write the content for that outcome. An administrator has to enable Enable Testplayer Custom Content first. See Settings.
Advanced pass/fail settings
The Advanced Pass/Fail Settings expandable decides whether a test-taker passes. Complete it before Results Summary Configuration — some of the results options depend on it.
Expand it on the test. Which fields you see depends on what you choose, so it grows as you fill it in.
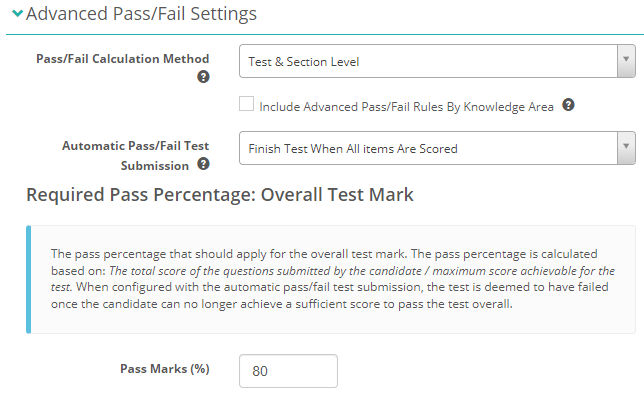
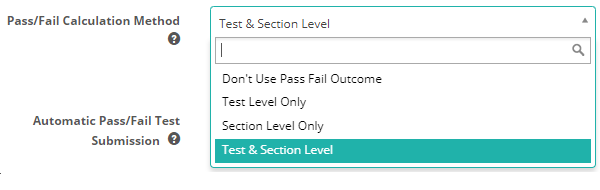
Pass/Fail Calculation Method — sets how pass and fail are calculated across the test and its sections. The options are Don't Use Pass Fail Outcome, Test Level Only, Section Level Only and Test & Section Level. Your choice controls which of the 2 pass-percentage blocks below appears.
Include Advanced Pass/Fail Rules By Knowledge Area — lets you fail a test-taker on specific knowledge areas, alongside the pass percentages you set below.
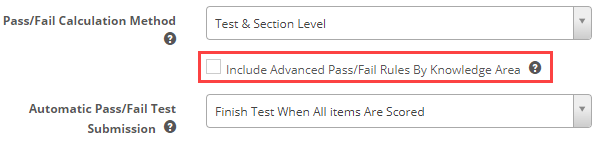
Ticking it adds the Required Advanced Pass / Fail Rules By Knowledge Area table further down the page. A knowledge area is the set of items carrying the tags you nominate, so each rule applies to a slice of the test rather than the whole thing.
Each rule takes a Rule Name, one or more Included Tags, a Rule Type and a Limit. Select Add to put the rule in the table, then Save. A rule only counts items that are worth marks and carry at least one of its tags; if nothing in the test matches, the rule is skipped.
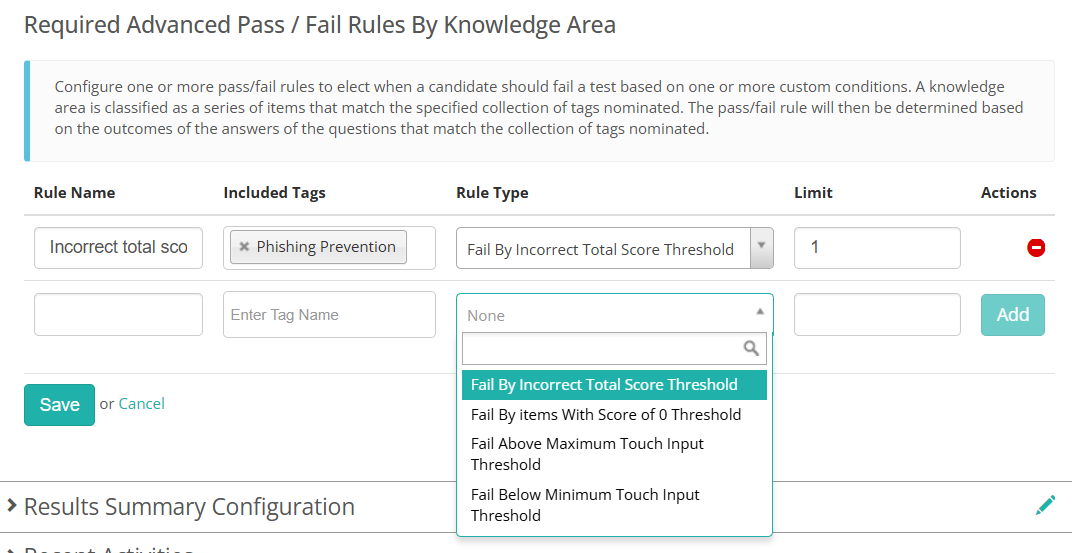
The Rule Type options are:
Fail By Incorrect Total Score Threshold — fails the test-taker once the marks they've lost across the tagged items exceed Limit.
Fail By items With Score of 0 Threshold — the same calculation, narrowed to items that scored zero. Limit counts marks, not items: 2 zero-scored items worth 2 marks each total 4, so a Limit of 3 is already exceeded.
Fail Above Maximum Touch Input Threshold — fails the test-taker once their total touch inputs across the tagged items exceed Limit.
Fail Below Minimum Touch Input Threshold — fails the test-taker when total touch inputs fall below Limit. Checked only once every item has been answered.
Note
A rule ends the test early only when Automatic Pass/Fail Test Submission is Finish Test On Failure to Achieve Pass Mark % or Finish Test When All items Are Scored OR Failure. Under the other options the rules still apply, but not until the test is submitted. No rule applies at all while Pass/Fail Calculation Method is Don't Use Pass Fail Outcome.
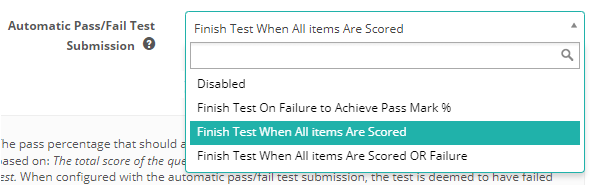
Automatic Pass/Fail Test Submission — stops and submits the test as soon as the pass or fail outcome is certain. The options are Disabled, Finish Test On Failure to Achieve Pass Mark %, Finish Test When All items Are Scored and Finish Test When All items Are Scored OR Failure. Every item must be automatically marked for this to work.
The Required Pass Percentage: Overall Test Mark block appears when the calculation method is Test Level Only or Test & Section Level. Set Pass Marks (%) to the percentage needed to pass the test overall. Saving it also updates the Pass Mark on the test's details.
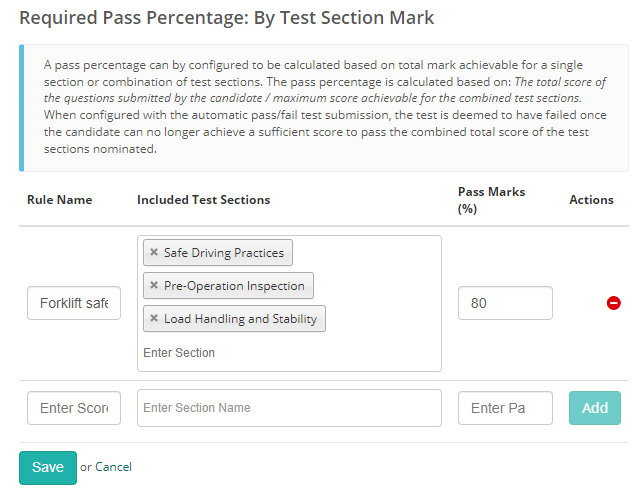
The Required Pass Percentage: By Test Section Mark block appears when the calculation method is Section Level Only or Test & Section Level. Add one or more rules, each with a Rule Name, one or more Included Test Sections and a Pass Marks (%) value. The percentage is calculated across that rule's sections combined, so a single rule can cover several sections. Only item sections can be included.
Warning
Add at least one rule. If you choose Section Level Only or Test & Section Level and leave this table empty, the results screen breaks at delivery. The test-taker sees "A problem has occurred" with Sequence contains no elements, and the player drops into offline mode. Either add a rule or set Pass/Fail Calculation Method to Test Level Only.
Results summary configuration
This is what actually turns the results screen on. Expand Results Summary Configuration on the test.
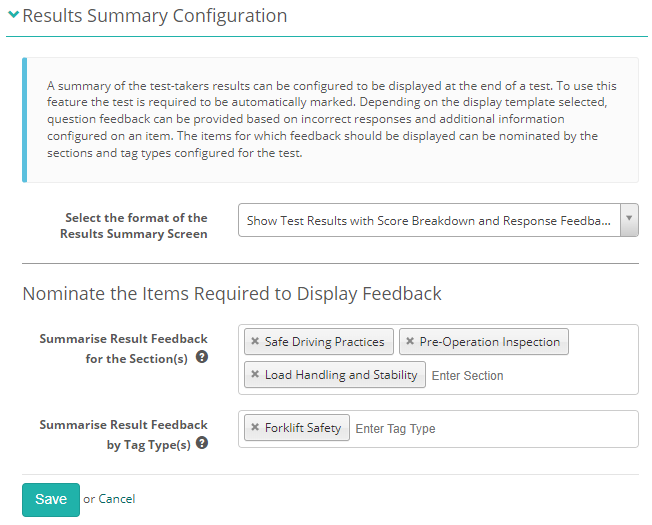
Select the format of the Results Summary Screen — controls what the test-taker sees:
- Disabled — no results screen.
- Show Test Result Only — pass or fail and the score, with no breakdown.
- Show Test Results with Score Breakdown and Response Feedback — adds the results panel and the View Incorrect Answers button.
- Show Test Results with Response Feedback — response feedback without the score breakdown.
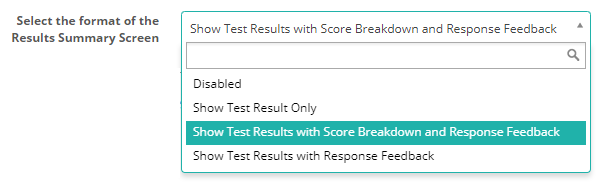
For the 2 formats ending in Response Feedback, complete the Nominate the Items Required to Display Feedback block:
Summarise Result Feedback for the Section(s) — the item sections the feedback covers.
Summarise Result Feedback by Tag Type(s) — the tag types the breakdown is grouped by. Only tag types attached to the module appear here.
Important
Populate both fields. If either is empty the results panel comes back blank. A nominated section also produces no rows if none of its items carry a tag from the tag types you selected.
These 2 fields are hidden under the other formats, and when Pass/Fail Calculation Method is Don't Use Pass Fail Outcome.
Warning
Values already saved in these fields are cleared when you save with them hidden. Switching the format back leaves them empty.
Important
Test results are not visible in preview mode. The screen still opens, but it comes back empty.
Blueprints and blueprinted tests
Configure Advanced Pass/Fail Settings and Results Summary Configuration in the blueprint, before you generate tests from it. Both expandables carry across to every test the blueprint generates, and on a generated test they're read-only — the edit pencil isn't there.
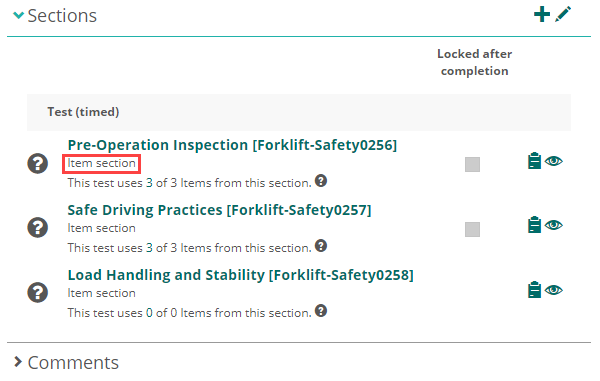
A blueprint needs only Item section types.
Troubleshooting
The results screen fails quietly: nothing errors at authoring time, and the gap only shows up once a test-taker submits. Start from what you see.
| What you see | Likely cause |
|---|---|
| The results panel is blank | One of the nominate fields is empty, or the sections you nominated hold no items tagged from the tag types you selected. See results summary configuration. |
| No results panel and no View Incorrect Answers button | Only Show Test Results with Score Breakdown and Response Feedback shows both. See results summary configuration. |
| The results panel shows but no View Incorrect Answers button | No item in the nominated sections has Enable Live Marking and Feedback for this item ticked, or every tagged item was answered correctly. See before you start. |
| Rows show a score but no label | The test section has no Display Title, or the tag has no Description. See where the labels come from. |
| No Advanced Pass/Fail Settings expandable on the test | Set a pass/fail outcome isn't ticked on the test's details. See before you start. |
| No Tags expandable on an item | Blueprint isn't an available test type, or the module has no tag types. See before you start. |
| "A problem has occurred" with Sequence contains no elements | The calculation method includes section level but the rule table is empty. See advanced pass/fail settings. |
| Nothing on the results screen in preview | Expected. Results render only for real attempts. |
Settings
Administrators configure the following at Settings > Test Designer Settings.
Available Test Types > Blueprint > Available — makes blueprints an available test type, which in turn makes tag types available on items and modules. Required for the knowledge-area breakdown on regular tests as well as blueprints.
Results Summary Configuration > Select the format of the Results Summary Screen — the default format inherited by new tests. Defaults to Disabled.
Test Section Options > Enable Live Marking of Items — makes the per-section Live Marking of Items option available, which is how a section becomes automatically marked. This setting depends on Enable ability to remove all non-linear navigation actions In the Testplayer.
Test Authoring Settings > Enable Testplayer Custom Content — makes the module's Testplayer Custom Content Settings expandable available, where you customise the wording on the results screens.
Two role permissions control whether the pass/fail and results summary expandables appear on the test at all. Administrators grant these at Settings > Roles.
Enable Results Summary Configuration — without it, Results Summary Configuration doesn't appear on the test.
Advanced Pass / Fail Settings Allow Editing of Tag Based Custom Rules — without it, the Include Advanced Pass/Fail Rules By Knowledge Area checkbox is hidden.
At the module level, an author configures the following.
Blueprint Settings > Tag types — the tag types available on the module's items and in Summarise Result Feedback by Tag Type(s) on its tests.
Testplayer Custom Content Settings > Test Results Summary Screens — customises the wording per outcome. Pick a Test Result Outcome and set the prompts for it.
Other types of feedback
Item feedback and live marking
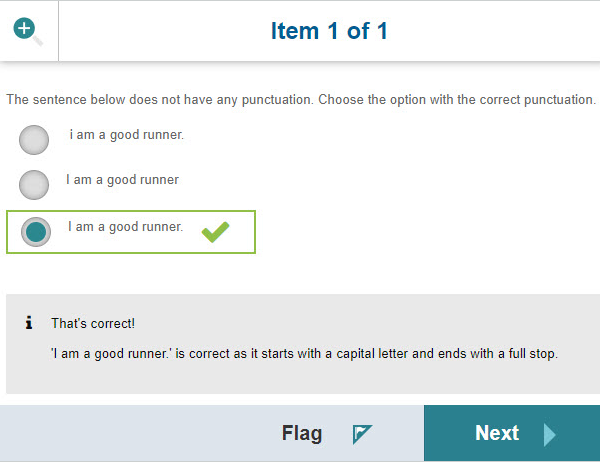
As a test-taker completes an item, the system marks it and shows feedback straight away. See feedback and live marking.
Results and feedback on the dashboard
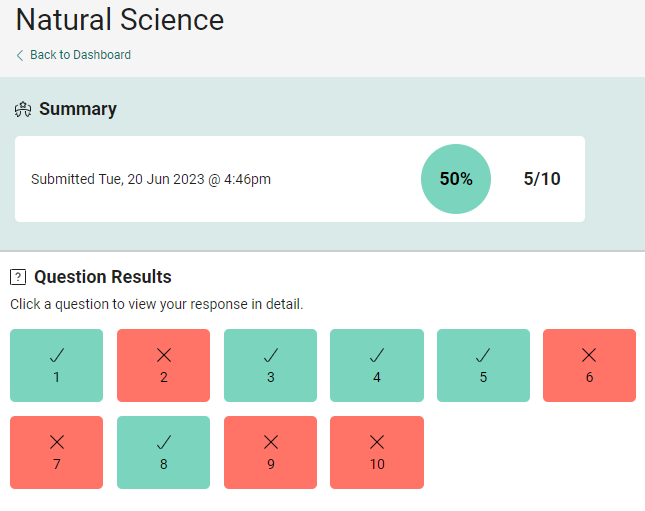
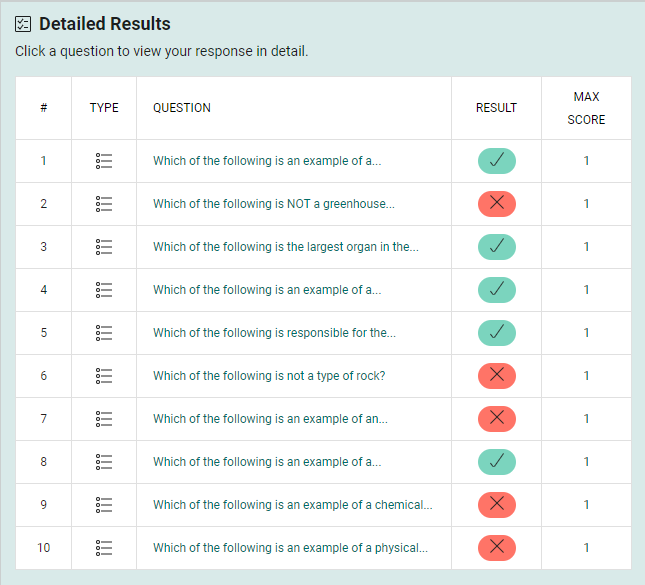
Test-takers can review their results from the tiles on their dashboard. See results and feedback.
Practice test feedback
You can add feedback to example or practice tests, so test-takers can review their answers after submitting. See add feedback to example tests.