Blind quality monitoring
Blind quality monitoring (BQM) is the technique of monitoring Marker consistency by randomly presenting a Marker with a candidate response that was standardised during S1, and then monitoring any error or discrepancy.
You can view how a Marker is tracking against the monitoring tolerances and compare these with the team average. Markers will be unaware that they are being monitored.
BQM can use either random allocation or stratified monitoring.
Random allocation
-
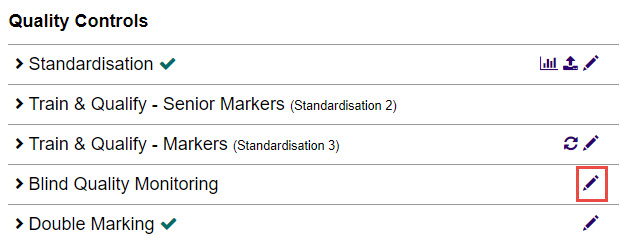
Select the Edit icon next to the Blind Quality Monitoring expandable section.
-
Complete the following:
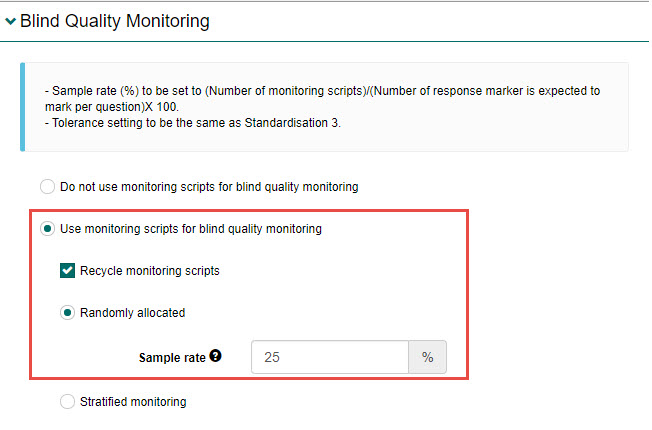
- Select the Use monitoring scripts for blind quality monitoring option.
- Select Recycle monitoring scripts (optional) if you would like to reuse the monitoring scripts in future marking.
- Select the Randomly allocated option.
- Enter a percentage number in the Sample rate field. This should be set to the number of monitoring scripts divided by the number of responses markers are expected to mark per question × 100.
-
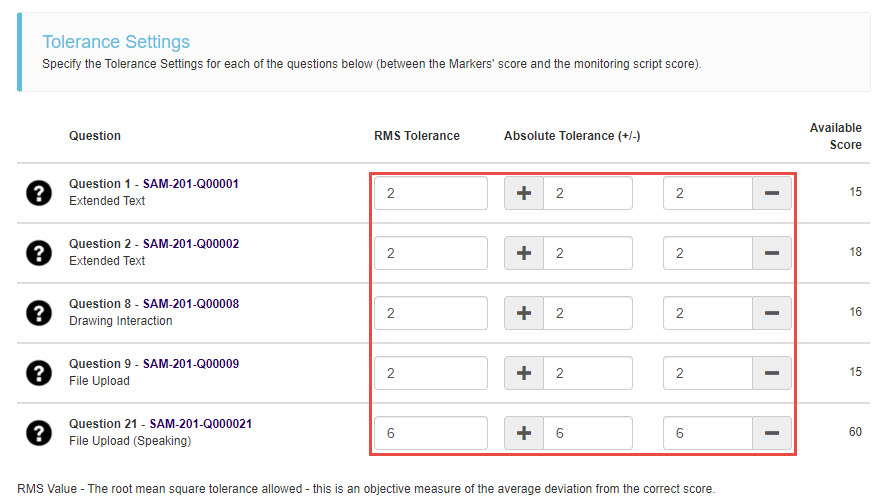
For each question, complete the following:
- Enter a number in the RMS Tolerance field. RMS value is the root mean square tolerance allowed — this is an objective measure of the average deviation from the correct score.
- Enter a number in the Absolute Tolerance fields for both above (+) and below (-) the correct score.
Tip
The values entered here will automatically populate across the grid, but you can change them if required.
-
Select the notification settings to determine how to handle Markers giving scores that exceed the tolerance levels:
Option Description Send the notification to SM's or KP's Sends a notification to Senior Markers or key personnel alerting them to a deviation outside of the tolerance level set. Suspend the marker Suspends the Marker from marking. A tolerance level must be set in the No. of out-of-tolerance scripts before action is taken field. When the Marker exceeds this tolerance, the system will take the specified action. 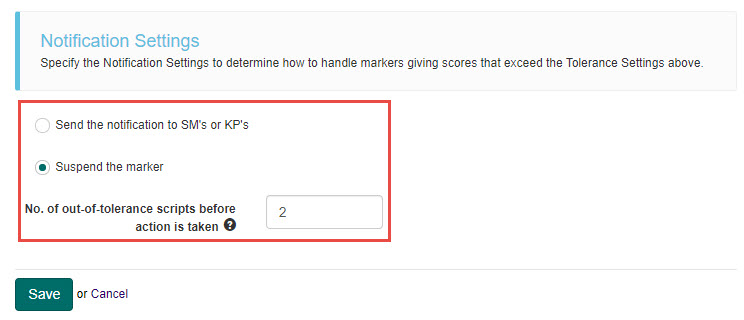
-
Select the Save button to save the changes.
Stratified monitoring
Stratified monitoring is an extension of BQM and allows you to break the sequence of the monitoring scripts into stages and blocks. The placement of specific monitoring scripts can be set in different stages. You have an option to manually allocate monitoring scripts to your preferred location.
-
Select the Edit icon next to the Blind Quality Monitoring expandable section.
-
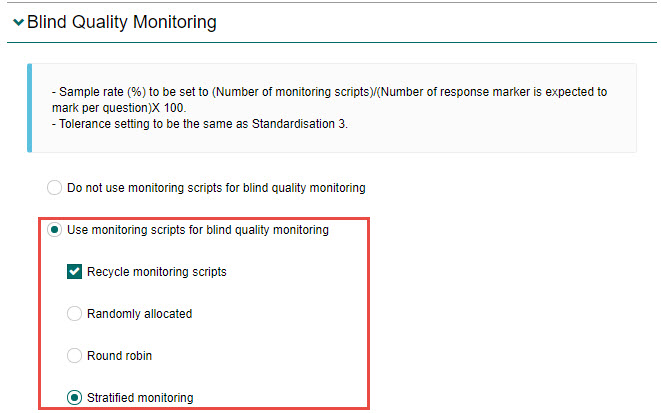
Complete the following:
- Select the Use monitoring scripts for blind quality monitoring option.
- Select Recycle monitoring scripts (optional) if you would like to reuse the monitoring scripts in future marking.
- Select the Stratified monitoring option.
-
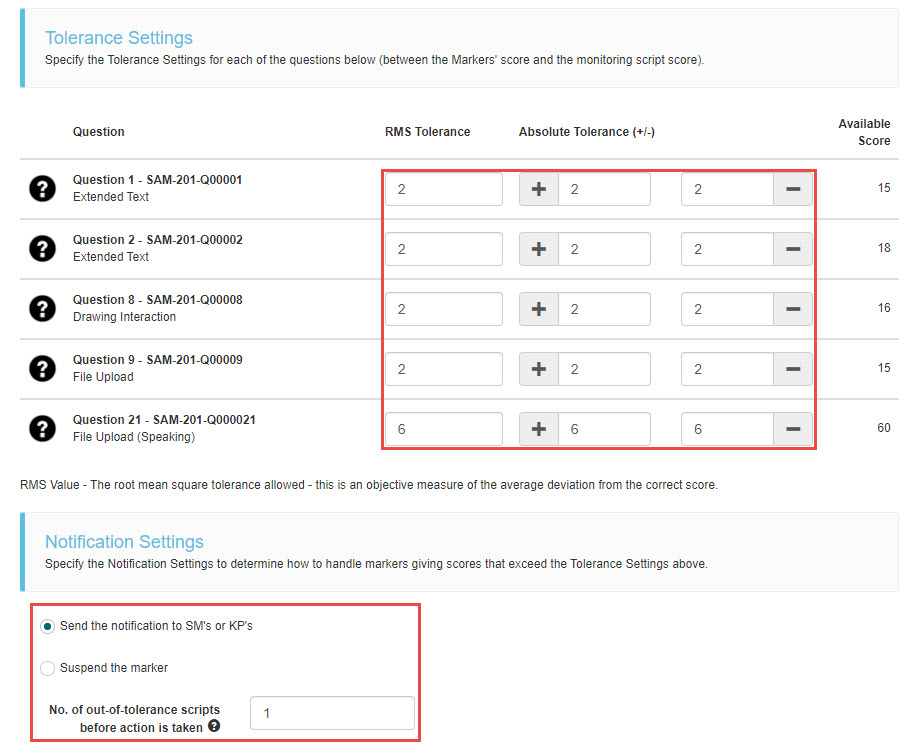
Configure the General area first by completing the following for each question:
- Enter a number in the RMS Tolerance field.
- Enter a number in the Absolute Tolerance fields for both above (+) and below (-) the correct score.
Tip
The values entered here will automatically populate across the grid, but you can change them if required.
- Select the notification settings to determine how to handle Markers giving scores that exceed the tolerance levels (same options as random allocation above).
-
Select the Next button to move to the Stages & Blocks area.
-
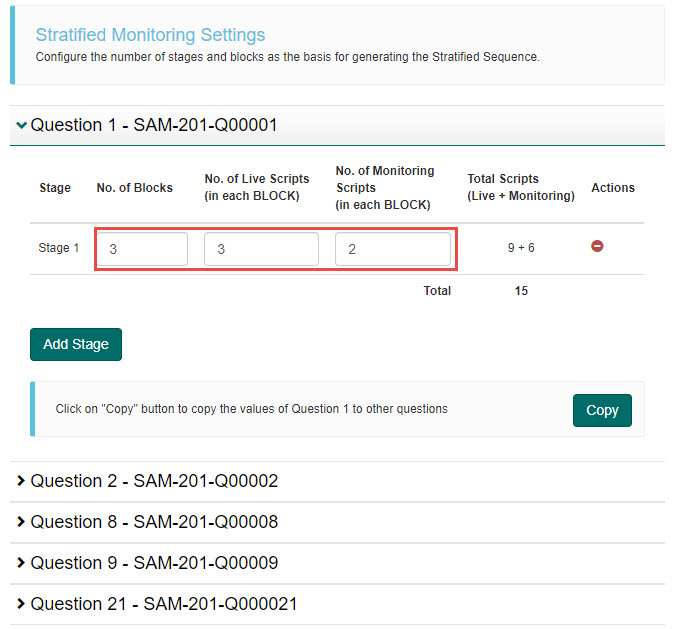
Configure the Stages & Blocks area by completing the following:
- Enter a number in the No. of Blocks field.
- Enter a number in the No. of Live Scripts (in each BLOCK) field.
- Enter a number in the No. of Monitoring Scripts (in each BLOCK) field.
- Select the Add Stage button (optional) if you would like to add another stage.
- Select the Copy button (optional) to copy the stages created in the first question to all other questions.
Tip
The values entered here will automatically populate across the grid, but you can change them if required.
-
Select the Next button to move to the Stratified Sequence area. In this area you can view the stages and blocks you configured in the previous step. You can now configure the stratified sequence, which can be random, manual or a combination of the two.
Important
Standardisation 1 must be completed before you can configure these settings.
-
Configure the Stratified Sequence area by completing the following:
-
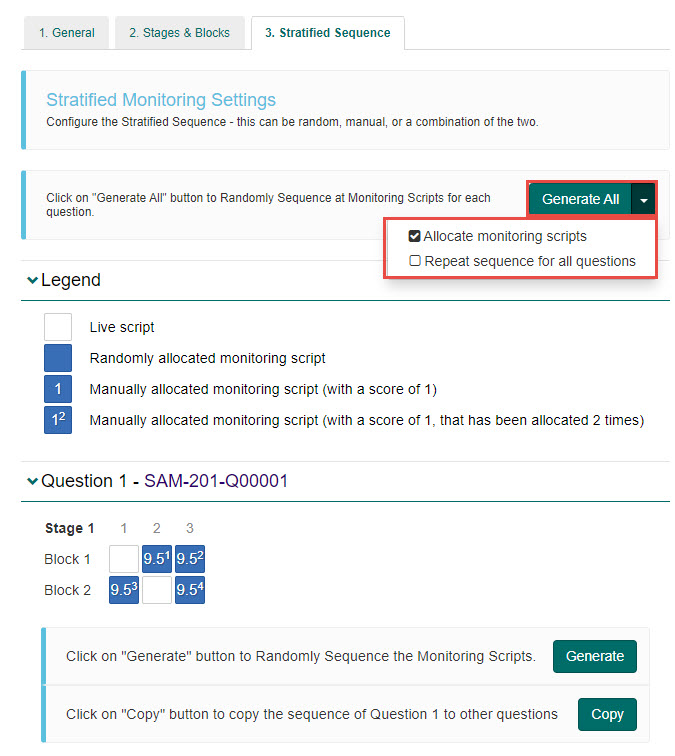
Select the drop-down arrow of the Generate All button and choose one or more options (optional):
Option Description Allocate monitoring scripts Allocates specific scripts to the cells. Repeat sequence for all items If selected, you won't need to generate scripts for each question. -
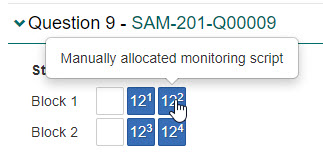
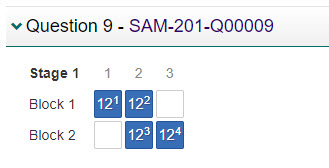
Select the Generate All button. Scripts will be allocated as shown.
- Select Generate (optional) if you did not use Generate All in the previous step.
- Select Copy (optional) to copy this to the other questions.
Important
You can hover over the cells to view more information.
-
Manage manually allocated scripts
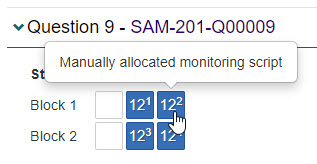
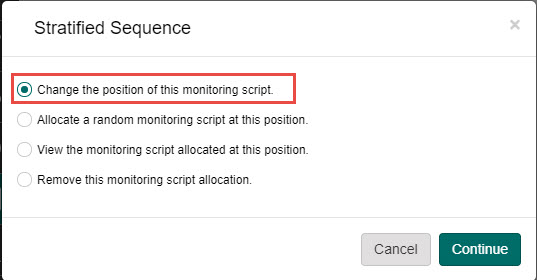
For manually allocated scripts, four actions are available:
- Change the position of this monitoring script
- Allocate a random monitoring script at this position
- View the monitoring script allocated at this position
- Remove this monitoring script allocation
Select a manually allocated monitoring script to access these options.
Change the position of this monitoring script
Select the Change the position of this monitoring script option, then select the Continue button.
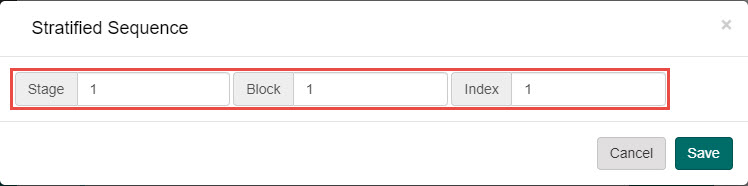
Select the required values in the Stage, Block and Index fields, then select the Save button.
The script displays in the new position.
Allocate a random monitoring script at this position
Select the Allocate a random monitoring script at this position option, then select the Continue button.
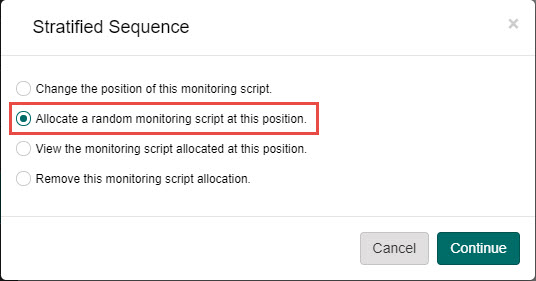
The cell will change from a manually allocated monitoring script to a randomly allocated monitoring script.
View the monitoring script allocated at this position
Select the View the monitoring script allocated at this position option, then select the Continue button.
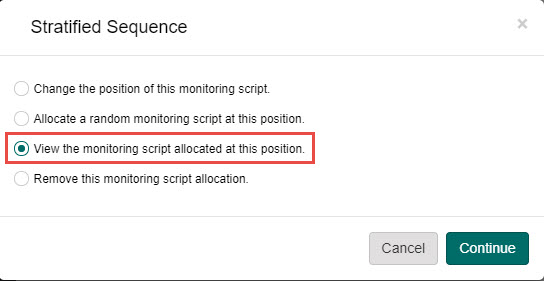
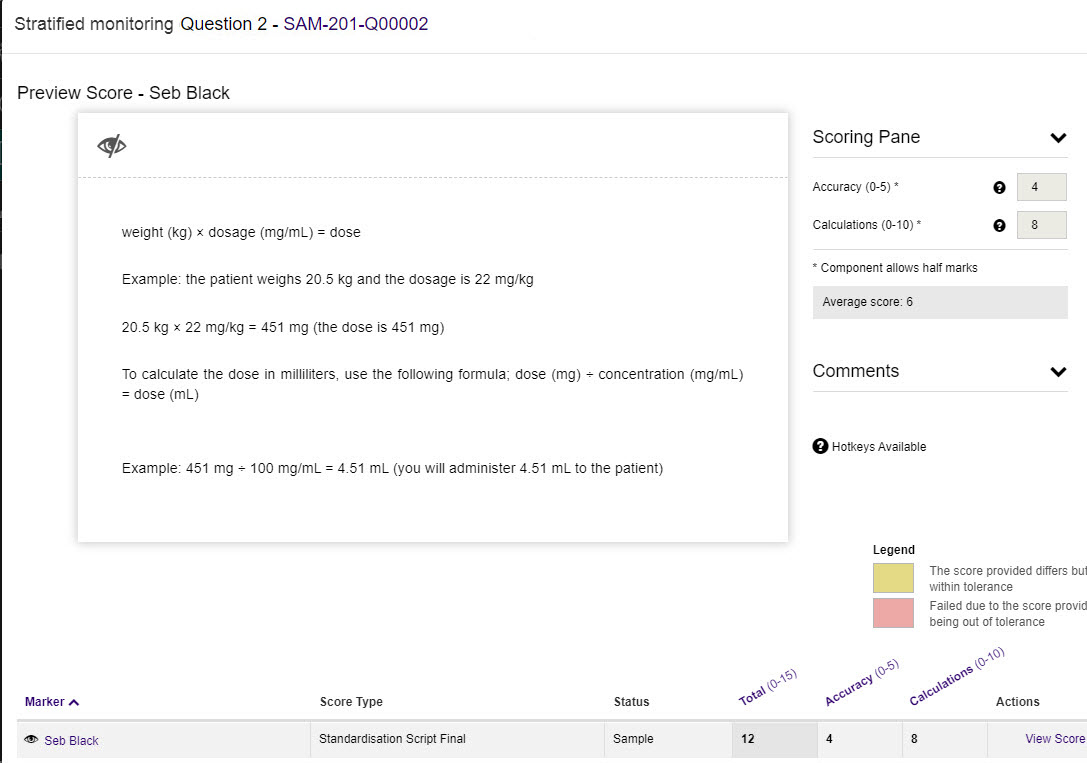
The script will appear in a popup, where you can view the standardisation scores.
Remove this monitoring script allocation
Select the Remove the monitoring script allocation option, then select the Continue button.
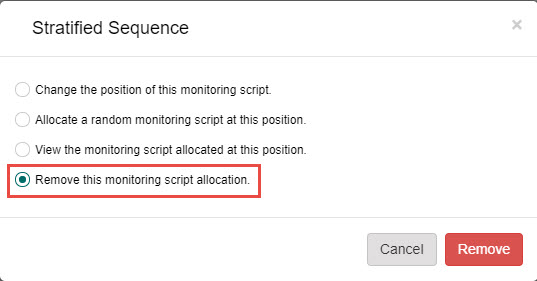
The cell will change from a manually allocated monitoring script to a live script.
Manage randomly allocated scripts
For randomly allocated scripts, three actions are available:
- Change the position of this monitoring script
- Allocate a specific monitoring script at this position
- Remove this monitoring script allocation
Select a randomly allocated monitoring script to access these options.
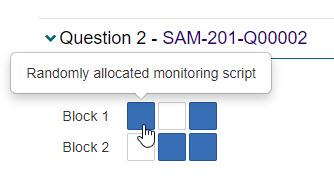
Change the position of this monitoring script
Select the Change the position of this monitoring script option, then select the Continue button.
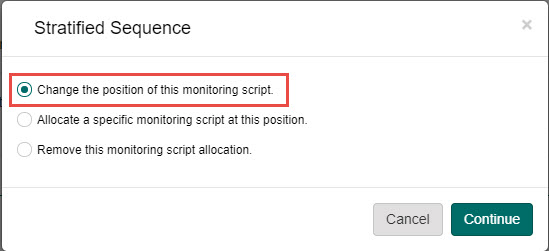
Select the required values in the Stage, Block and Index fields, then select the Save button.
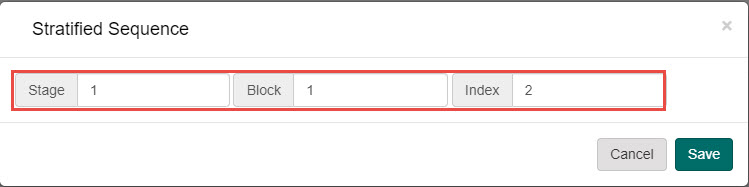
The script displays in the new position.
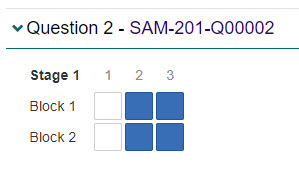
Allocate a specific monitoring script at this position
Select the Allocate a random monitoring script at this position option, then select the Continue button.
Use the arrows to scroll through the scripts until you identify the required one (if applicable), then select the Allocate button.
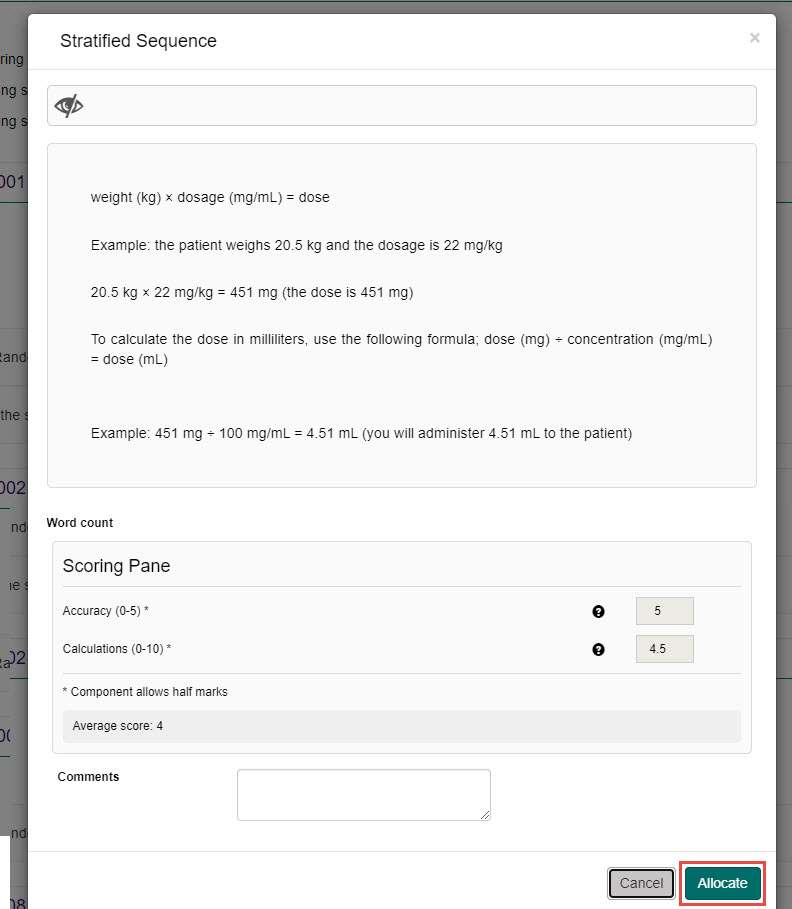
The cell will change from a randomly allocated monitoring script to a manually allocated monitoring script.
Remove this monitoring script allocation
Select the Remove this monitoring script allocation option, then select the Continue button.
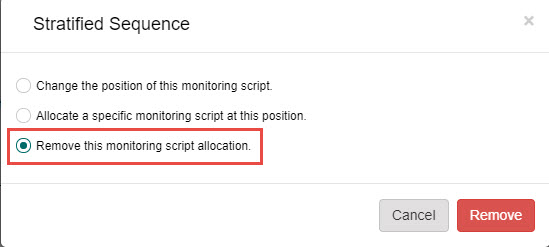
The cell will change from a randomly allocated monitoring script to a live script.
Manage live scripts
Two actions are available for live scripts:
- Allocate a random monitoring script at this position
- Allocate a specific monitoring script at this position
Select a live script to access these options.
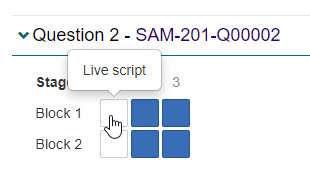
Tip
The steps for these are the same as those in the Manage randomly allocated scripts section.