Feedback and live marking
Feedback and live marking provides you with options to display feedback in the test player during or after a test.
Note
Feedback and live marking only applies to system-marked items.
Feedback and live marking has two primary purposes:
- Live marking — a visual indicator showing test-takers whether their response was correct or incorrect, displayed immediately after answering. Available for multiple choice item types only.
-
Contextual feedback — written feedback displayed in the test player. Teachers can access this via the Guttman and question summary reports; test-takers can access it through their candidate dashboard. Available for most system-marked item types.
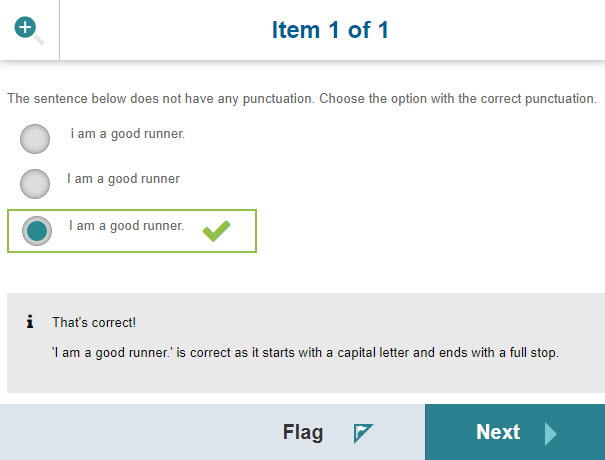
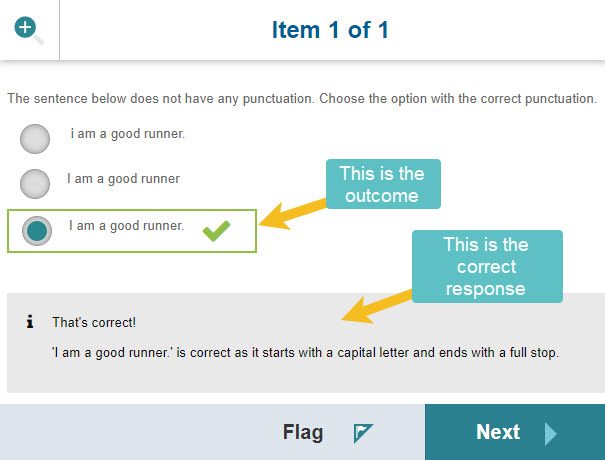
In the example above, the highlighted response with the tick is the live marking indicator. The information panel below shows the contextual feedback.
Edit feedback and live marking
Important
Before configuring feedback on an item, ensure Live Marking of Items is enabled in the relevant test section (see Enable live marking in a test section) and that Enable Live Marking and Feedback for this item is checked on the item — it is on by default.
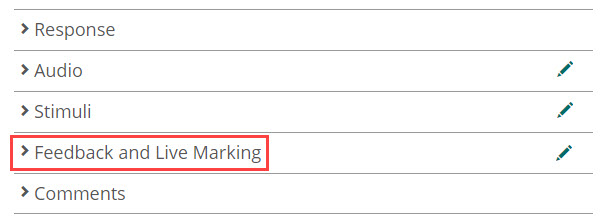
On the item editing page, scroll to the Feedback and Live Marking section and select the pencil icon to open it in edit mode.
To show test-takers their outcome and the correct answer immediately after answering, select Show Outcome and Correct Response.
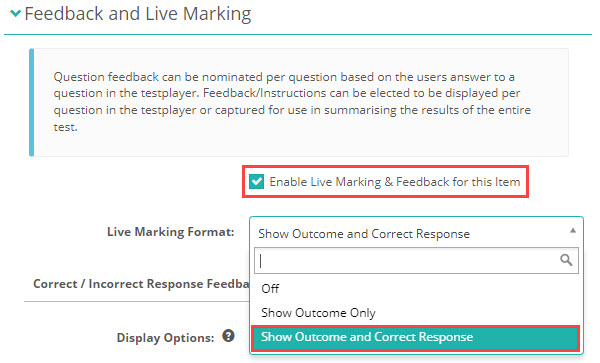
The test player shows the test-taker's selected response alongside the correct answer. The Outcome is the option the test-taker selected; the Correct Response is the field with the response feedback.
Correct/incorrect response feedback
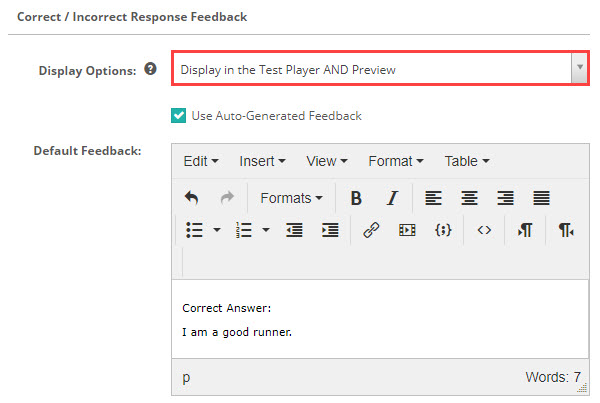
In the Display Options dropdown, select Display in the Test Player AND Preview. This makes the feedback display to the test-taker during the test, and to test authors in the item preview.
Further down this section you can set custom feedback. You can also use system auto-generated feedback, which displays in the Default Feedback editor.
Note
If you leave Use Auto-Generated Feedback checked and also enter custom feedback in the fields below, the system uses your custom feedback rather than the Default Feedback shown here.
Additional information
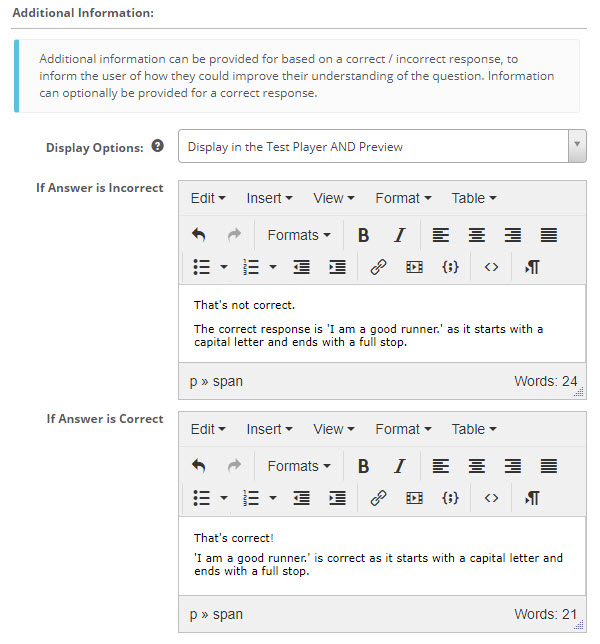
Enter the text you would like test-takers to see when they answer correctly, and a separate message for when they answer incorrectly. Use the Display Options dropdown in this section to control when this feedback is shown, then select Save.
Override feedback based on scored response
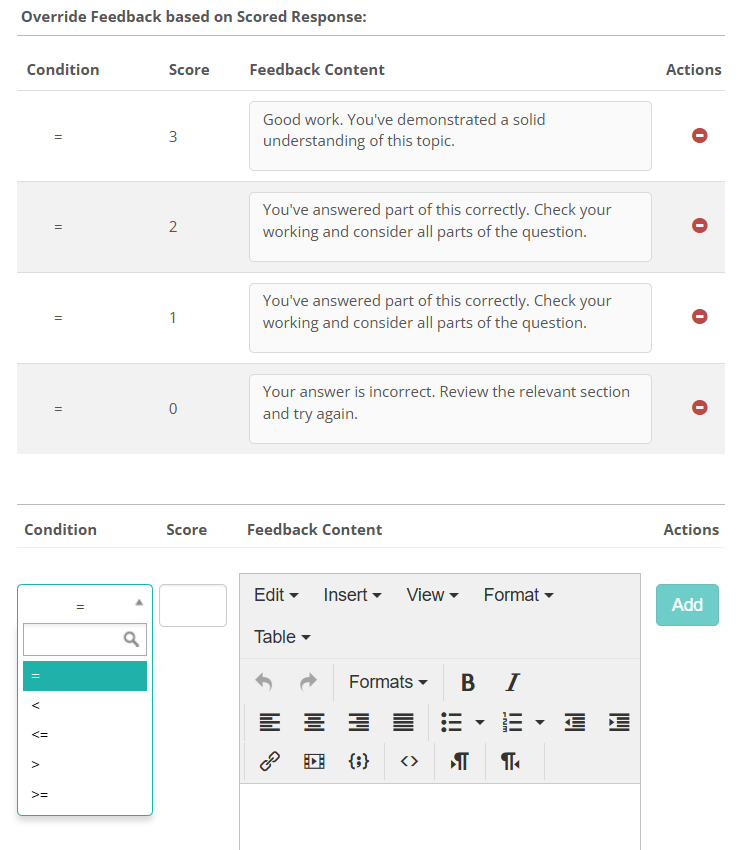
This section only appears for items that use a partial credit scoring type: Per Distractor, Numeric Range – Graded, Touch Timed Range – Graded, or Pairwise. It is not shown for standard correct/incorrect scoring, where the only possible scores are 0 or the maximum — use the Correct/incorrect response feedback section for those items instead.
When visible, you can add feedback rules based on score thresholds. Select a condition operator (=, <, <=, >, or >=), enter a score value in the Score field, type the feedback text in the Feedback Content editor, and select Add. You can add multiple rules to cover different score ranges. Rules must not overlap — a given score can only satisfy one condition. For example, on a 3-point item: < 3 (covers scores 0, 1, and 2) and = 3 (full marks).
Hide feedback from test-takers during a test
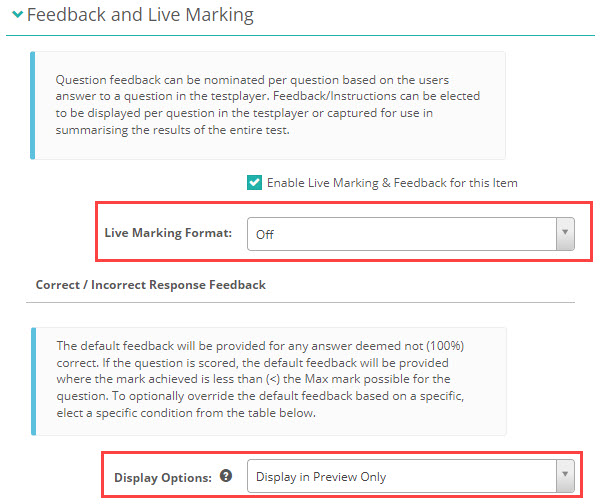
To hide feedback from test-takers during a live test, set Live Marking Format to Off and set Display Options to Display in Preview Only.
Note
The feedback accessed from the reports and the candidate dashboard will still be available.
Enable live marking in a test section
When you create a test section for your items, ensure that Live Marking of Items is enabled.
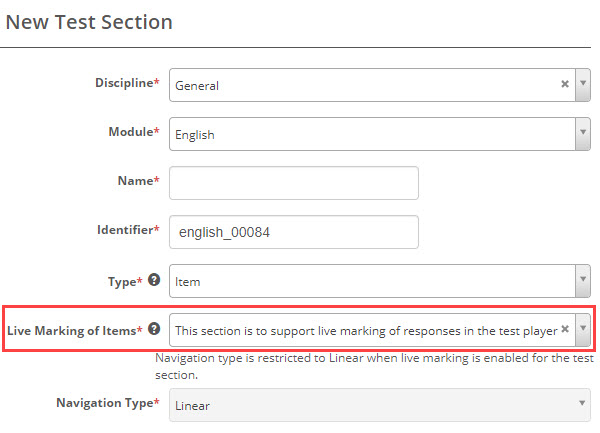
The system restricts the navigation type to Linear when live marking is enabled for the test section.
Settings
Note
Some settings are only available to system administrators.
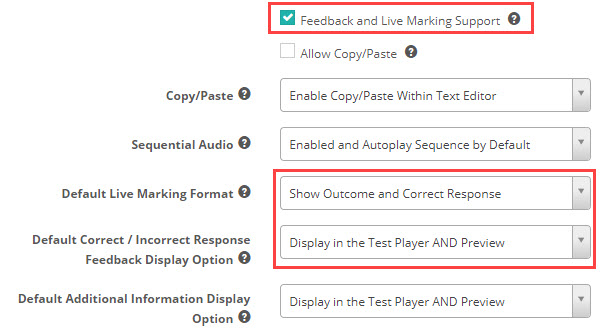
Navigate to Settings > Test Designer Settings and expand the Questions options section. Check the Feedback and Live Marking Support option to enable feedback and live marking on your site.
You can also set default options that apply when you create a new item. You can override these defaults per item.
Defaults
At an item level the Live Marking Format and Display Options fields are available. You can set default values for these in the two fields highlighted below.
- Default Live Marking Format — Options are Off, Show Outcome Only and Show Outcome and Correct Response.
- Default Correct / Incorrect Response Feedback Display Option — Options are Off, Display in the Test Player AND Preview, or Display in Preview Only.