Manage users
Insights provides several ways to create and manage user accounts, from adding individuals manually to bulk imports and automated self-registration.
There are several ways to add user accounts to Insights:
- Add a single user using the New User screen.
- Add multiple users quickly with the QuickAdd feature.
- Import users or test-takers from a spreadsheet.
- Allow users to self-register.
- Use the Janison API framework to automatically create or update users by connecting Insights to your internal systems, such as your HR system.
Note
The Insights system is highly configurable, so the labels and menu items you see may differ from those shown here. Your access will also depend on your role permissions.
Add a single user
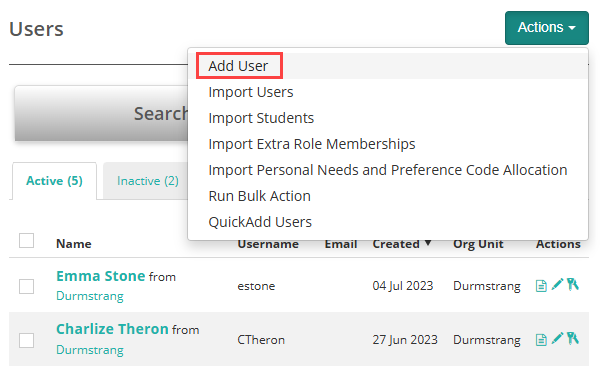
Navigate to Manage People > Users. Select Add User from the Actions drop-down.
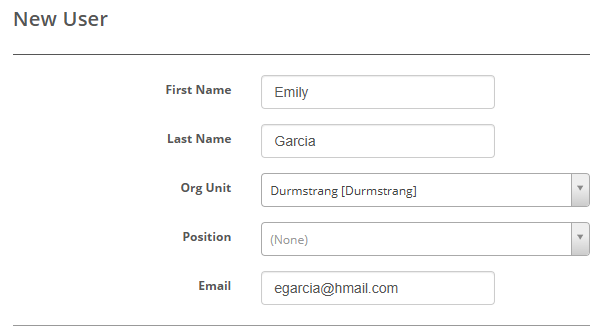
Enter the user's personal and organisational details as needed.
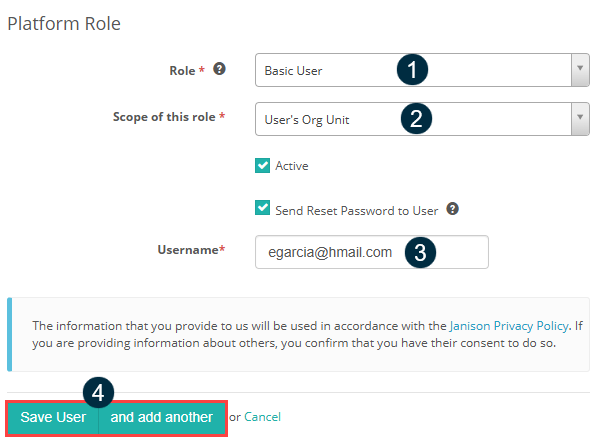
In the Platform Role section:
- Select a Role.
- Select a Scope of this role.
- Enter a Username based on your organisation's naming conventions (e.g. egarcia or the email address).
-
Select Save User to finish, or and add another to add another user.
Note
For details about roles, see the Roles and key features guide.
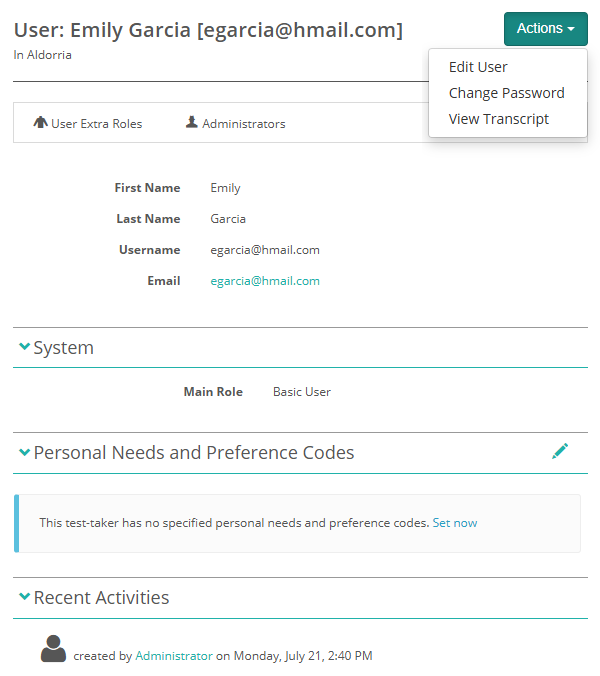
The user screen displays an Actions drop-down with options to:
- Edit User
- Change Password
- View Transcript
Additional sections let you:
- view the user's role
- add disability adjustments (also known as Personal Needs and Preference Codes, or PNP codes — learn more)
- view recent activity.
Note
The options in the Actions drop-down and the sections you see may vary based on your role and your site's configuration.
Import users
You can add users in bulk using an import. For general users such as markers or test authors, use this option. For test-takers, use the import test-takers option covered below.
There are two types of imports:
- data upload
- sync data from a HR system.
Warning
Syncing users from a HR system will deactivate any users in Janison Insights who are not listed in the spreadsheet.
The data upload option will not deactivate users on import, even if they are not on the spreadsheet. Users are only deactivated if the Is Active column is set to No.
Change default settings
Select Import Users from the Actions drop-down.
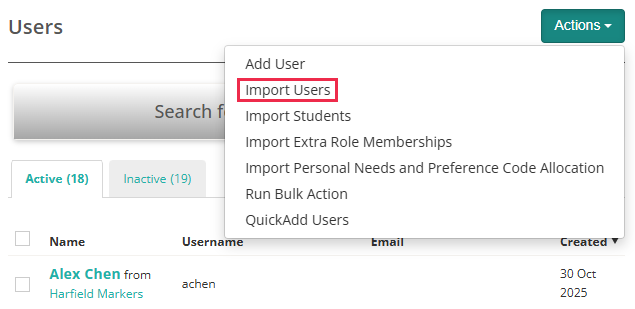
Select Default Settings.
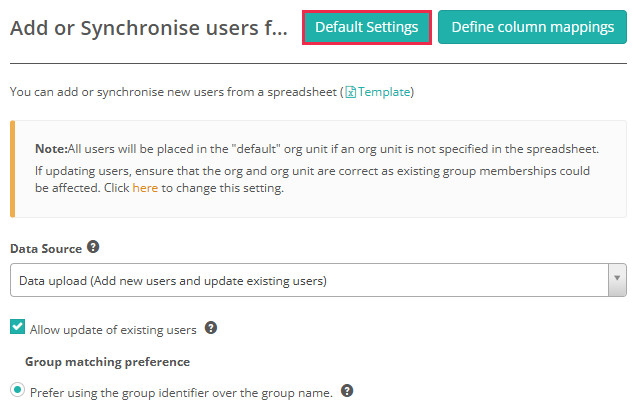
Edit the default settings in the User Import expandable section as required:
- Selecting one or more options in the first column will make that option selected by default from now on.
- Selecting Disable Manual Override? next to any option will remove it from the Data Upload screen.
- You can limit the number of users to be imported by entering a number in the Max number of users to be imported using Web Role field.
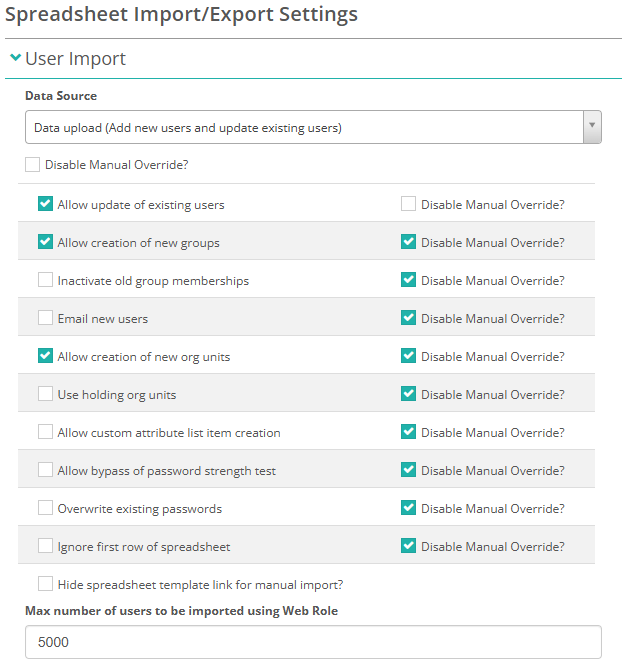
Select Save to save your default settings.
Complete the data upload
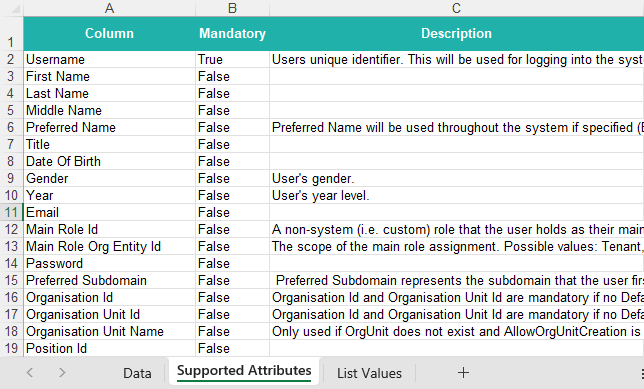
Select the Template link to download a sample Excel template.
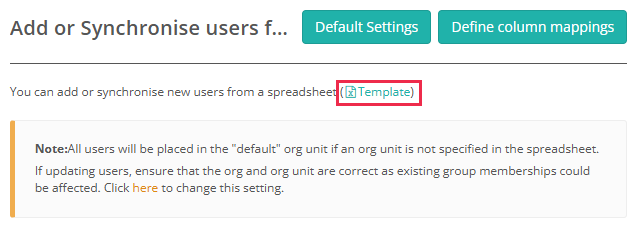
Tip
The template includes any custom user attributes configured for your site, so the columns you see may differ from another organisation's template. The Supported Attributes tab lists requirements for each column.
Open the downloaded template and enter all required data.
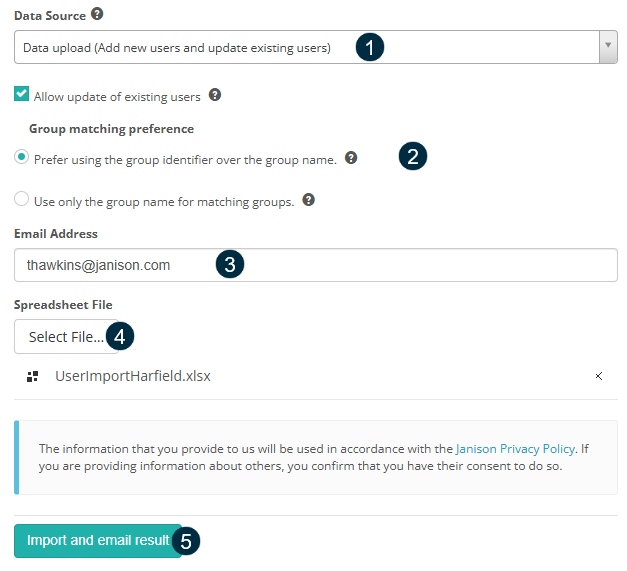
Tip
For more details on any option, hover over the ? icons.
- In the Data Source drop-down, select the import type. To add new users and update existing ones, select Data upload (Add new users and update existing users).
- Select your preferred Group matching preference.
- The Email Address field automatically populates with your email address. Change it if you want someone else to receive import notifications.
- Select Select File to upload your completed spreadsheet.
-
Select Import and email result to submit.
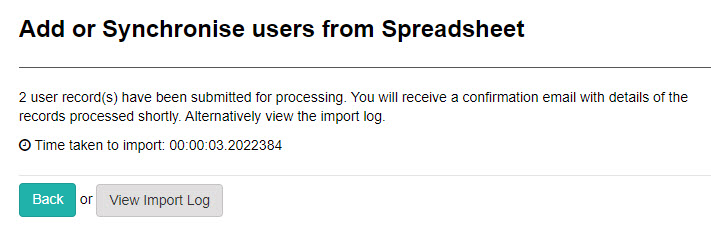
A confirmation screen shows the import status and a link to the import log.
Sync data from a HR system
Set the default settings and column mappings
Tip
You can set default settings for syncing using the same steps in Change default settings above.
Select Define column mappings.

- Select Select File to upload your spreadsheet file.
-
Select Define Mappings to match fields between your spreadsheet and the system.
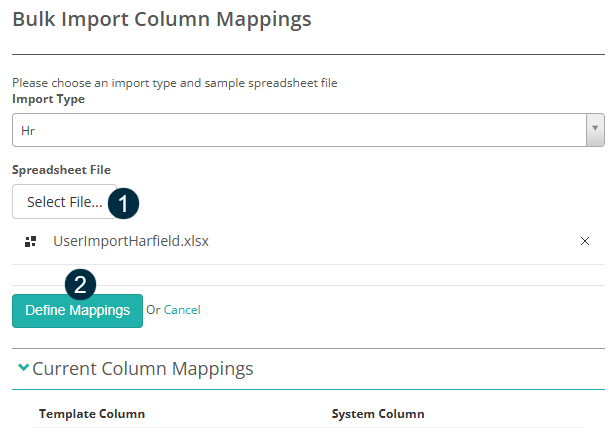
The spreadsheet headings appear in the first column. Use the drop-downs in the second column to map them to the appropriate system field.
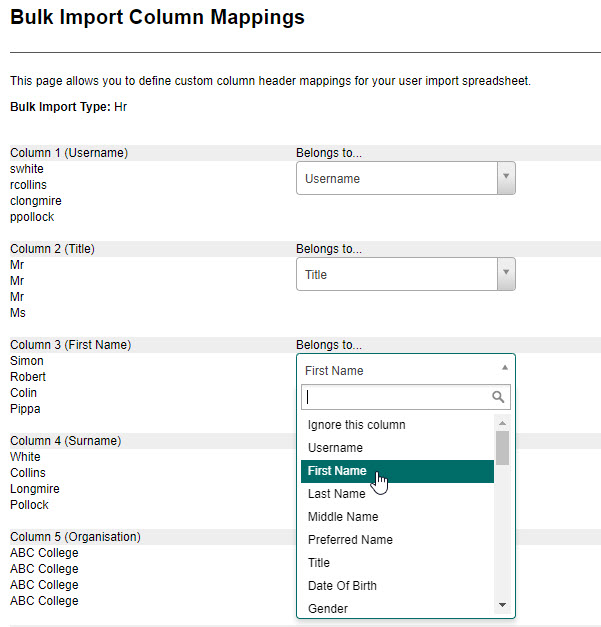
Select Save to save the column mappings.
Once you have defined your column mappings, the HR import runs on a schedule. Contact your Account Manager to arrange the scheduled import job.
Import test-takers
The test-taker import is designed to import test-takers directly into their relevant role. The import template is dynamic and admins can easily tailor it to the specific requirements of their institution. It can also filter test-takers into their relevant groups.
Note
This import may also be referred to as a student import or candidate import.
See our guide Import test-takers.
Quick-add users
This option lets you quickly add users with a limited set of fields.
Important
QuickAdd is a plugin and is not available unless it is active on your site. Contact your Account Manager for more information.
Select QuickAdd Users from the Actions drop-down.
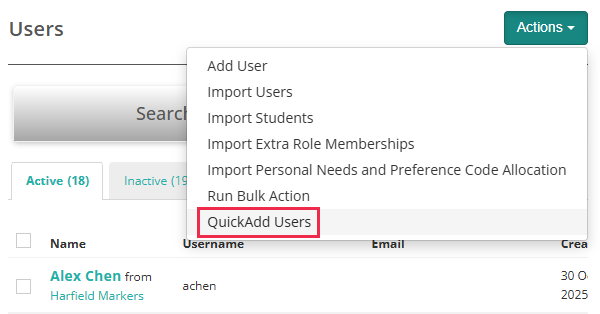
Tip
The fields and columns you see may differ depending on the options configured for your site.
Complete the form as required.
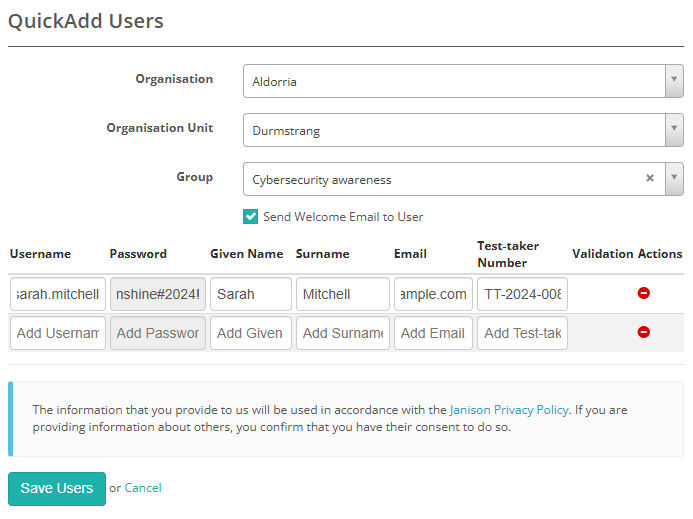
When you have finished, select Save Users.
Set up self-registration
Self-registration lets new users create their own accounts.
There are three ways this can be done:
- via a self-registration form on the login page
- via a self-registration form on a separate page
- via a secure self-registration link sent by email.
Important
By default, self-registration is disabled in Janison Insights. To enable it, go to Settings > User Settings and select the appropriate Self-registration option.
Self-registration form
If Registration form on the login page or Registration form on a separate page is selected, users register as follows.
Select Register on the login page (if using the separate-page option).
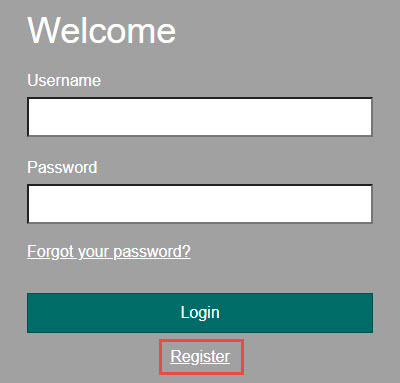
Enter the required registration information. Mandatory fields are marked with a red asterisk. Select Sign Up to submit.
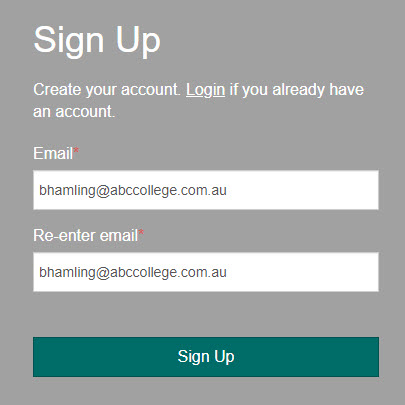
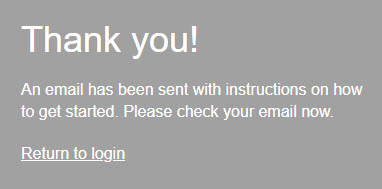
A notification confirms that an email has been sent with instructions to get started.
Self-registration link
If Registration via secure link in Email is selected, you can invite up to 30 users at a time to self-register by emailing them a secure link.
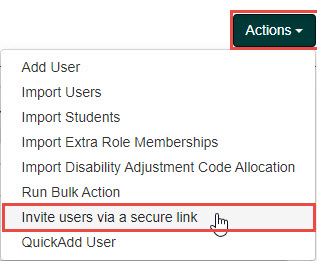
Navigate to Manage People > Users. Select Invite users via a secure link from the Actions drop-down.
Complete the invitation form:
- select an Organisation Unit
- select a Role
- select a Scope of the Role
- enter the email addresses of the people you want to invite in the Email Addresses field
- edit the invitation text in the Email Body field.
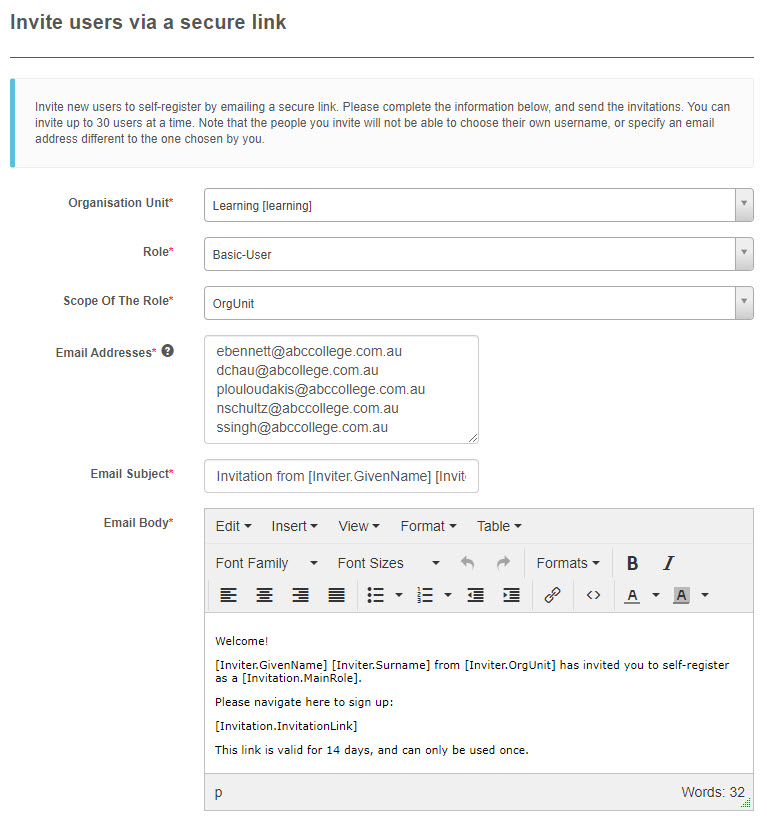
Select Send Invitations.
When a user selects the link in the email, they are directed to the Sign Up screen.
View and edit a user
Access users from the Users tab under Manage People. This screen lists all existing user accounts.
Tip
You can reorder the list by selecting any column heading, such as Name, Username, or Created.
From this screen you can:
- search for a user
- view a user's details
- edit a user
- change a user's password
- add user roles
- archive a user.
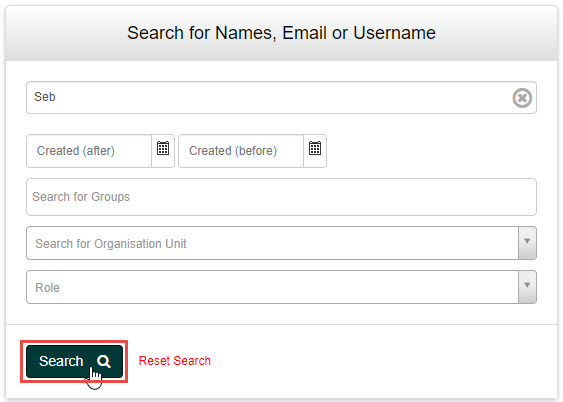
Search for a user
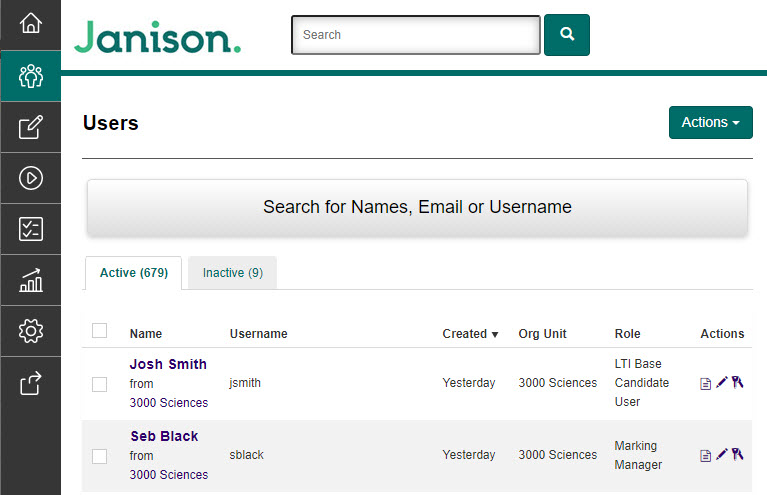
Use the search to find a user quickly when the list is large.
In the Search field, type the user's name or username, then select Search.
Tip
To start a new search, select Reset Search.
View a user's details
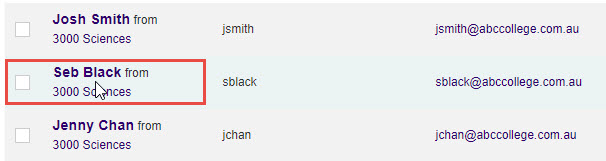
Search for the user you want to view, then select their name to open their record.
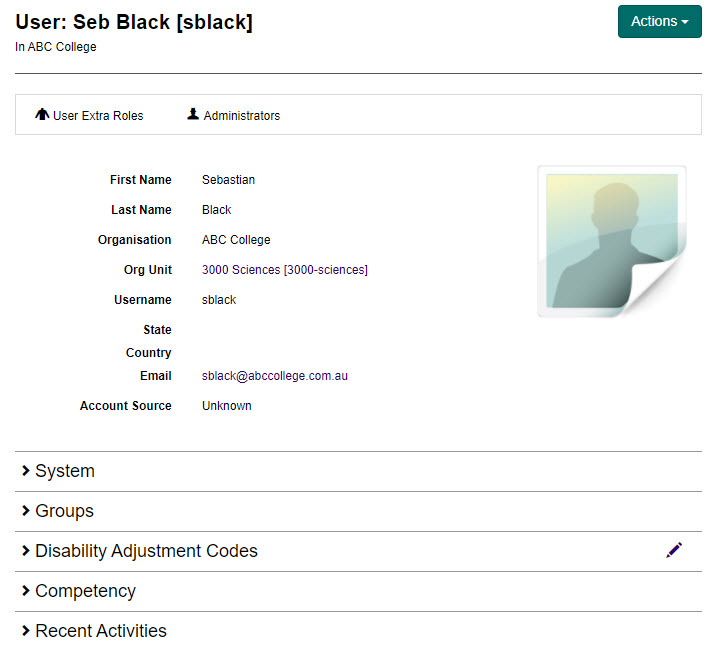
The user's details are displayed.
Tip
From this screen you can also view:
- system role
- groups
- disability adjustments
- competency
- recent activities.
Edit a user
You can edit the following user details:
- profile image
- personal details (name, address etc.)
- organisational details (organisation, organisation unit)
- user role in the system.
Search for the user, then select the Edit icon in the Actions column.

Tip
If the Actions column is not visible, open the user's details, then select Edit User from the Actions drop-down.
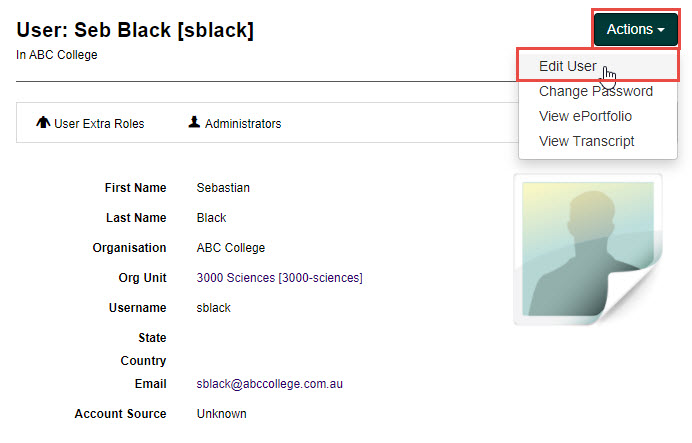
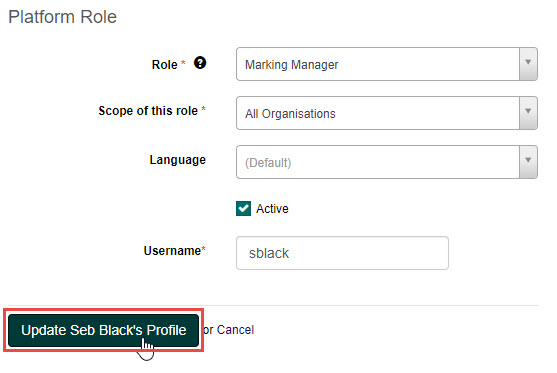
Update the details as needed, then select Update {User's Name} Profile to save.
Change a user's password
As an administrator, you can also change a user's password.
Select the keys icon in the Actions column.

Tip
If the Actions column is not visible, open the user's details, then select Change Password from the Actions drop-down.
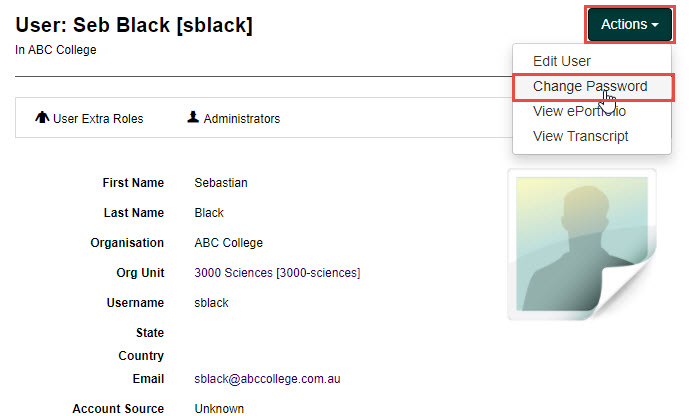
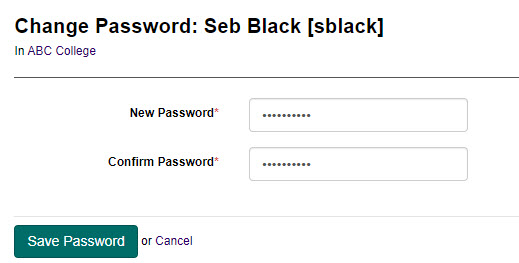
Enter the new password in New Password, confirm it in Confirm Password, then select Save Password.
Add user roles
A role is a collection of permissions that defines what a user can do. You add and edit roles in the Edit User screen.
Tip
For more detail, see Roles and key features.
To edit or add the main role of a user
Go to the Edit User screen for the user. In the Platform Role section, select a Role, then select Update {Users Name} Profile to save.
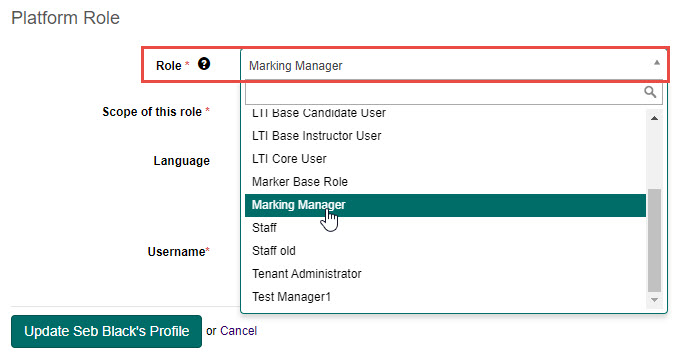
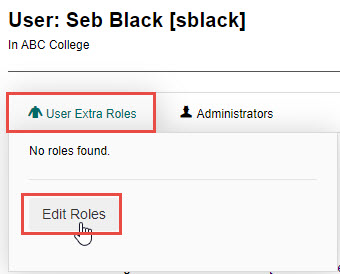
To edit or add extra roles for a user
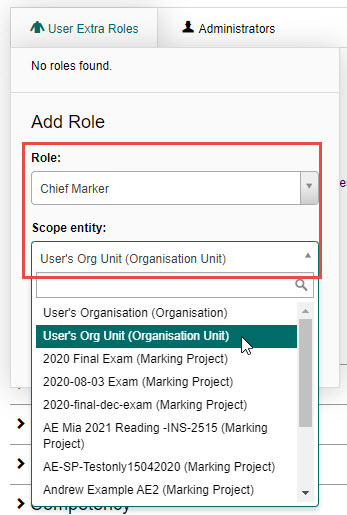
Go to the user details screen. Select User Extra Roles, then select Edit Roles.
Select a Role, then select a Scope entity. Select Add Role to save.
Archive a user
Archiving a user sets them to inactive and removes their access. You can archive users individually in the Edit User screen, or in bulk from the user list.
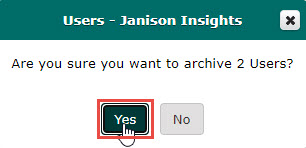
Select the checkbox next to the users you want to archive, then select Archive.
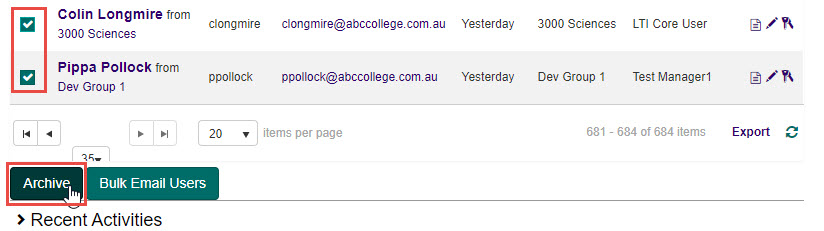
Select Yes to confirm.
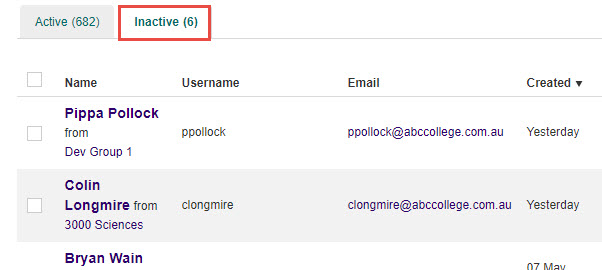
The archived users appear under the Inactive tab.
Tip
To restore a user, select the checkbox next to their name and select Unarchive. They return to the Active list.
Settings
Administrators can configure user settings at Settings > User Settings.
Some settings apply per role. Select a role from the drop-down and select Continue to open the User Settings for Role {Role} screen, then expand Create / Edit Form.
Create / Edit Form — controls, for the selected role, which fields appear on the New User form and in that role's import template, which fields are mandatory, the Hint Text shown against each field, and how usernames are generated (Username Generation). First Name and Last Name are always mandatory and can't be changed. These settings apply to every role — including test-takers, where they shape the columns of the test-taker import template.
Self-registration — sets whether users can self-register and which method to use. Options are disabled (default), registration form on the login page, registration form on a separate page, or registration via a secure link in email.
Allowed email domains — restricts self-registration to specific email domains (for example, @yourorg.com.au). Leave blank to allow any domain.
Username generation — controls how usernames are assigned when creating users. Options include entering a username manually, using the email address as the username, or auto-generating a username from a name pattern.
Auto-generate password — when enabled, the system generates a password automatically when a new user is created.
Default organisation unit — the organisation unit automatically assigned to new users created via self-registration.
Default role — the role automatically assigned to new users created via self-registration.
Default group memberships — the groups that newly self-registered users are added to automatically.
Max users to import using web role — limits the number of users that can be imported in a single data upload via the web interface.