Modules
Modules are organisational tools in Janison Insights that let you arrange disciplines into focused subtopics. For example, "biology", "chemistry" and "physics" could be modules within a "science" discipline.
To access modules, navigate to Author > Modules.
Create a module
Manual creation
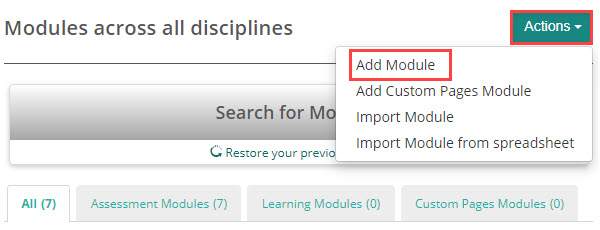
Select Add Module from the Actions dropdown.
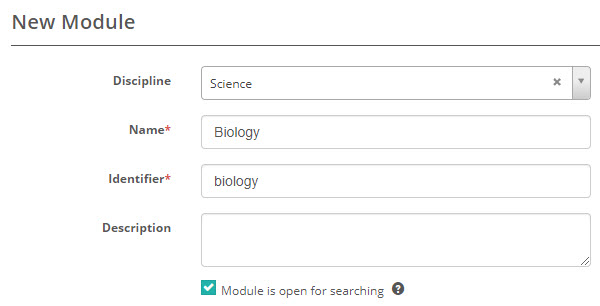
On the New Module screen, choose a Discipline (for example, science) and give the module a Name (for example, biology). You can also set an Identifier and a Description. If your site has open modules enabled, tick Module is open for searching so this module's items appear when you add items to tests in other modules within the same discipline.
If workflows are enabled for your site, choose a workflow for each content type — Tests Workflow, Test Sections Workflow and Items Workflow — then set how workflow transitions cascade between them:
- Items follow Test Sections — a workflow transition on a test section applies to all items in that section.
- Test Sections follow Tests — a workflow transition on a test applies to all sections in that test.
Sites that also use resource and stimulus workflows see additional Resources Workflow and Stimuli Workflow selectors, along with Resources follow Items and Stimuli follow Items options.
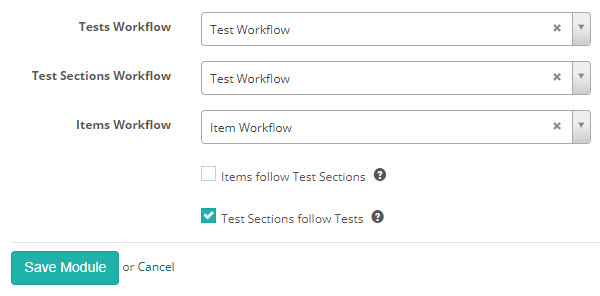
Select Save Module to open the module details screen, where additional configuration options are available.
Bulk import
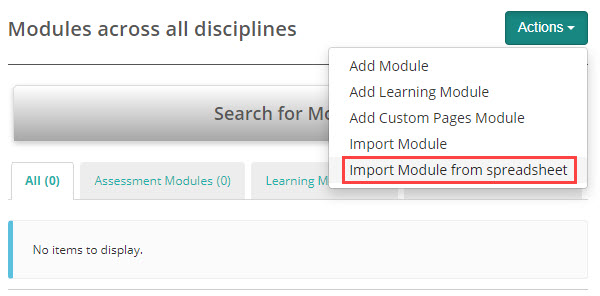
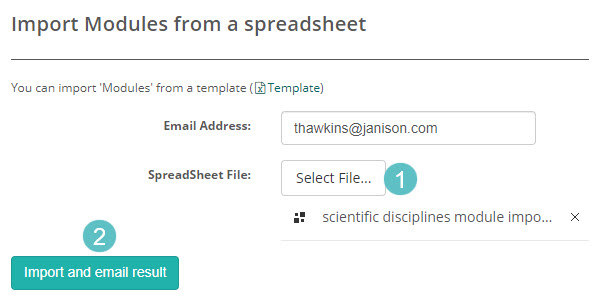
Navigate to Author > Modules and select Import Module from spreadsheet from the Actions dropdown.
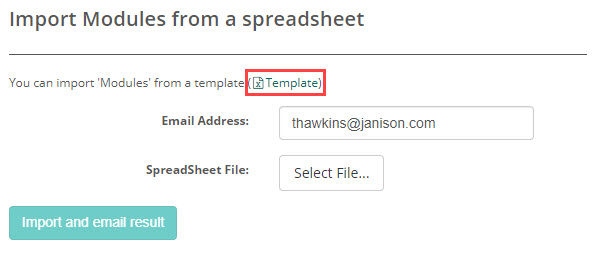
Download the Excel template.
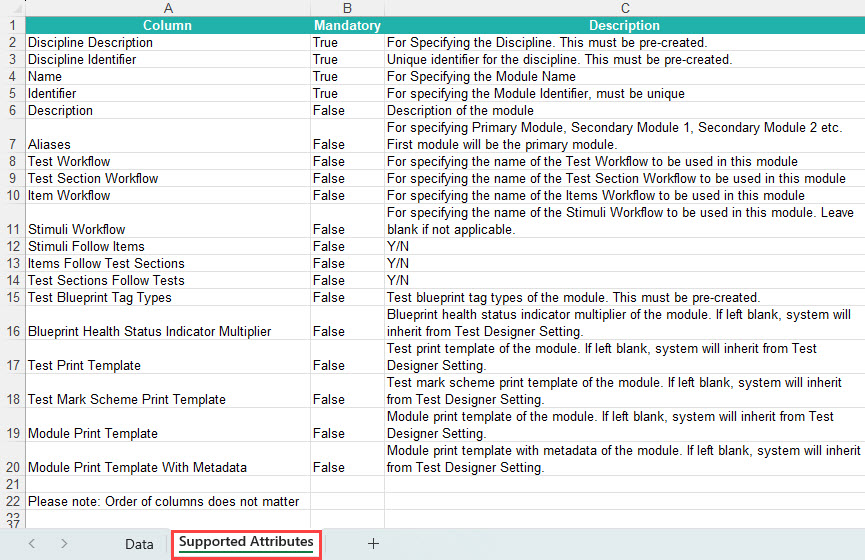
Review the Supported Attributes tab for mandatory fields.
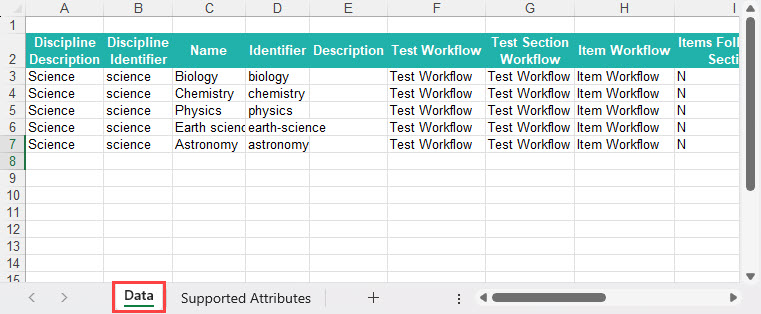
Complete the template with your data.
Upload the file and select Import and email result.
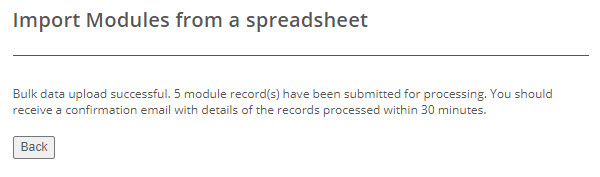
Insights confirms on screen that your import has been submitted.
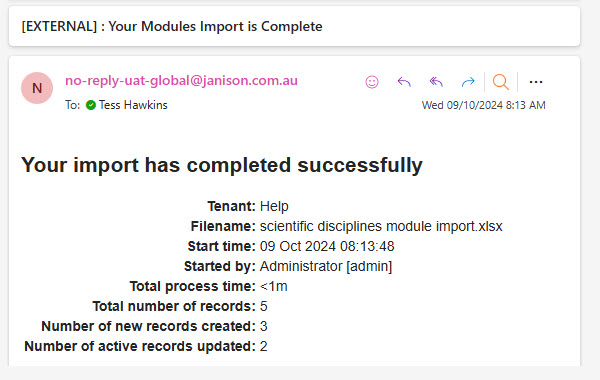
You will receive an email confirmation with the import results.
Module sections
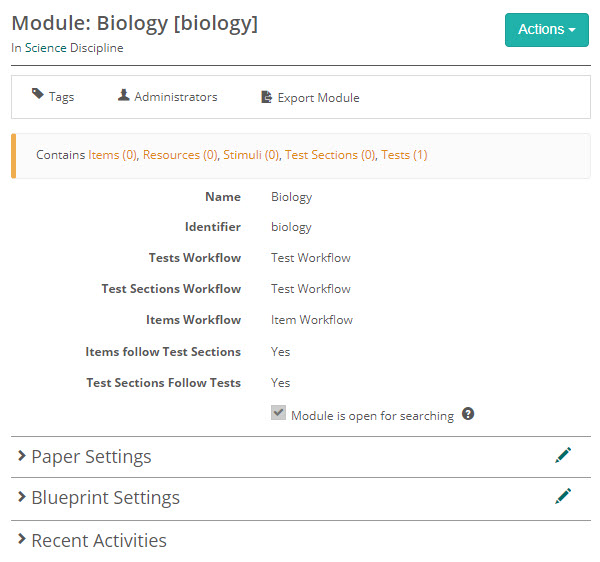
Depending on your site configuration, a module may include:
- Paper Settings — enables test printing for paper-based delivery or review.
- Blueprint Settings — specifies tag types for creating test blueprints.
Export and import
Export a module
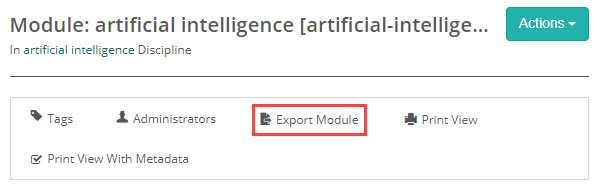
Open the module and select Export Module from the actions bar. The export file downloads to your computer.
Import a module
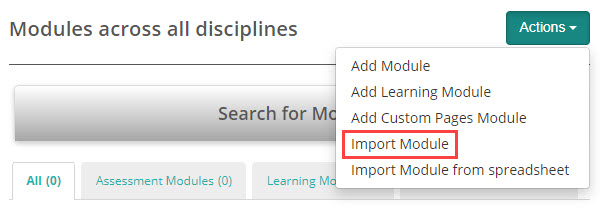
Navigate to Author > Modules and select Import Module from the Actions dropdown.
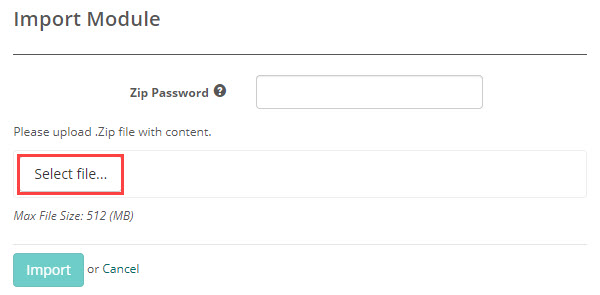
Use Select File to choose the export file, then proceed with the import.
First import
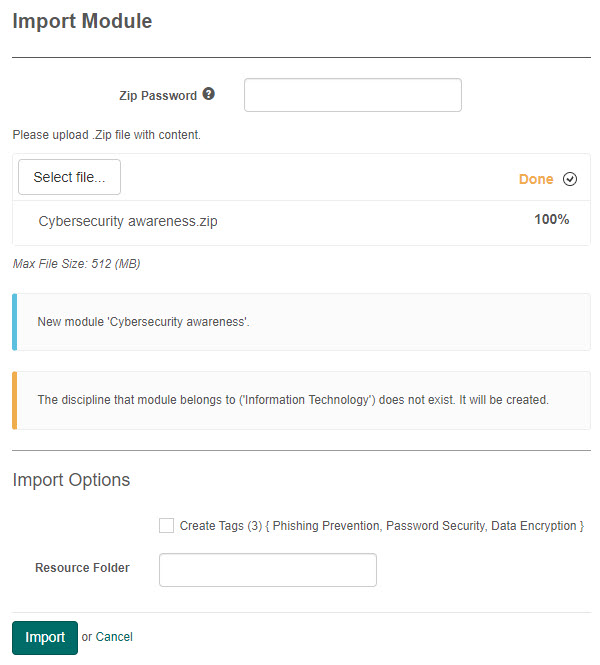
The system creates the module, items, resources, stimuli and tests, and generates any missing disciplines and tags automatically.
Subsequent imports
The system updates existing components without deleting items that are absent from the source site.
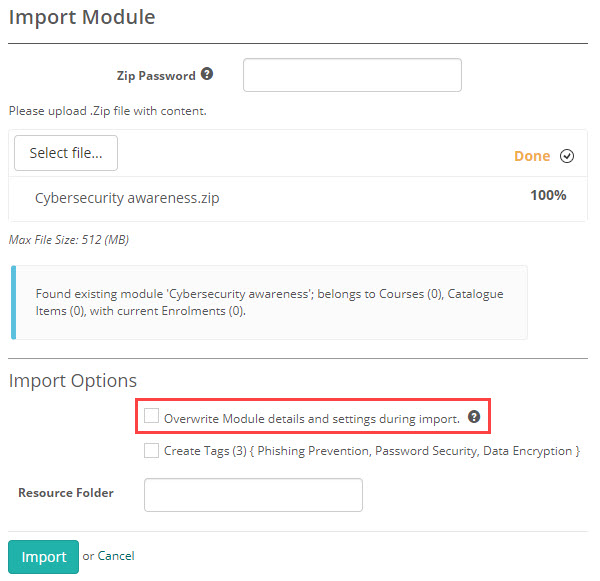
Tick Overwrite Module details and settings during import to update the module's details and settings to match the import file. Leave it unticked to update only the module's items, resources, stimuli and tests.
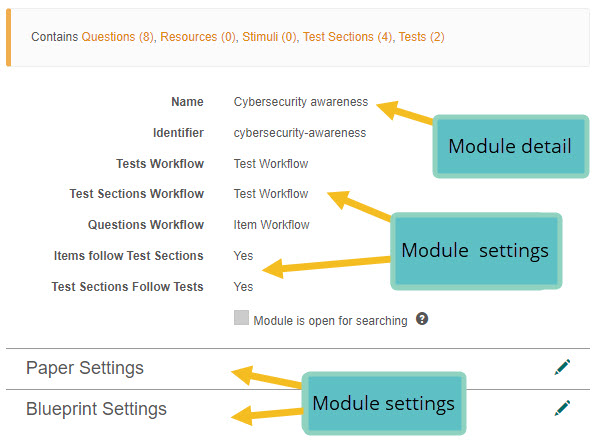
Settings
Several settings control how modules behave. Administrators configure most of them at Settings > Test Designer Settings.
Enable Open Modules (under Test Authoring Settings) — makes the Module is open for searching option available when you create or edit a module.
Enable paper based tests (under Test Authoring Settings) — makes the Paper Settings section available on the module details screen.
Available Test Types — tick Blueprint to make the Blueprint Settings section available on assessment modules.
Import Options — sets whether Overwrite Module details and settings during import is ticked by default on a subsequent import.
Workflow settings on a module draw on the workflows defined at Settings > Workflow definitions; the workflow options only appear once your site uses workflows.
To protect module exports with a password, enable one further setting at Settings > Tenant Settings > Security.
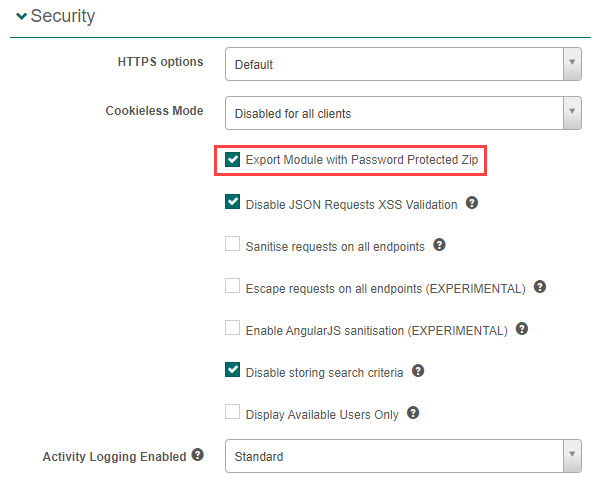
Export Module with Password Protected Zip — secures module export files with a password. When it's on, the export option reads Export Module (password protected).
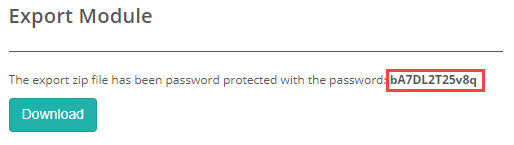
When exporting a protected module, you'll receive a password along with the download link.
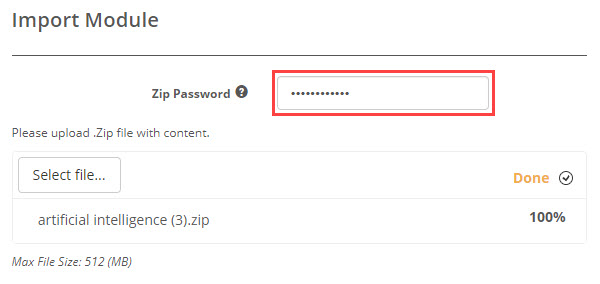
When importing a password-protected file, enter the password when prompted.